instagram takipci satin al - instagram takipci satin al mobil odeme - takipci satin al

bahis siteleri - deneme bonusu - casino siteleri

bahis siteleri - kacak bahis - canli bahis

goldenbahis - makrobet - cepbahis

cratosslot - cratosslot giris - cratosslot

Announcement

Collapse
No announcement yet.

What did you 3D print today?

Collapse
X
 
  • Filter
  • Time
  • Show
Clear All
new posts

    Had a sleepover with my sisters kids. They all lit up when we talked about 3d printers. Spent the duration of their time churning out part requests.

    There is something uplifting about hearing a 6 year old say " That's so satisfying ." When peeling tree supports off. And " Thats so mesmerizing." As the printers run in front of her eyes.

    They would scream "SLICE!" before I could get to the button in Cura.

    And one of the 8 year olds said, "So wait you can basically make anything you can imagine?"

    I replied pretty much if you can draw it right. And it was like a light bulb went off in their head.

    I really hope I inspired them to be creative like I've grown to be.

    I did model a small plastic coin for the bee piggy bank with the 6 year olds initials in them, but I ran out of time to print them. Ill have to pay the kiddos a visit soon.. darn..
    Attached Files
    https://www.mcarterbrown.com/forum/b...khaus-feedback

    Comment


    • Spider!

      Spider!

      commented
      Editing a comment
      The "create anything" level I poke at every now and then is in Blender. I've made some really ugly sculptures in blender and printed them. Even with a tablet I find it difficult, but it's fun.

    My first custom gear, er... Draw to spec. I missed the oscillating of my old garage fan. I opened the base and found this spur gear broken. I used the gear generator in fusion 360 to design a new one and printed it in petg. It helps that the original gear was pretty bad. It worked on the first try. I think this gear has a better tooth profile than the original, which wasn't actually curved.
    Feedback

    https://www.mcarterbrown.com/forum/b...der-s-feedback

    Comment


    • superman

      superman

      commented
      Editing a comment
      Nice, I may have to look for that tool. Don't think i have seen that.

    • BrickHaus

      BrickHaus

      commented
      Editing a comment
      Me neither. I honestly wanted a series of gears up the side of my lever project initially. Had I know designing them was this easy, I likely would have attempted it.

    • Spider!

      Spider!

      commented
      Editing a comment
      superman, I had to search for it. It's under the DESIGN/UTILITIES/ADD-INS/Scripts and Add-Ins/SpurGear

      There are two, I used the bottom one with the more common icon. The blue "C" icon didn't seem to do anything. I just ran the script at the time, but you can go to the "Add-Ins" tab (vs the "Scripts" tab) and have it loaded to your SOLID/CREATE menu. You still have to do that every time you open Fusion.

      This was surprisingly like FreeCAD .20

    Getting into the Easter thing! Trying out a few different style and resins.

    Comment


      Attempted to print some sheridan feed parts, and re print my co2 lever holder out of petg last night..

      Something came loose.. running it again at 75% speed while at work today..

      At least the Spring bridge Alexndl designed finished. I can attest to his design skills. His sheridan parts are all top notch. He inspired me to attempt a spring feed.
      https://www.mcarterbrown.com/forum/b...khaus-feedback

      Comment


        If at first you don't succeed, then try again at 75% speed.
        Attached Files
        https://www.mcarterbrown.com/forum/b...khaus-feedback

        Comment


          My take on a Karni style snatch grip.

          My version of a Karnivore paintball marker snatch grip.
          Attached Files

          Comment


          • Frmrspec
            Frmrspec commented
            Editing a comment
            You could use the back of the body as a ledge to support that tail… significantly reduce/eliminate the chance of the end snapping off.

          Took a little time to reverse engineer some unobtainium Click image for larger version

Name:	IMG_3437.jpeg
Views:	460
Size:	374.8 KB
ID:	403565

          Comment


          • Frmrspec
            Frmrspec commented
            Editing a comment
            Maybe? Last time I gave out files the most prominent print for pay paintballer took the file and started selling prints of it…… after adding his/their logo of course

          • BrickHaus

            BrickHaus

            commented
            Editing a comment
            Ooof. I understand. Well Id even buy a printed one depending on asking cost. I get it though. People are lame. I can say Ive been given many files from great minds in these parts. They dont go further than personal use.

          • SETHZILLA!

            SETHZILLA!

            commented
            Editing a comment
            I don't have a printer but i'll buy one of these from you directly if you're willing?

          And something else to go with it.. eventually I’ll machine both out of aluminum but for now I’m personally printing these out of CF-Petg and have them being made via SLS nylon to test for funzies Click image for larger version

Name:	IMG_3725.jpeg
Views:	430
Size:	252.4 KB
ID:	403569

          Comment


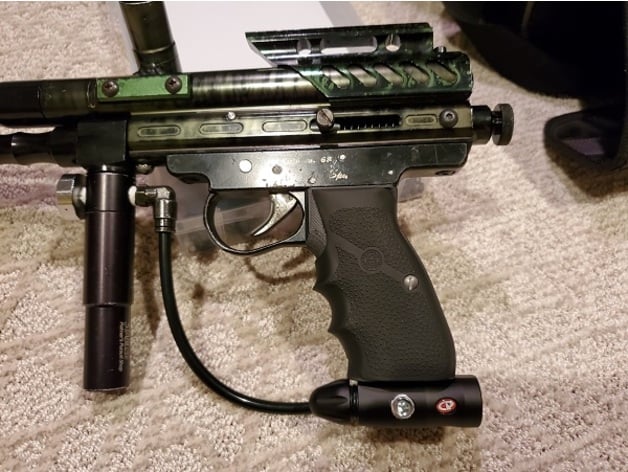
            New Spyder grip:

            Click image for larger version  Name:	20230511_213657.jpg Views:	3 Size:	126.3 KB ID:	404003
            This is a grip for a Spyder paintball marker that fits Hogue CZ 75 wrap-around grips. Sometimes called an "86 frame", though those are typically much more vertical (86 degree angle) and usually use CZ 75 grip panels, not wrap-arounds. Hardware Needed:10-32 Square Nut x28-32 x 3/4" Socket Flat Head Screw x28-32 x 5/8" Socket Flat Head Screw x28-32 Hex Nut x41/4-20 x 3/4" Socket Head Cap Screw x11/4 Flat Washer x1Hogue CZ-75 Screws You will need to pause the print to insert the 10-32 square nuts into the recesses for mounting the ASA. Print with support. I've included two versions of the .STL, one without support, and one with manually created support. Use whatever works best for you. The 8-32 flat head screws and nuts reinforce the mounting point and the ASA holes to prevent layer delamination. You will need to use a ball-end hex key or cut down a standard hex key to tighten the 1/4-20 screw to attach the grip. This grip will only fit on old school Spyder frames that have a removable AR15 style grip. This will not fit on an AR15 due to how the grip fits around the specific features of the Spyder frame. But you may want to use this as inspiration for modifying to fit other things. I've included .STEP files.

            Comment


            • Brokeass_baller

              Brokeass_baller

              commented
              Editing a comment
              Oh my. That's nice.

            • Frmrspec
              Frmrspec commented
              Editing a comment
              Was that originally a spyder SE? New grip frame/front block and missing the barrel cage? A spyder SE was the second marker I ever owned and I’ve been obsessed with that green/black acidwash ever since. I can never find a marker I want to get it reannodized with

            • Jackson

              Jackson

              commented
              Editing a comment
              Frmrspec, perfect ID. I bought the SE missing the barrel cage, expansion chamber, hardline, and ASA. I prefer a single trigger on all my guns, so I swapped the frame out for one from an original Spyder. Random LPC for that late 90's/early 00's feel. At one point I was using a titanium striker, but the sear notch is pretty badly worn on it. AKA Lightning bolt, Palmers Stabilizer, and Palmers 12" dual spiral vented brass out front to round it out.

            Fun with tpu. thanks to Rainmaker for his 10rd tube caps and MuddyBloodyFactory for the tank butt covers. I had no issues printing tpu apart from some very minor stringing on my stock ender 3 v2. the 15ci cover fits very snug, took some persuading to get on.

            Comment


            • MuddyBloodyFactory
              MuddyBloodyFactory commented
              Editing a comment
              hell yea! I need to get on those caps too :P got a link?

            have a special project I’m working on and had to play with some of the dimensions of the 86 frame.. decided I might as well make it similar to the J12 86 frame (which I find more aesthetically pleasing), and bumped up some dimensions to fit my massive hands and made it so it can use the previous 86/CZ grips. Ran out of filament at the end of the print and had to switch to black. Trigger guard is a bit cartoonishly big but all in all it feels nice


            Click image for larger version

Name:	IMG_3752.jpeg
Views:	391
Size:	324.7 KB
ID:	406583

            Comment


            • MuddyBloodyFactory
              MuddyBloodyFactory commented
              Editing a comment
              I had a lot of issues with my trigger guards being brittle and I really had to thicken them up on my frame, just fyi. Looks great though!!!

            • Frmrspec
              Frmrspec commented
              Editing a comment
              This is just a proof, I just got in a bunch of different types of CF filament ill be playing with, I need to optimize this model for 3D printing, probably add an isogrid to the inside of the grip plus I’ll be machining one out of aluminum, thanks for the tips though!

            A poo tweaker... first pass. [Carver one RVA]

            Requires a flat washer, lock nut, and 10-32 (button head optional) screw (about 1 inch).


            Click image for larger version  Name:	Carver1RVA.jpg Views:	0 Size:	144.1 KB ID:	412849 Click image for larger version  Name:	Carver1RVAF360.jpg Views:	0 Size:	122.3 KB ID:	412850
            try to ignore the junk...


            Click image for larger version  Name:	IMG_20230602_140959613.jpg Views:	0 Size:	645.3 KB ID:	412851
            Feedback

            https://www.mcarterbrown.com/forum/b...der-s-feedback

            Comment


            • BrickHaus

              BrickHaus

              commented
              Editing a comment
              Bruuuuh. If I cant get me a free one, Im on this. Thanks for the post.

            • Spider!

              Spider!

              commented
              Editing a comment
              17 yo me doesn't care if it melts in the car, which it would have in Texas, unless I decide to try some ASA.

            • BrickHaus

              BrickHaus

              commented
              Editing a comment
              Haha, i have a pla ring for my wifes car cup holder. Been in her car for over a year now. Still looks good.

              Id think petg would last.

            Nothing super special, but I dug my Ender 3 out of storage, and after 100000x level tests, this is probably the cleanest print I've made on it ever.

            Originally posted by Terry A. Davis
            God said 640x480 16 color was a covenant like circumcision.

            Comment


              I probably should have took a better pic. Pretty simple part that solves some issues. Check on the video if your curious.


              BeardedWorks.com (Your Inception Designs and Shocktech Dealer)
              BW Youtube
              BW Ebay

              BW Email
              I buy Automags and Mag Parts also.

              Comment


                An odd -man card. When you have an uneven number of players per side, the short team gets this card at their starting area. The first player out can come pick it up and re -enter play. Good for complex fields (mazes) where you are not sure if the extra life has been taken.

                Or make up other rules.

                Printed in soft tpu.
                Feedback

                https://www.mcarterbrown.com/forum/b...der-s-feedback

                Comment

                Working...
                X