instagram takipci satin al - instagram takipci satin al mobil odeme - takipci satin al

bahis siteleri - deneme bonusu - casino siteleri

bahis siteleri - kacak bahis - canli bahis

goldenbahis - makrobet - cepbahis

cratosslot - cratosslot giris - cratosslot

Announcement

Collapse
No announcement yet.

Vee Twin Autococker

Collapse
X
 
  • Filter
  • Time
  • Show
Clear All
new posts

    #46
    Out of curiosity, would it be possible to do one out of brass or stainless? I'm sure the tooling / speeds & feeds would need to be adjusted.
    -Either is possible, if you have a deep enough wallet.

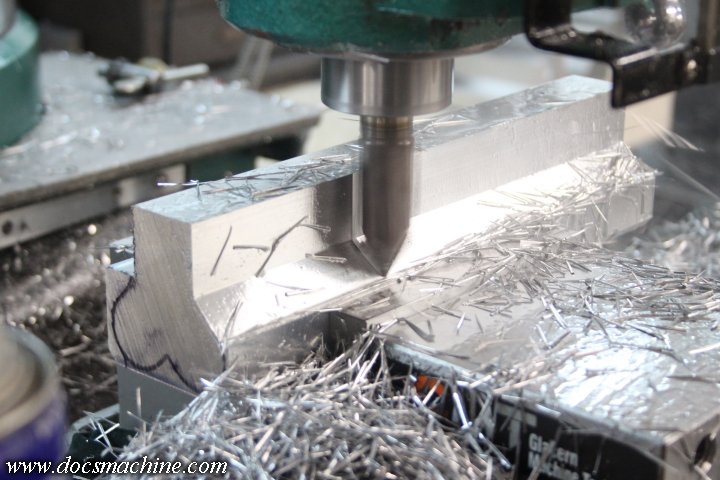
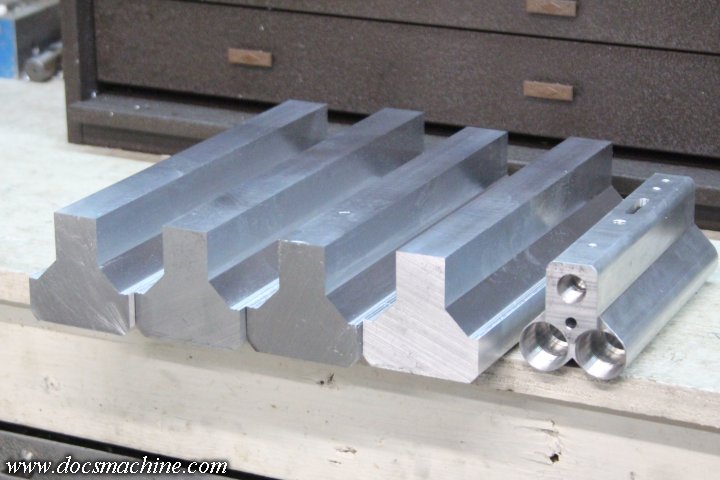
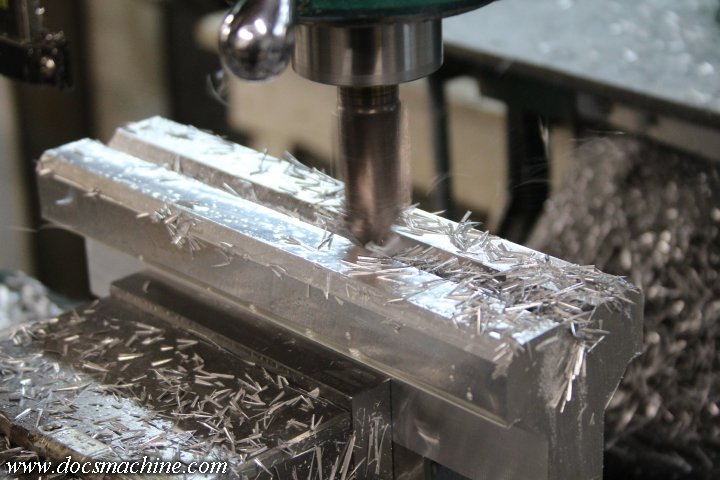
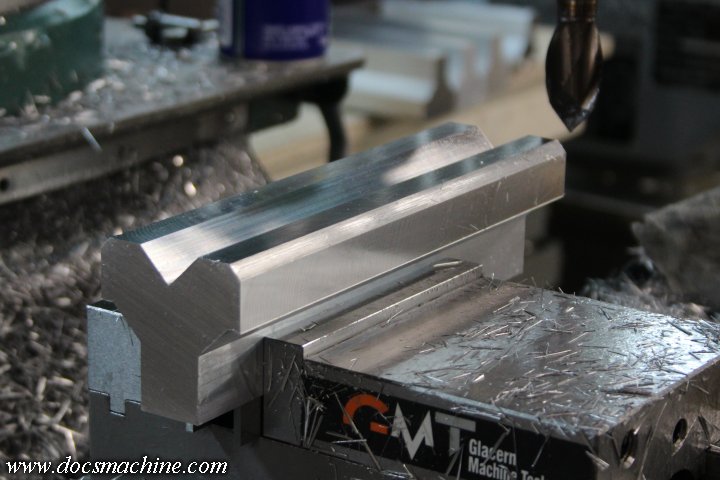
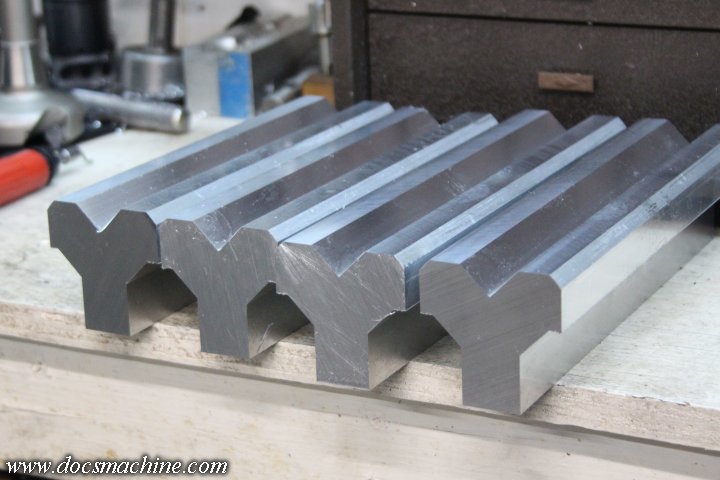
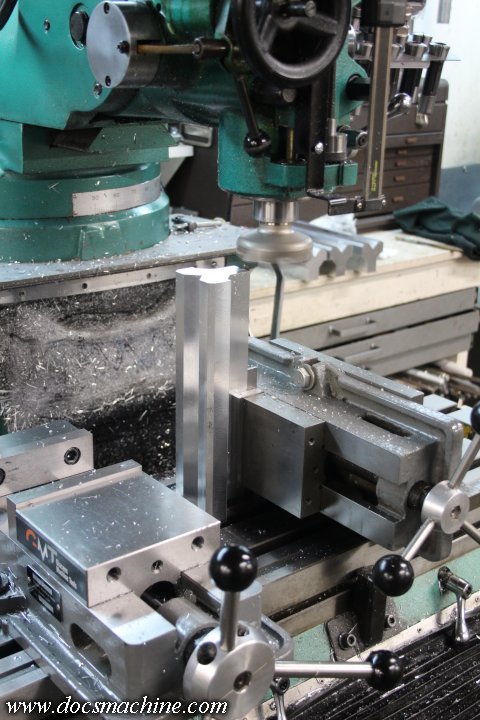
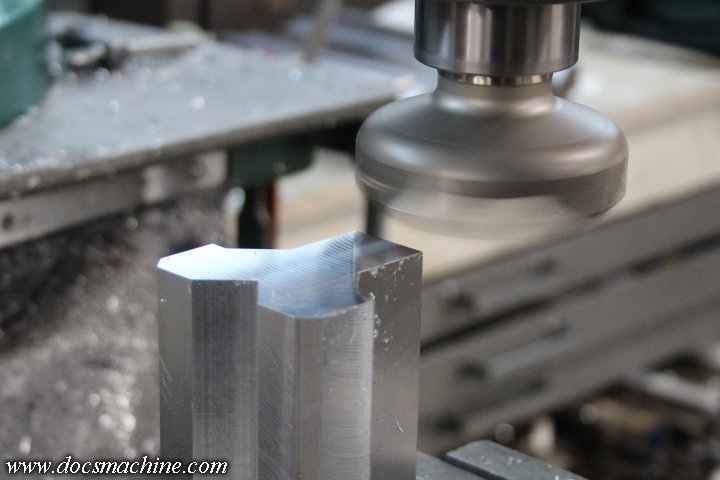
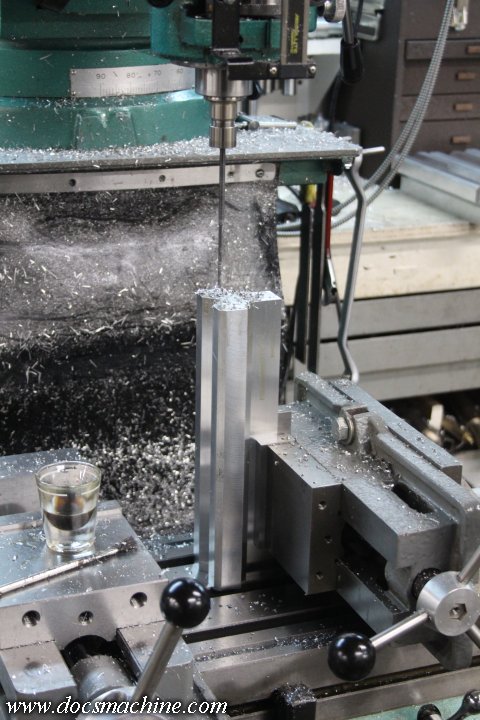
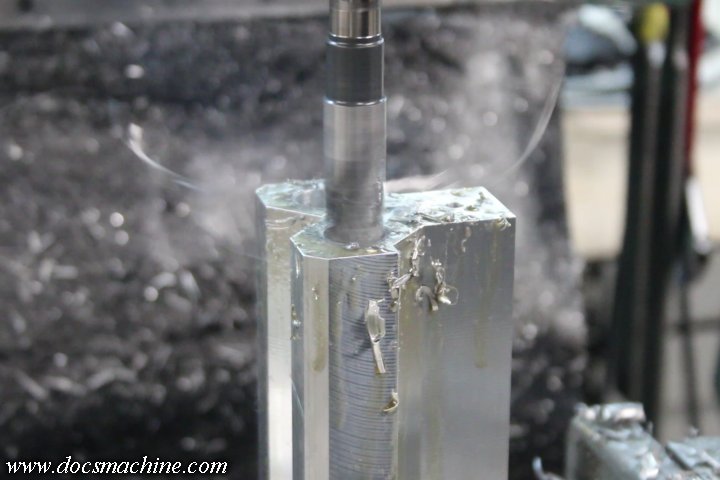
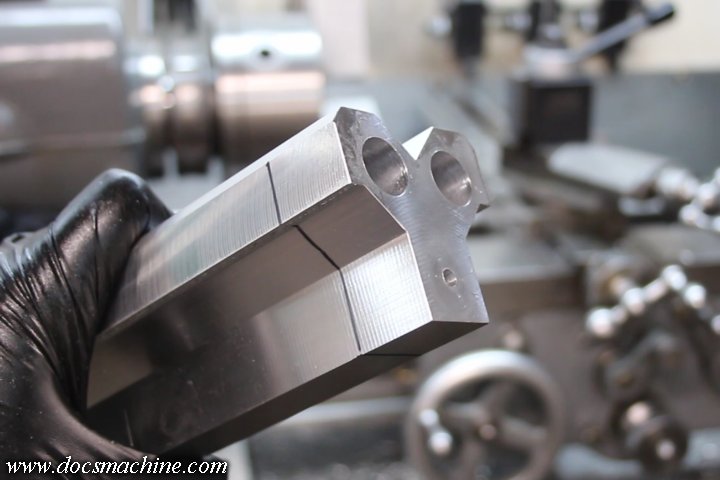
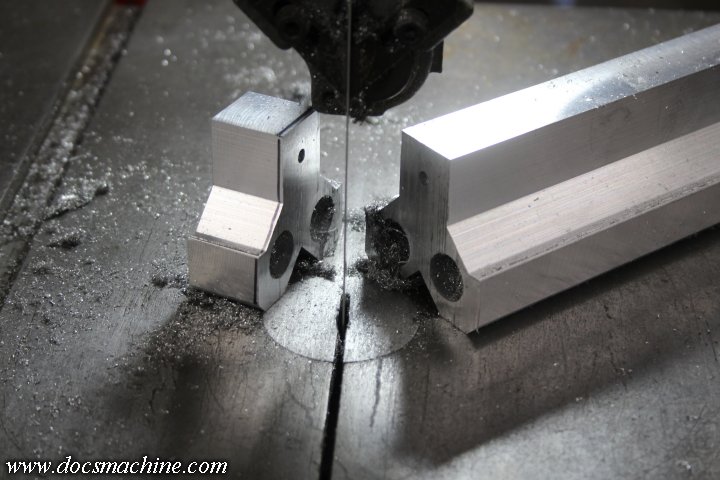
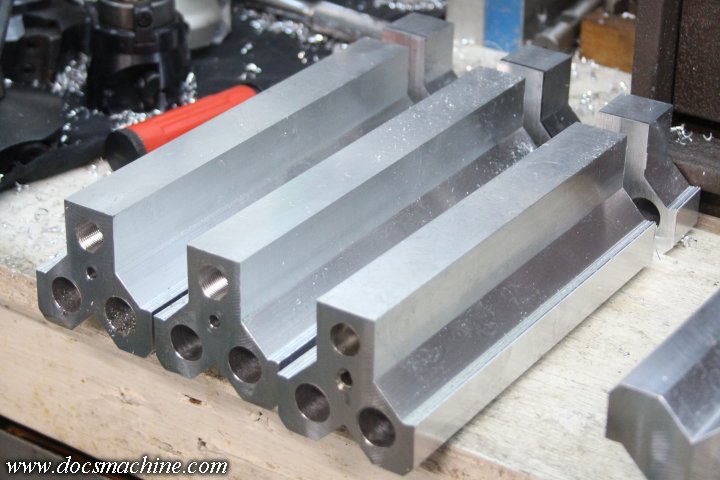
    Milled from solid brass, like the aluminum shown here? No problem! Figure the price will be roughly twice quoted- you're looking at $250 just in raw bar stock- and the resulting gun will be about six to eight pounds heavier than a normal VT.

    More reasonably, I could put together a body out of soldered brass tubing, like a Palmer's gun- I've always wanted to make a brass 'Cocker body that way, and it'd only be a little more effort to make one in Vee-Twin style.

    If you're interested in something like that, drop me an email and I can work you up a quote.

    Stainless? Not impossible, but milled-from-solid, on my poor manual machines? You'd be looking at three to five times the cost. As above, one could be assembled from silver-soldered or brazed stainless tubing, but there'd still be a ton of work in it.

    None of it's impossible, though.

    Doc.
    Doc's Machine & Airsmith Services: Creating the Strange and Wonderful since 1998!
    The Whiteboard: Daily, occasionally paintball-related webcomic mayhem!
    Paintball in the Movies!

    Comment


    • BlindFaith429
      BlindFaith429 commented
      Editing a comment
      Unfortunately, my pockets aren't deep enough right now. More of a curiosity question.

      Still enjoy following along though and drooling on my keyboard with each update lol

    • CrowsFeast

      CrowsFeast

      commented
      Editing a comment
      As one of my old colleagues used to say, "give me time, money, and floor space and I can do anything." Nobody is willing to give all 3 though.

    #47
    I love the update posts here, Doc. Thank you for taking the time!
    My Old Feedback (300+) https://web.archive.org/web/20180112...-feedback.html

    Comment


      #48
      One quick note, as I'm trying to keep all my waterfowl predominantly colinear: A lot of this work applies to the whole run, obviously. Internal work, threading, barrel threading, etc. So I can do these "in a batch" and save time and setup hassles.

      But, please keep in mind that almost all of these are custom orders, with a lot of variations. So there will come a time when I can no longer do them "all at once", and will have to sit down to focus on just one setup 'til that ones' done, then move on to the next. The fairest method for that will be by order of... well, orders. I'll take care of them in order you gents got on the list. PayPal incept dates, if you will.

      Doc.

      Doc's Machine & Airsmith Services: Creating the Strange and Wonderful since 1998!
      The Whiteboard: Daily, occasionally paintball-related webcomic mayhem!
      Paintball in the Movies!

      Comment


      • Chuck E Ducky

        Chuck E Ducky

        commented
        Editing a comment
        Just let me know when you are ready for payment on theses. I definitely want a pump one/ With a the Mech front block just in case. Not sure if you got my email.

      • Lt. head-shot

        Lt. head-shot

        commented
        Editing a comment
        I can't speak for others on the "list", but I'm excited for any updates, even if they are not on mine. I love the build process so seeing any progress made is awesome!

      • Chuck E Ducky

        Chuck E Ducky

        commented
        Editing a comment
        Me to that’s my favorite part seeing these things come together is so cool.

      #49
      Just let me know when you are ready for payment on theses. I definitely want a pump one/ With a the Mech front block just in case. Not sure if you got my email.
      -I'm sorry, I thought I got ahold of everyone that 'mail'd. I did swap PCs right as this was getting underway, and it's entirely possible I overlooked someone.

      But yes, they're underway- obviously - and a couple are still unclaimed. If you want to hit me with a down payment, one of those can sure be yours.

      Doc.
      Doc's Machine & Airsmith Services: Creating the Strange and Wonderful since 1998!
      The Whiteboard: Daily, occasionally paintball-related webcomic mayhem!
      Paintball in the Movies!

      Comment


      • Chuck E Ducky

        Chuck E Ducky

        commented
        Editing a comment
        Yes I will take one. I will email you again tonight square everything up thanks Doc.

      #50
      Finally got some new tooling in for this little project. Usually I'll tilt the head of the mill over to 45 degrees (typically "nodding" it forward, towards the operator) in order to mill the angled portions.

      This time, I managed to find a 90-degree endmill, sort of like having a drill point. This sort of thing is getting more and more popular these days as they make great chamfering and countersinking mills. And a 1" diameter one gives a 45 degree flat that's just under 3/4" long. A touch marginal, but enough to do the angled flats on the blanks without having to tilt the head.

      So with a little care on the roughed blanks, I was able to clean up both side faces easily and quickly, with a smooth, sharp transition between the two faces. (That is, no risk of an accidental undercut.)


      Even though this was basically a "finishing cut", there was still a bit of meat to be removed.


      That gets the valve tube section of the body down to spec, and half of the angled sides, nice and accurately.


      Then, centered on the same valve-tube area, the same endmill easily made the separation at the top.


      I was able to very accurately center that feature by measuring the thickness of the two sides, and once evened up, just plunge 'til I hit dimension.


      And that was all I had time for, today.


      I also got a better rounding cutter, so I should be able to get the rest of the profiling done this weekend. After that, it's time for a LOT of boring drilling... I mean, drilling & boring.

      Doc.
      Doc's Machine & Airsmith Services: Creating the Strange and Wonderful since 1998!
      The Whiteboard: Daily, occasionally paintball-related webcomic mayhem!
      Paintball in the Movies!

      Comment


        #51
        I love seeing the progress reports!

        Hey Doc, i sent you an email earlier in the week. Let me know of you don't see it and I'll resend.

        Sent from my SM-G970U1 using Tapatalk

        "What could go wrong?" - Sethzilla!

        Member of WORR BOYZ pump paintball team
        Playing since 1986: Stock, Pump, Mech, Electro, tourney, but now mostly rec.

        Feedback:
        https://www.mcarterbrown.com/forum/b...lla-s-feedback

        WTB:
        https://www.mcarterbrown.com/forum/b...-wtb-wgp-parts

        Comment


          #52
          Hey Doc, quick question. I want to make a custom barrel plug for mine. What is the distance between the centers of the barrels/bores? I am thinking if I know the distance from center to center, I can use that to figure out my max dimensions.

          Comment


            #53
            Originally posted by SETHZILLA! View Post
            Hey Doc, i sent you an email earlier in the week. Let me know of you don't see it and I'll resend.
            -I keep forgetting to shoot those pics. I'll get that done today.

            Hey Doc, quick question. I want to make a custom barrel plug for mine. What is the distance between the centers of the barrels/bores?
            -That's actually a very good question. It's either 1-1/16" (1.0625", close enough to 27.0mm as makes no difference) or 1-1/8". (1.125", or 28.57mm.)

            And I say "that's a good question" because up 'til now, most of my "plans" for these things has been little more than cocktail-napkin sketches. The original one I made back in 2004, I actually cut out a cardboard cross-section to see where all the ports and holes need to go.

            Even the last batch, which was anywhere from six to ten years ago, was admittedly kind of 'seat of the pants'.

            Now, keep in mind that, if I'm allowed to toot my own horn a bit, I'm pretty good at that kind of thing. There's absolutely nothing wrong with those previous ones, it's just that with this batch, I'm taking the opportunity to nail down more of the dimensions and details, as well as finally working up a proper CAD model. (Probably in F360.)

            So before I start drillin' an' borin', I'll be taking the time to more solidly nail down design and dimensions. There's some separation between the barrels- you don't want them touching, or possibly interfering if one or the other is a bit oversize. I'm pretty sure I used to use 1/8", making the center-to-center 1.125", but gimme a day or two to get that firmly established.

            Doc.


            Doc's Machine & Airsmith Services: Creating the Strange and Wonderful since 1998!
            The Whiteboard: Daily, occasionally paintball-related webcomic mayhem!
            Paintball in the Movies!

            Comment


            • Lt. head-shot

              Lt. head-shot

              commented
              Editing a comment
              Seat of the pants is exactly how I roll as well! 1-1/8th is good enough to get me started working up a rough idea. Thanks Doc!

            #54
            Okay, first up, for those that have taken one too many shots to the head, the center-to-center distance is, in fact, 1.125" exactly.

            Second up, before I started today, I needed to do a little cleaning.

            That trash can was mostly empty when I started. 90% of the aluminum in there came off these bodies.


            Next up was to essentially 'reinvent the wheel'. As above, all the drawings and data I've had for this thing over years have been little more than glorified cocktail napkin sketches. They worked, but I've always wanted to revisit the actual layout and see if maybe it couldn't be streamlined or improved or whatever.

            I rechecked all my numbers, and for giggles, scribed it out on a chunk of scrap sheet aluminum.


            And, interestingly enough, my "from scratch" numbers wound up exactly what my old numbers were.

            I reduced those numbers to a set of coordinates for the drilling, and used that to whip up a quick test template. And that, compared to the blanks, was pretty much spot-on.


            Now, the hot trick for the drilling, since I don't have a horizontal boring mill, is this little setup I put together years ago. It's just an angle plate that holds one of my 4" machine vises on its side.


            With a little adjusting, the "bottom" and fixed jaw are indicated to a very small fraction of a thou to square and true, and then I could cycle all the blanks through and mill the ends flat and square.


            Thus begins the laborious task of drilling all of these. First, one needs to center drill, then pilot drill, and start running my collection of extra-long "aircraft" drills through.


            This usually isn't a problem, just in this case, I have a small pile of bodies to do, and two of them are an inch longer than usual, for a purpose that will become apparent when that particular build gets to the assembly table.

            It's gonna take me a few days to chew through all of these, and I had to order another drill bit to get the long ones done, but you won't be missing anything- it's just more of the same.


            And even though I can't 'complete' the drilling just yet, I went ahead and drilled and tapped for the front-block bolt.


            That positively identifies the "front" end of each blank, so I can drill, bore and thread as needed from there.

            Doc.
            Last edited by DocsMachine; 02-06-2022, 04:37 PM.
            Doc's Machine & Airsmith Services: Creating the Strange and Wonderful since 1998!
            The Whiteboard: Daily, occasionally paintball-related webcomic mayhem!
            Paintball in the Movies!

            Comment


              #55
              I love these build updates! So cool to see the creation process. Makes you really appreciate the skill that goes into one of these.

              Comment


                #56
                Doc, what internals and pneumatics do you recommend for the full body vee twins?

                Comment


                  #57
                  -Well, as noted earlier, you're trying to shoot two balls at the same time. You're going to need heavy springs, a heavy hammer, a high quality ram, and an inline reg capable of higher pressures.

                  I seem to recall being able to run one at 600-650 PSI. That Firpo video mentions needing 750.

                  One thing to consider, is that barrel selection is going to be critical on these things.Too far over or underbored, and you'll have a great deal of trouble trying to get full field velocity. You'll want the longest control bore you can manage, and the best fit to the paint you can.

                  Last time I had one set up, I had a pair of 14" one-piece CP barrels, in I think .684", that matched whatever paint I had at the time (probably Draxxus) pretty well. I sweet-spotted the reg, and then played with the springs 'til I got a decent velocity.

                  Apart from that, any decent adjustable LPR and 3-way, any post-2K vertical ASA should fit the full size bodies, standard cocking rods, etc.

                  Anyway, back to the juicy stuff! Got a bit ahead of myself today, but no problem.

                  I probably should have finished the exterior profiling before I started drilling, but it's really six of one, half a dozen of the other. For the profiling, I have to tilt the head, and kind of preferred to do more of what work I could while the head is still upright.

                  (Yeah, I can of course return it to upright, it's just time-consuming.)

                  Anyway, as I was drilling these, I went ahead and bored a few inches of the bolt passages to full size...


                  And then, here's one of the tricky bits. I marked off 1" of the end...


                  And ran 'er through the bandsaw.


                  I'll keep each block matched with the body it came off of- they're close enough to identical it shouldn't make any difference, but it's good practice.


                  And, that's why I probably should have done the full profiling first, but no worries, I have a fixture specifically for holding the block in place while I mill the profiles. The backblock on the first one was an entirely separate chunk of 1" plate.

                  What this WILL do, is simplify the rest of the drilling, so it's a worthwhile trade-off.

                  Anyway, do that twice more, and there's three with a good chunk of the preliminary drilling done.


                  Once I have the rest done, I'll face the tail end of each body to length, and then the blocks down to size. After that, we just need to do more drilling, boring, threading, reaming, milling, shaping and turning. We're practically done!

                  Doc.
                  Doc's Machine & Airsmith Services: Creating the Strange and Wonderful since 1998!
                  The Whiteboard: Daily, occasionally paintball-related webcomic mayhem!
                  Paintball in the Movies!

                  Comment


                    #58
                    From my experience on double barrels, you REALLY don't want to go too far under with the underbore. It sets you up to get a barrel imbalance, which can lead to one side spiking and one side stacking paint in it. The stacked paint is bad---the paint that's shooting is worse. It gets really, really hot. With today's paint, 684 is probably the right ballpark, or running a double freak. So anyone grabbing one, think of this. It will matter.

                    And Firpo gave you good advice on the valve pressure. That should be right. No problem with most modern adjustable tanks.

                    Progress looks great Doc. You got some lucky buyers.

                    Comment


                      #59
                      random question, with all those shavings. do you collect them and use them for anything else. maybe melt them down and make something else with them. just wondering.

                      Comment


                        #60
                        I try to keep them separate from steel cuttings and just dirt on the floor, etc. Just before starting this batch, I did a bit of extra cleanup, both because, well, let's face it, my poor ol' shop needed it and so I could sweep up the aluminum and save it as mostly pure.

                        I don't do anything with it, personally, but after I've collected a few bags, I take it to the local metals recycler. Doesn't pay much, but I like to see it get reused than just tossed in the dump, and the recycler is actually considerably closer than the dump.

                        Doc.
                        Doc's Machine & Airsmith Services: Creating the Strange and Wonderful since 1998!
                        The Whiteboard: Daily, occasionally paintball-related webcomic mayhem!
                        Paintball in the Movies!

                        Comment

                        Working...
                        X