I always liked that sl68
-
-
More pics!
Here's a shot I set up on a then-neighbor's back-lot junkpile, of the three 'Cockers I had on hand at the time.
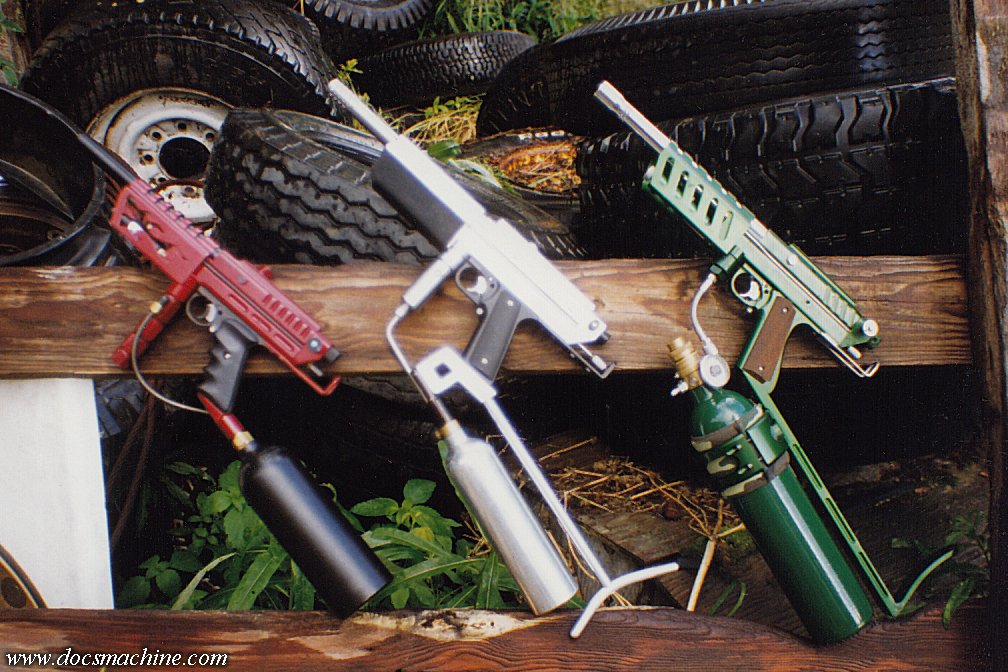
On the right is the Green Cannon again, though in a slightly earlier iteration- note the regulator is still brass. Between this pic and the above one, I nickel-plated it.
The middle one is kind of a junk-box 'Cocker, something I put together one day on a whim, out of spare parts I had laying about. I liked it so much I eventually bought a buffing wheel for my bench grinder, and polished the bejeebers out of it.
It was never as mirror-shiny as I was able to get later stuff, as I learned more about polishing, but it was cool nonetheless. Keeping in mind a lot of play back then was still in the woods- so a polished chrome marker wasn't considered the best idea. Kind of like a sniper putting a hi-viz vest over his ghillie suit. But I rocked it anyway.
The lefthand one is the semi-famous PyroCocker, made for a friend who was one of our field regulars at the time.
Pretty basic gun, even for the time, but he wanted it personalized, as his screen name was PyroFiend.
Anyway, I was pretty happy with the hot-rod flames milled into the shroud.
Speaking of milling, here's another 'Cocker body I was pretty proud of:
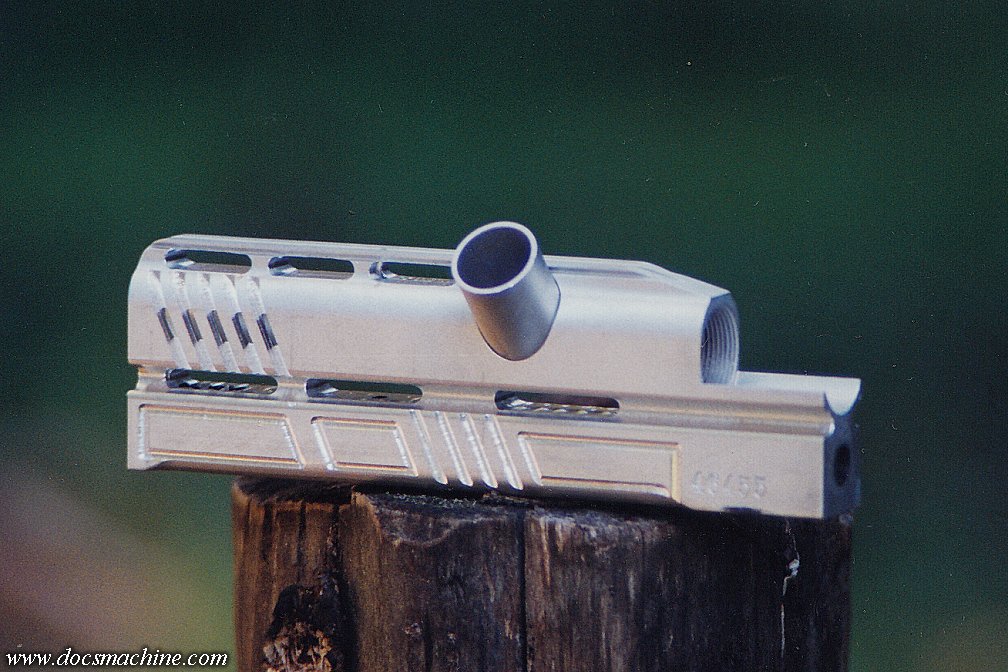
The owner, as I recall, sent me some photos of a couple other 'Cockers, and sort of "mixed and matched"- he wanted this feature from this gun, that other feature from the other. I recall one was an early Brad Nestle gun, the photos of which had been all over the internet- such as it was- even before I got an account.
Which, as a further aside, itself proves that no, the internet is NOT forever. Back in the day you couldn't swing a badger without hitting one of those Nestle pictures- everyone had a copy on their Angelfire or Geocities page, as their forum avatar, in any one of a thousand galleries... And today, none of them can be found.
There's one Nestle gun from back then- The Autococker Formerly Known as Prince but those are new pics, from a gun that resurfaced a number of years ago. (I think it was auctioned to help pay some medical bills.)
Anyway, this body eventually got polished and assembled into the Lava Cocker- the grip and barrel were mine, put on to mock it up for a good pic. That's another paper photo I'm hoping to find, to rescan into a higher resolution image.
I also want to duplicate the milling, and if I can, find somebody that can dupe that anno. That was PK Selective work, and they've been out of the biz for a pretty long time now.
And finally, the infamous DOC9000!
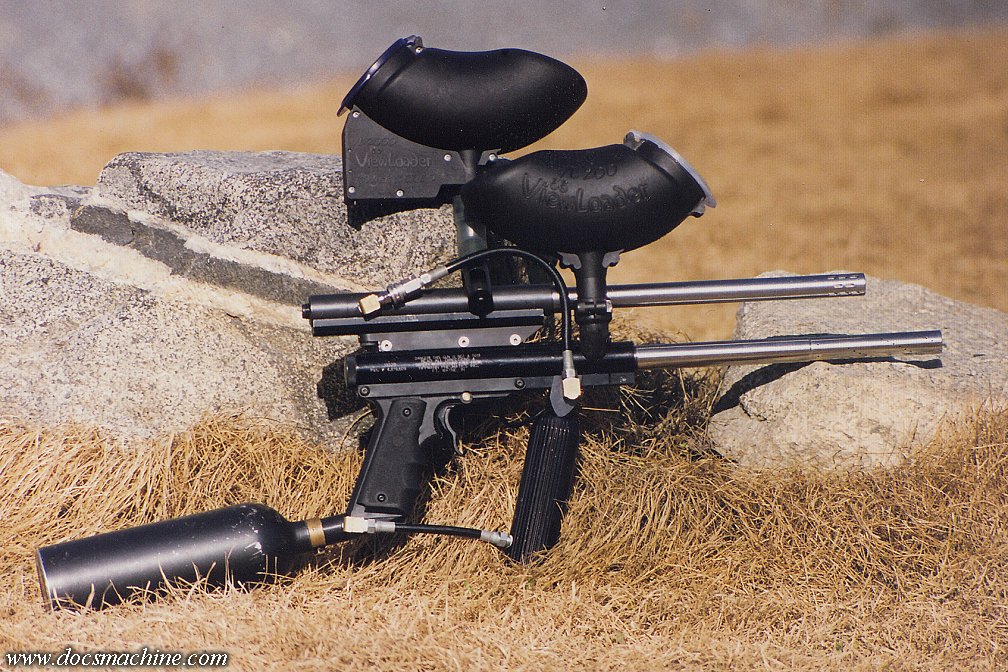
A hopper-left Automag on top of a fairly normal 68 Carbine. The action of the Carbine fired the 'Mag, with just a smidge of separation between the shots.
That trigger on the Carbine was one of my welded and shaped stock Tippmann triggers, in this case MolyKoted- kind of like today's Cerakote- as is the 'Mag itself and the adapter unit that holds the two together.
A Guild regular from back in the day, called Bror Jace, took it to a Castle Conquest one year, and reportedly had a blast with it. I actually sold a few of those over the years, the most famous one being a version with a Model 98- the Doc9098- that made it into a center spread of Paintball Magazine.
More pics on the way!
Doc.Doc's Machine & Airsmith Services: Creating the Strange and Wonderful since 1998!
The Whiteboard: Daily, occasionally paintball-related webcomic mayhem!
Paintball in the Movies!Comment
-
For the past couple of days, I've been running several baskets of parts on the Logan, my little CNC-converted lathe. As I've complained before, said lathe is slooooo-oow. With a max spindle speed of only 1,400 RPM, the shorter of the two types of parts I was running took just under six minutes, and the longer, just hair over eight.
Because of needing to keep "birds nests" of swarf off the work, and since the machine has no flood coolant, needing to periodically manually squirt it with a little WD-40, I can't just press the button and go do something else for six to eight minutes. So, I did what I could while I had to babysit. I cleaned off the Nichols horizontal, which was still set up for a part I last ran a year ago. And there have been times I wanted to use it, but didn't have or want to spend the time to break down that setup.
It's back to a regular vise, and once again usable at the drop of a proverbial hat.
One other thing that had bugged me for literal years, was the Exacto mill, which is just adjacent to the Logan. I'd pretty fully rebuilt that about a decade ago, but one thing that annoyed me and eluded an easy fix, was there was some slop in the manual quill downfeed handle. Basically what you yank on to use it as a drill press.
And that was the issue- the pressure of drilling took up that slop, but as soon as the drill "broke through", it jumped down a little due to the slop, and the drill could grab. I've broken drills that way, and one of those damaged the part.
So, while I was standing there twiddling my thumbs (the doctor said I should get more exercise) I cracked open the downfeed mechanism.
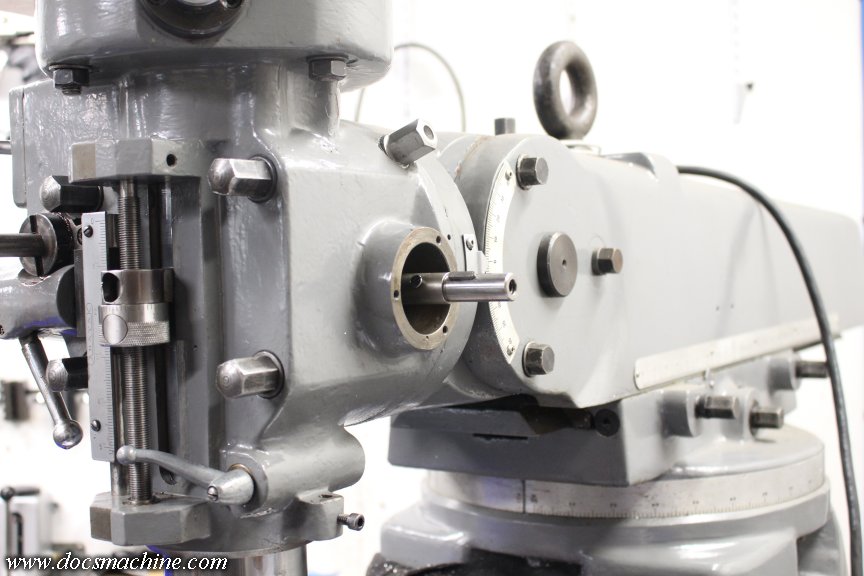
Now, it wasn't as easy as that- it was the same process as repairing the clockspring on the green mill a couple months back, but in this case, the spring holder didn't actually have any holes for that 'spanner' wrench. Initially, I held it with a big pair of Channeloks, but of course I wanted something better for the reinstallation.
So I drilled a pair of holes in the spring housing....
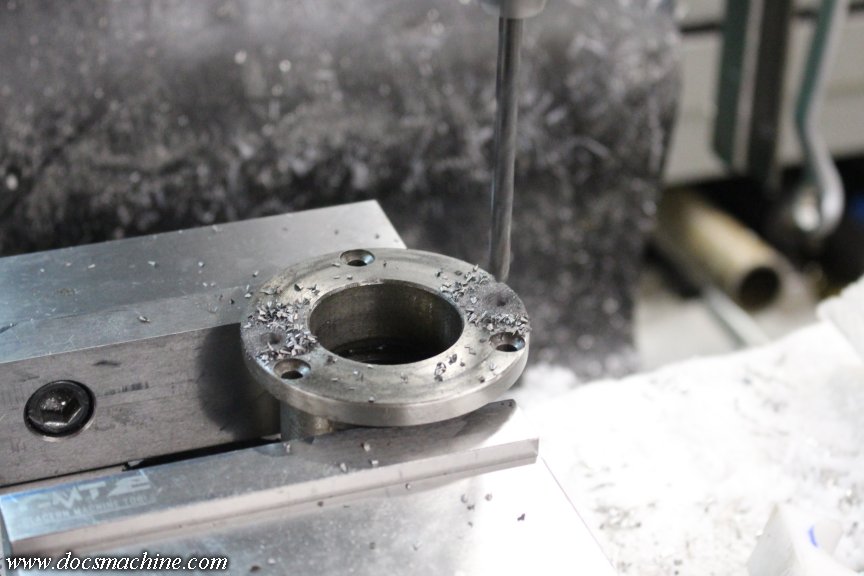
... So I could use that same ad-hoc spanner wrench from the other mill. Worked a treat.
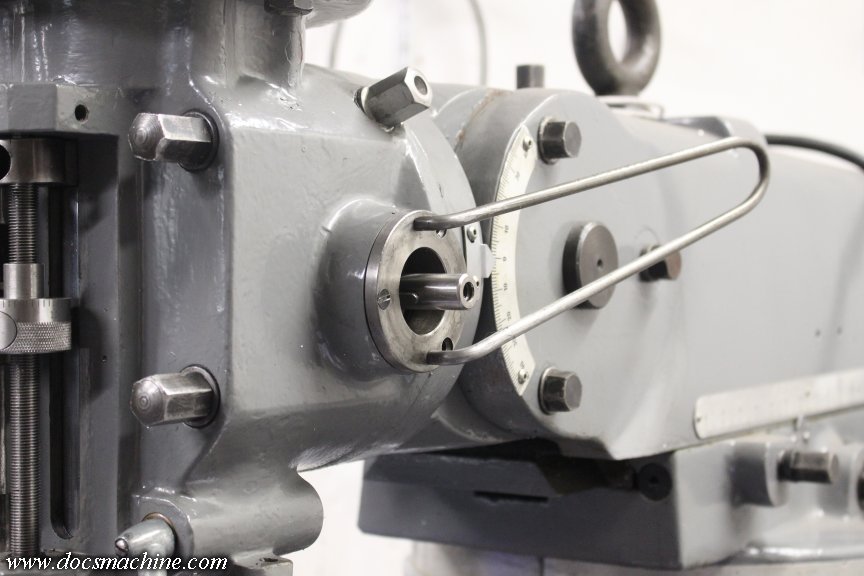
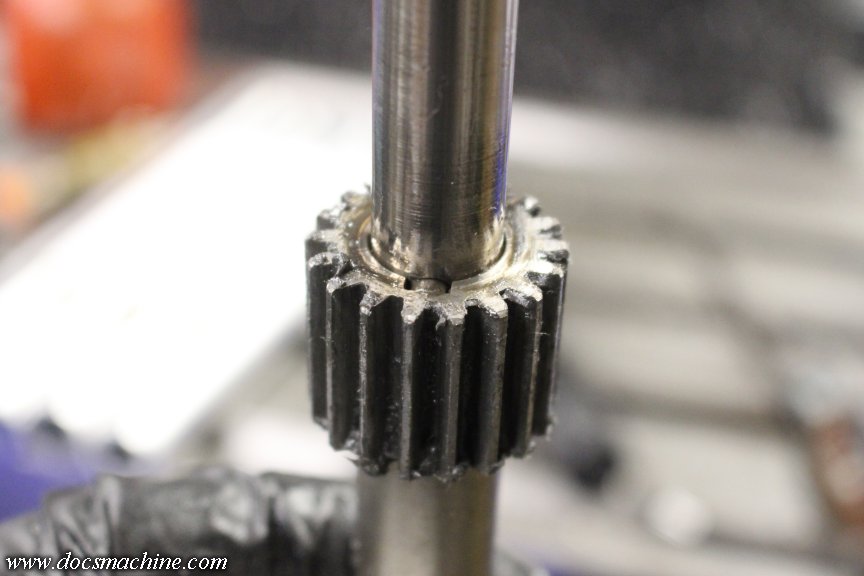
After some diagnosis- not helped by having to attend to the lathe every 2-1/2 minutes- I determined that the pinion gear was loose on the shaft. Both the gear and the key had worn.
So I got out some key stock, and milled down a fresh, but slightly oversize key:
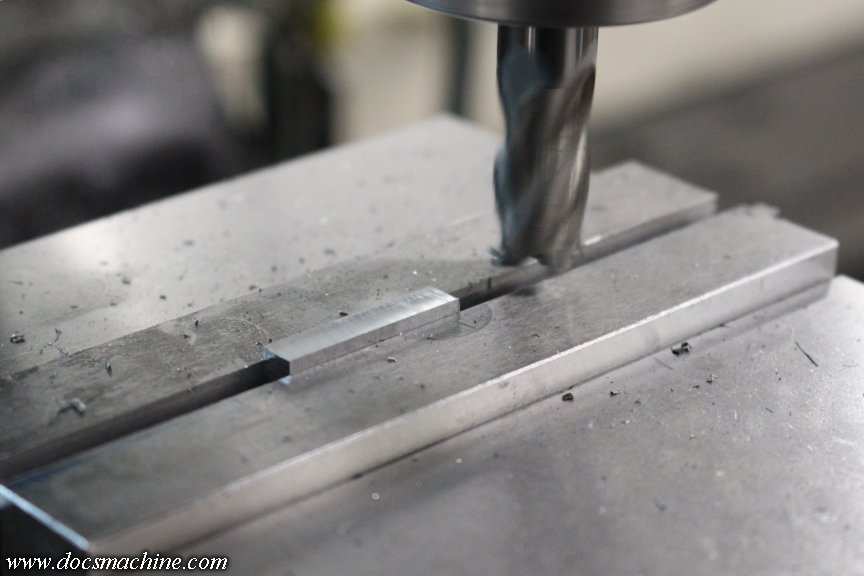
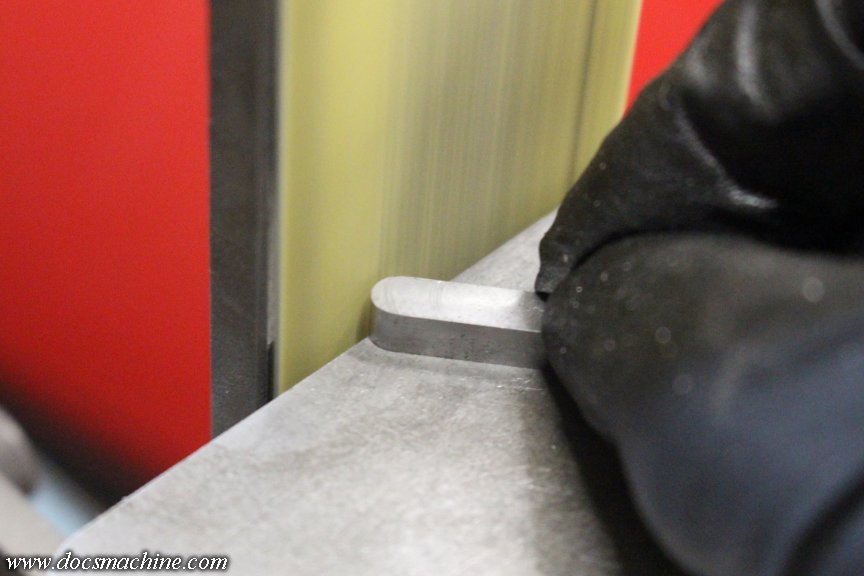
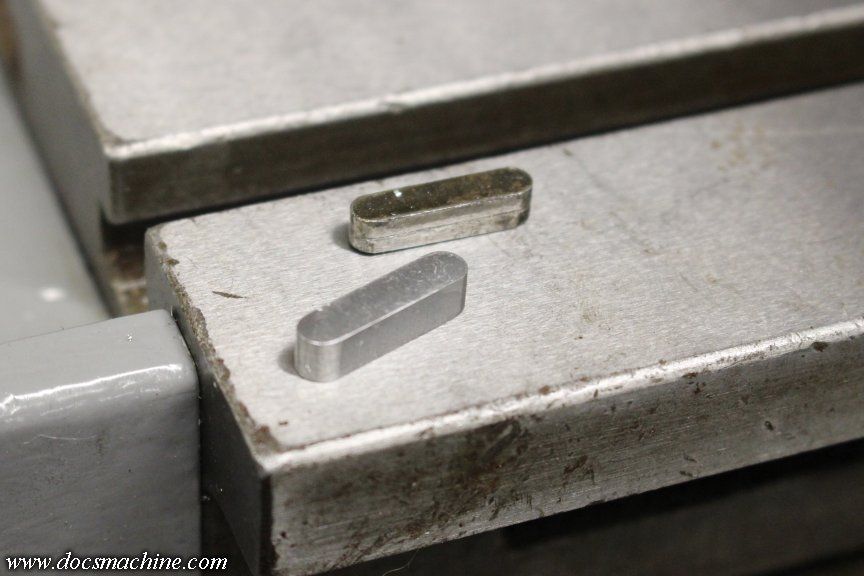
Since the gear had some wear too, but the hardened shaft was fine, I had to make a slight step in the key, being very careful to keep the tolerances tight. I wanted a light-to-moderate press fit, for zero slop.
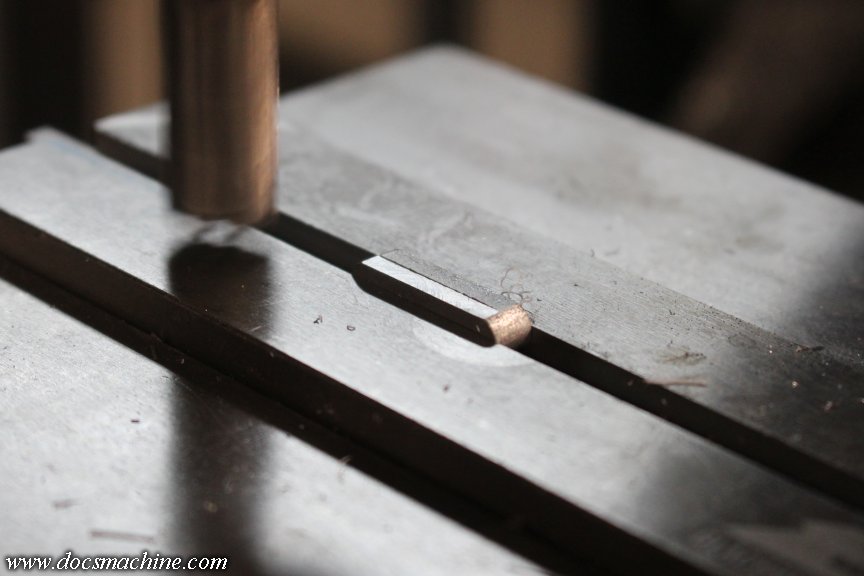
And it worked great. I used the smooth face of the mill vise to press the key into the shaft, and it held well enough that, since it was a teense too tall, I was able to mill it down a few thou with no issue.
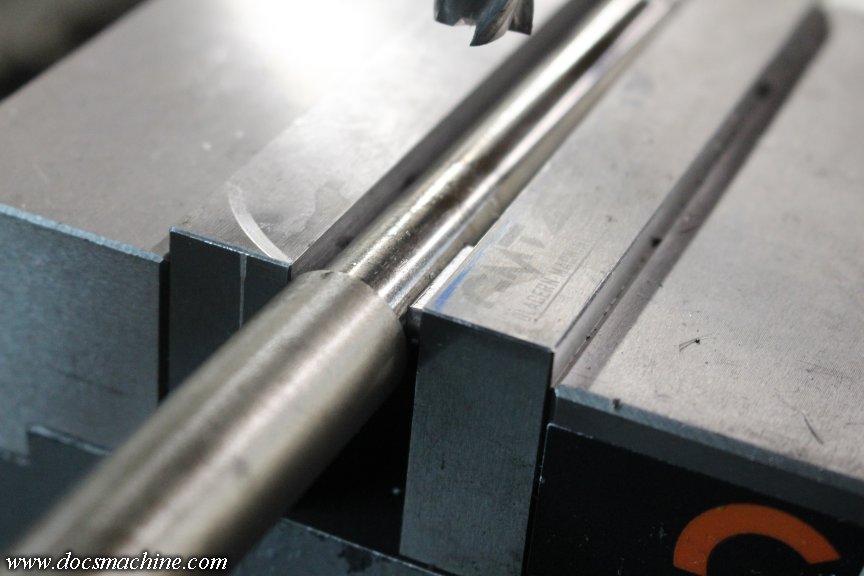
The gear itself had to be lightly tapped into place with a padded hammer...
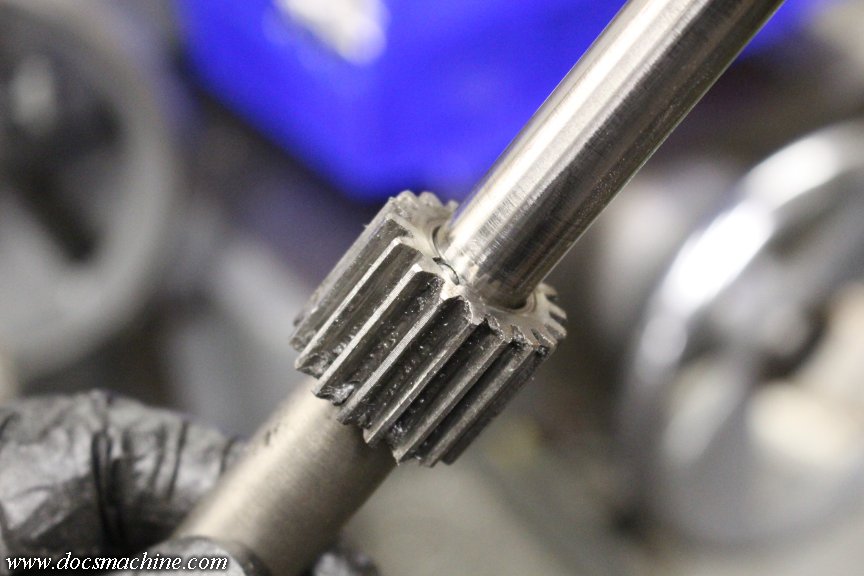
Then cleaned, regreased and reinstalled.
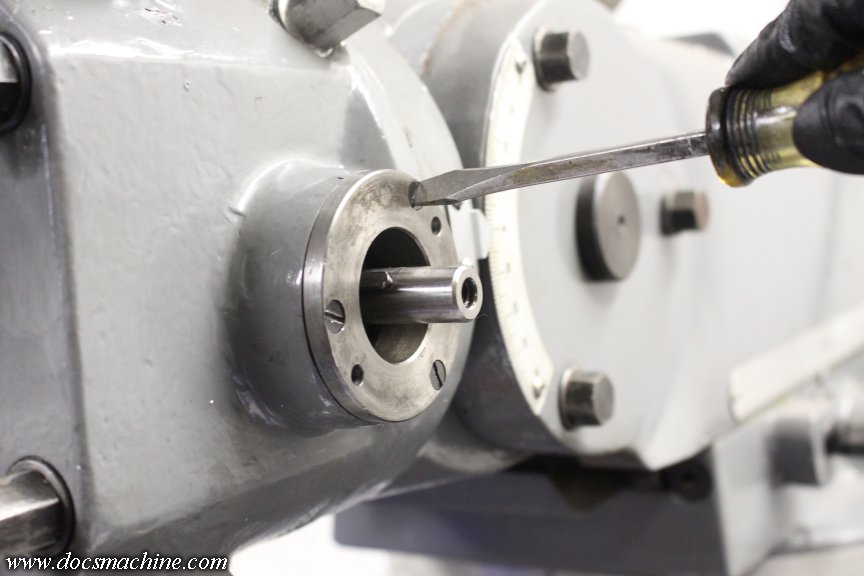
And, while no picture can show you the lack of slop, the whole process was worth it- almost all the extraneous movement is gone.
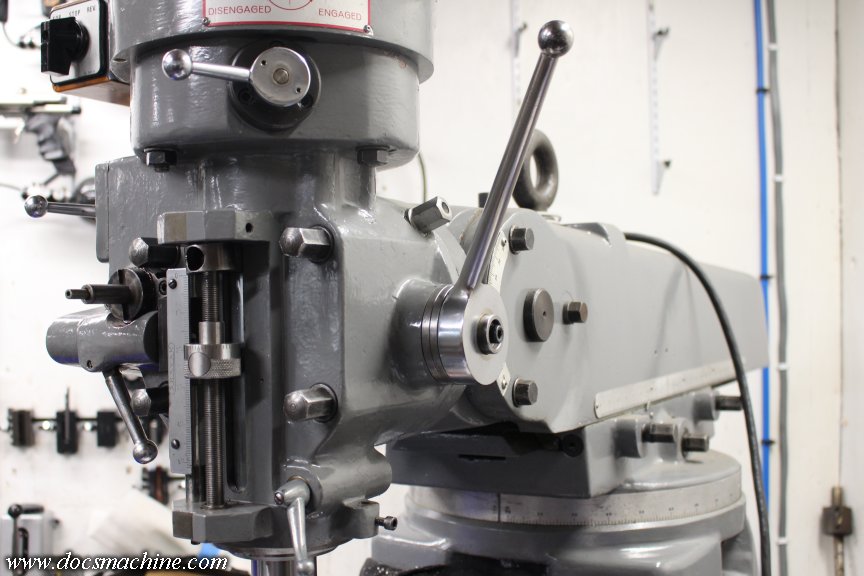
Much better drilling action- well worth the effort. The kind of thing I wish I'd done years ago.
Doc.Doc's Machine & Airsmith Services: Creating the Strange and Wonderful since 1998!
The Whiteboard: Daily, occasionally paintball-related webcomic mayhem!
Paintball in the Movies!Comment
-
Coming down to the last parts I need to run on the Logan- down to a dozen or so, but after the day of running, I didn't feel like resetting the machine again. I'll kick those out tomorrow, and then start feeding the Omni.
One thing I did get done was dusting off another mod for the Exacto. The two main upgrades I've wanted to do to this mill have been to add a DRO, and a new power feed. The DRO was the best mod I ever did on the green mill, and these days the main reason I default to it rather than the Exacto.
But for the moment, the first part I started looking into was the power feed. This machine originally came with one from the factory, but it was a monstrous 100+ pound cast-iron thing with a 3/4HP 3-phase motor. The drive gears were destroyed when I got the machine, and I've always presumed somebody had let it run up against the physical stops, and the brass/bronze gears were the first to let go.
Instead, I plan to install a modern "Servo" type drive like most home-shop mills come with these days:
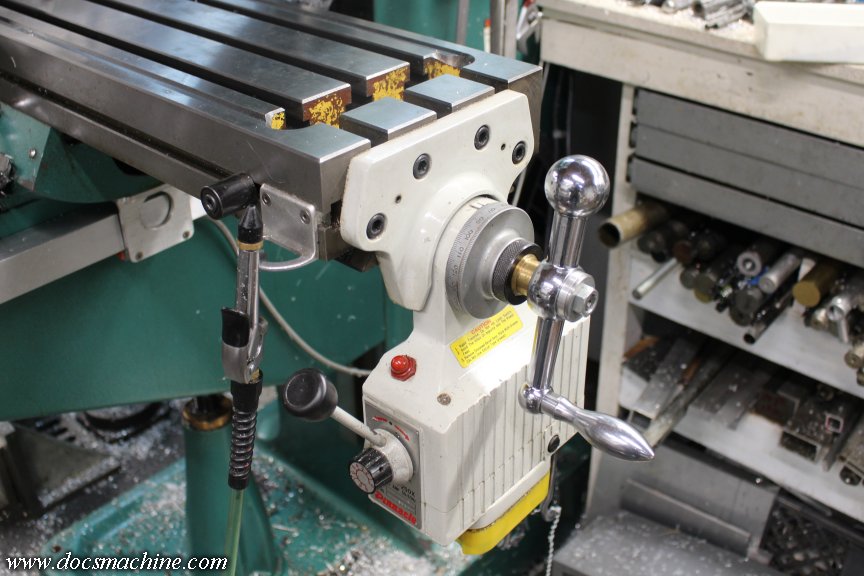
To keep the working travel of the table even with that huge factory power feed, Exacto added a long table extension to allow the full movement.
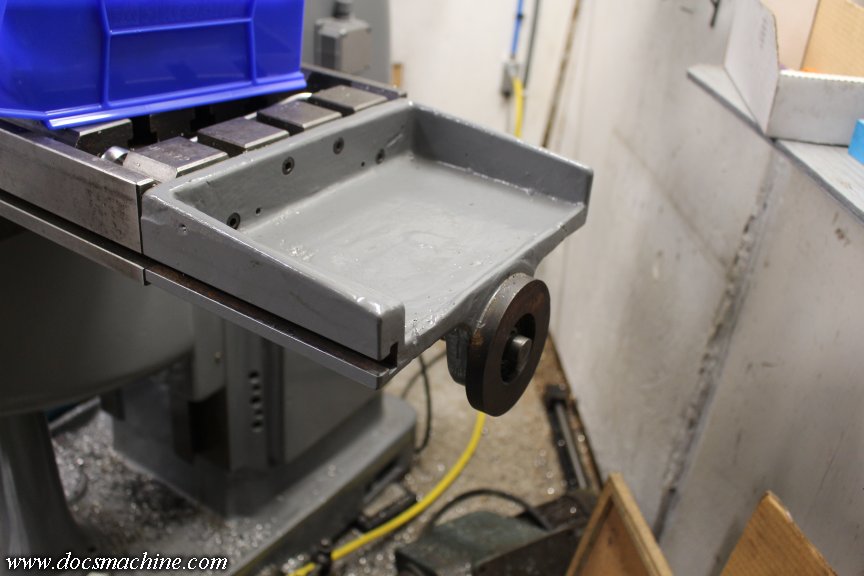
According to all the pics I've seen, there should be a handle there, but presumably it was removed at some point, I'd guess so the spinning handle didn't interfere with the next machine in the row, maybe?
Anyway, take that big extension off, and that leaves me a solid 8" of leadscrew I can turn down to Bridgeport spec in order to use an off-the-shelf Servo feed.
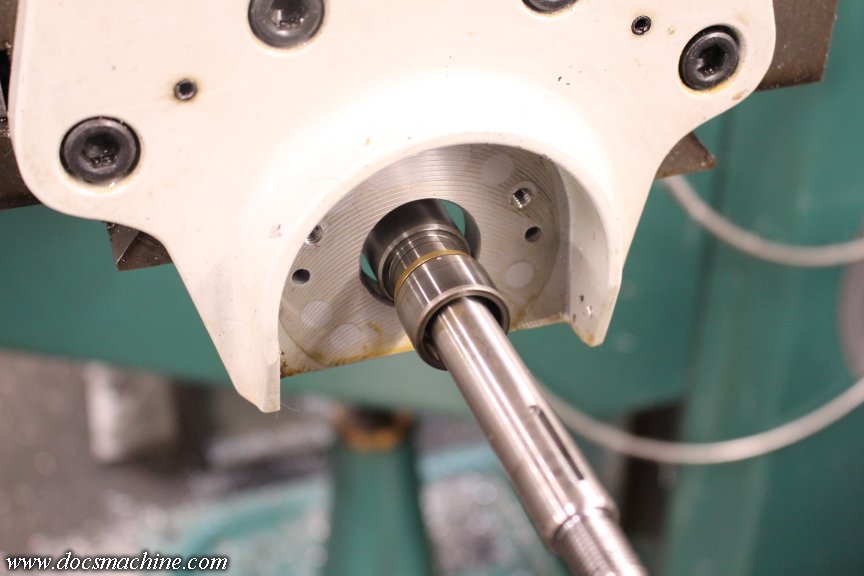
It's unfortunately not quite that easy- the bolt pattern at the end of the Exacto table isn't the same as a Bridgy, and it's a full 3" wider. So I ordered- several years ago- a block of Dura-Bar cast iron, which I'll machine down as a copy of the mounting plate- a hybrid between the Servo mount and the Exacto table.
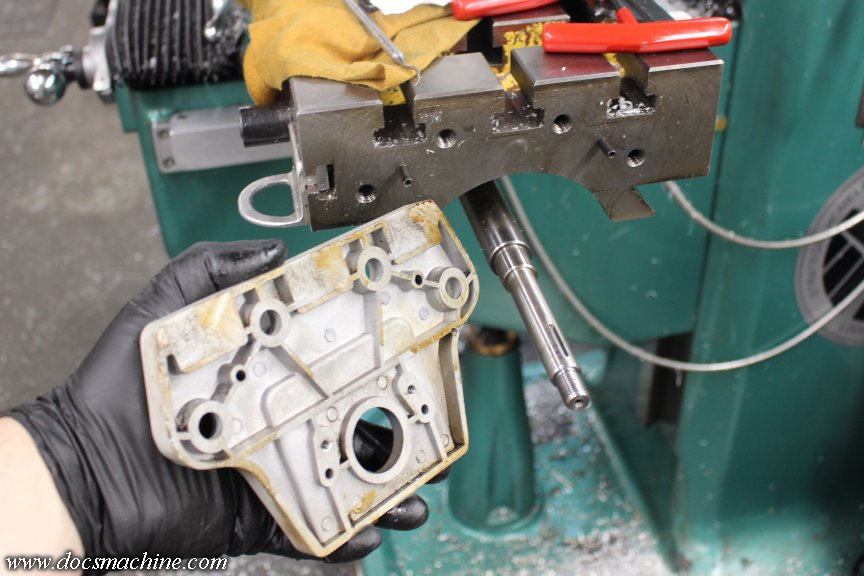
It's gonna be a bit tricky, and I only get one chance (unless I order another $200 in iron, or $175 in aluminum ) but after a quick teardown and close measurement, I at least have the specs for the screw. So I can yank that and trim it down anytime I have a free half-day or so.
I also dusted off the DRO parts and opened those up for the first time- since I ordered them in early 2024. Both will be attended to as time permits, stand by.
Doc.Doc's Machine & Airsmith Services: Creating the Strange and Wonderful since 1998!
The Whiteboard: Daily, occasionally paintball-related webcomic mayhem!
Paintball in the Movies!Comment
-
And DONE!
Over 250 pieces, that took an average of maybe around seven minutes each. (This isn't all of them, the cart isn't big enough to hold all the bins. )
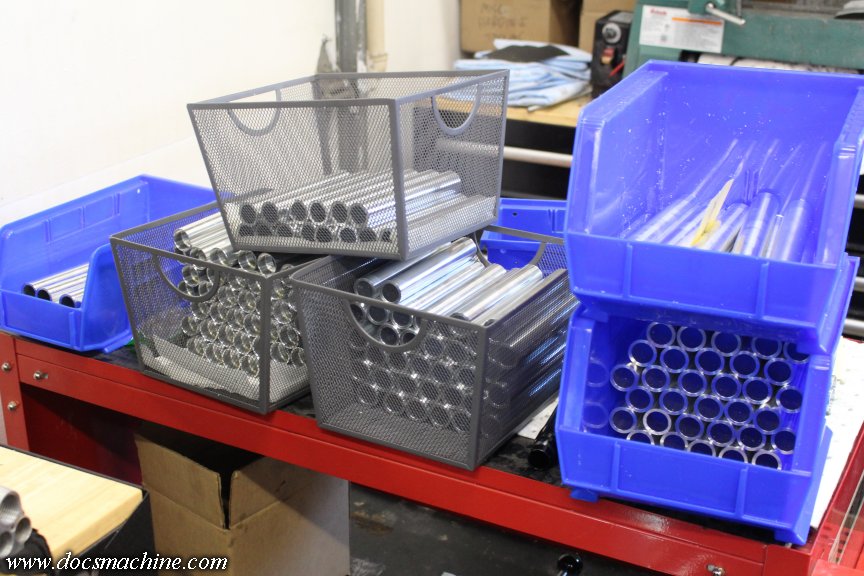
I'd have lit up the turning center to start crankin' em through, but I have about five hundred and eleven other things screaming for my attention, so maybe tomorrow. Should be a nice break to have a 2:20 cycle time rather than an 8:05
Oh, and there's gonna be some brass in there somewhere, too.
Doc.Doc's Machine & Airsmith Services: Creating the Strange and Wonderful since 1998!
The Whiteboard: Daily, occasionally paintball-related webcomic mayhem!
Paintball in the Movies!Comment
-
I've been too busy to post much lately, and a lot of it has been just manufacturing- and we've all seen pics of the oil-soaked insides of my turning center before. Any new pics would look the same.
But, I did one quickie little job for a Guilder a week or two ago, and figured I'd post that: Here's what I got in, a 2005 WGP "Black Magic" midblock Autococker.
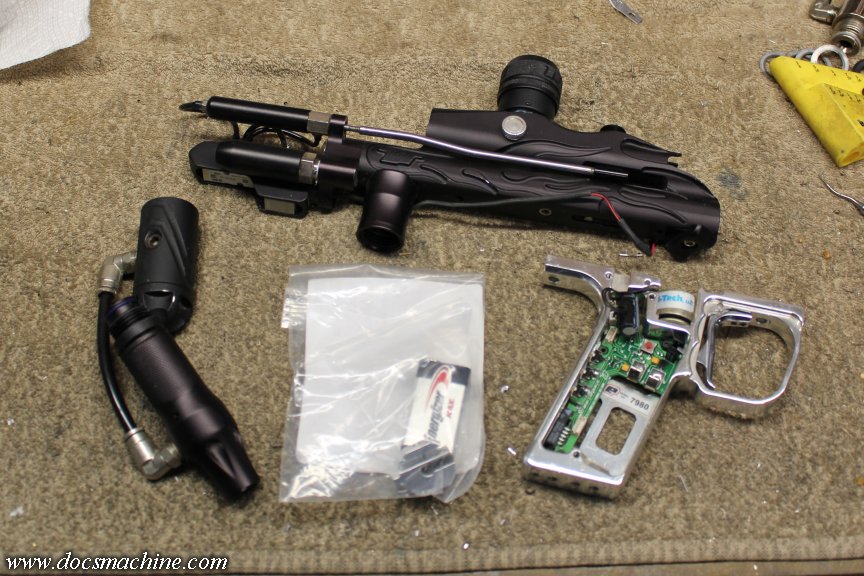
That's more or less how I received it, and I was told it hadn't been assembled or aired up in quite some time.
That gets the usual strip-down and cleaning...
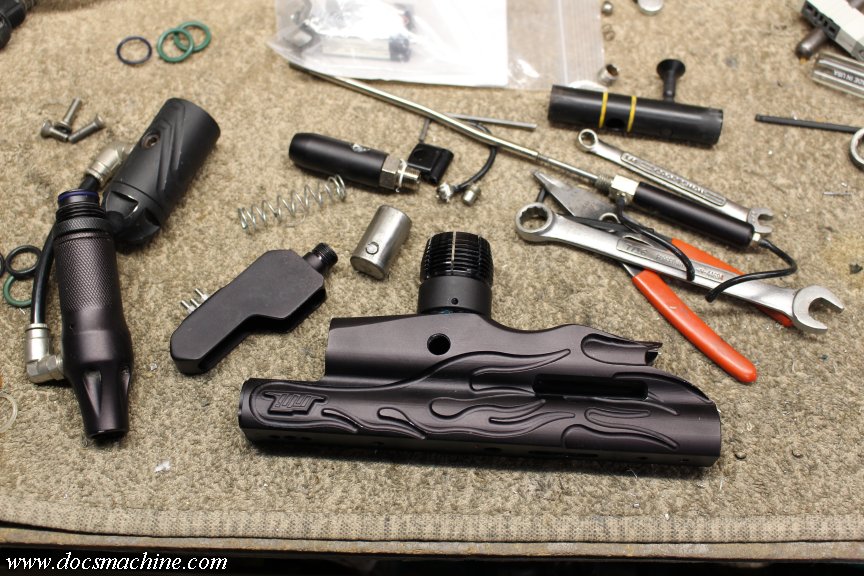
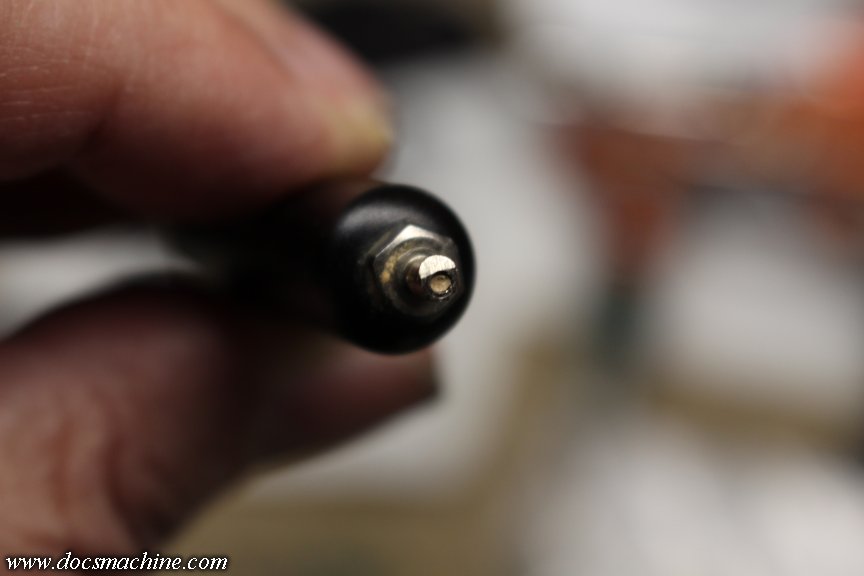
And of course a close inspection. You never know what you might find- like this dented ram nipple clogged with that I suspected was compressed cardboard.
Everything got cleaned, inspected and reassembled. I only found one rotted Buna-N O-ring, the rest were good condition WGP urethanes. A couple were worn though- notably the ram piston- so a few got replaced, and everything properly lubed and reassembled. Pretty standard stuff.
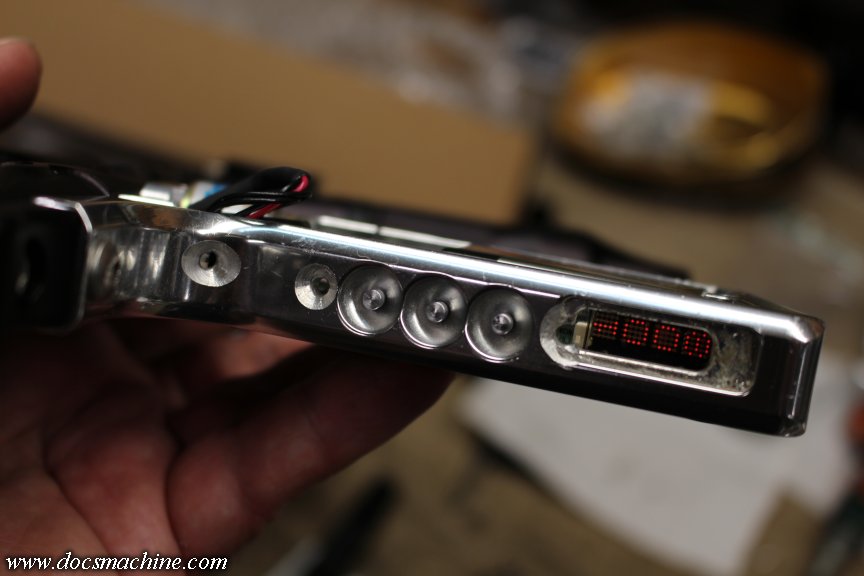
Though in this case, since it was kind of a "basket case", there were a few things that needed attending. First, the button inserts for the E-Blade were missing- I actually have some of these in stock, but they only fit anodized frames, not this chromed one. (The holes are just a touch too tight due to the plating.) So I got out some weeny bar stock and turned a fresh set:
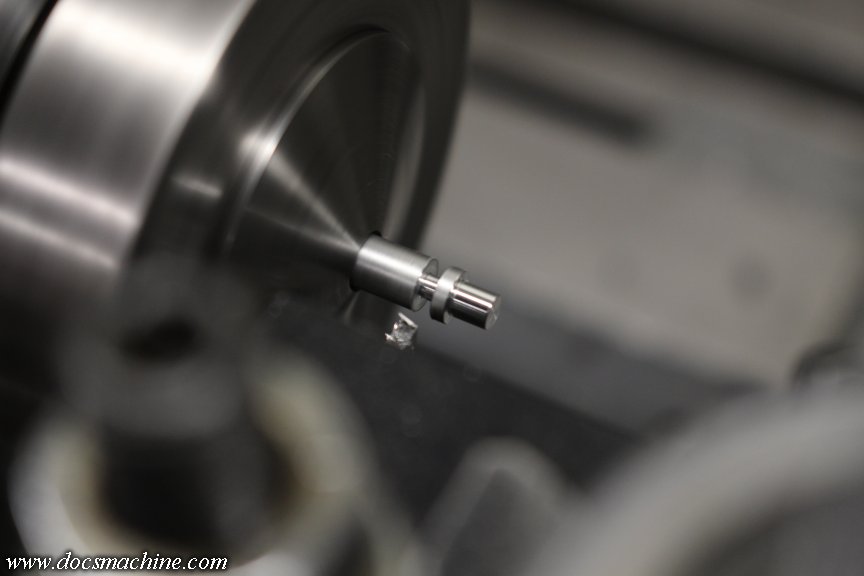
And a trick for making and parting off teeny parts? Lay a piece of black cloth in the chip tray to catch them. Makes it so much easier to find.
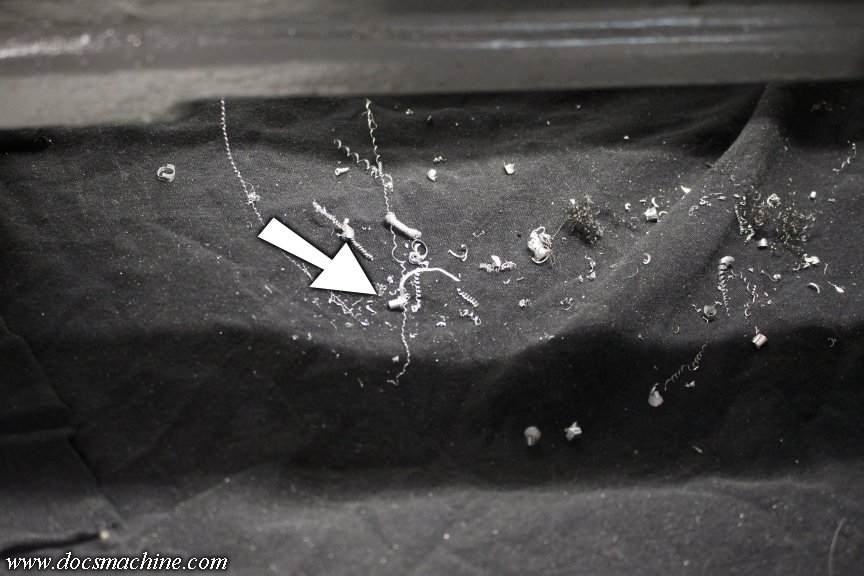
And done. That was easy. (And no, I have no idea what the other three hand-drilled holes were for.)
Fully assembled and given a preliminary leak test.
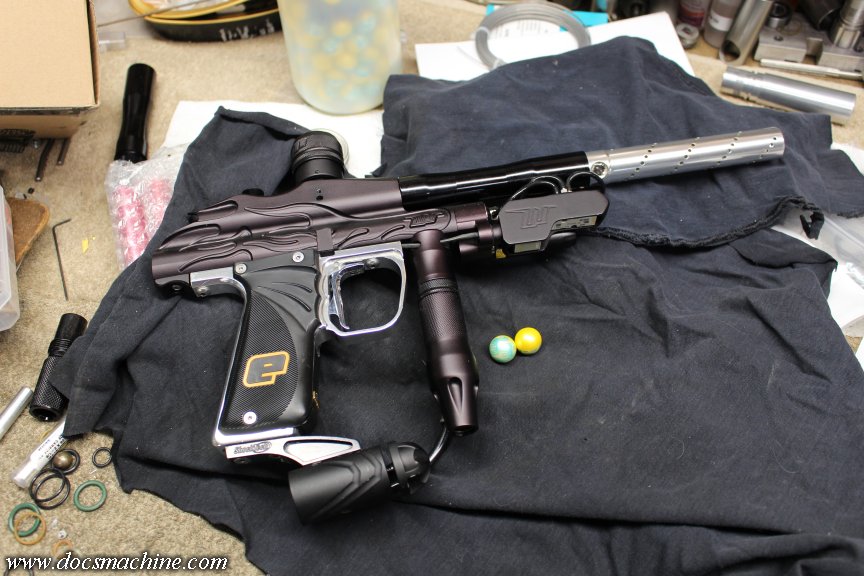
I didn't get an eye with it, nor did I have one to try, but she worked fine with it disabled. Although with the ultra-light midblock sled and Delrin bolt, it was almost too fast- I had to add some CSON time to keep from chopping the last balls in the stack, or when hand-needing. A functional eye should help that- which is, of course, what it's for.
However, when testing, I had to add what I thought was too much spring pressure at the RVA to get the velocity up. That, from long experience, is in no small part due to the cavernous factory bolt.
All too many players think it all has to do with airflow- and in some cases, and certain valve styles, it does. The assumption is "bigger ports equal more flow which equals more velocity", and that's not necessarily the case.
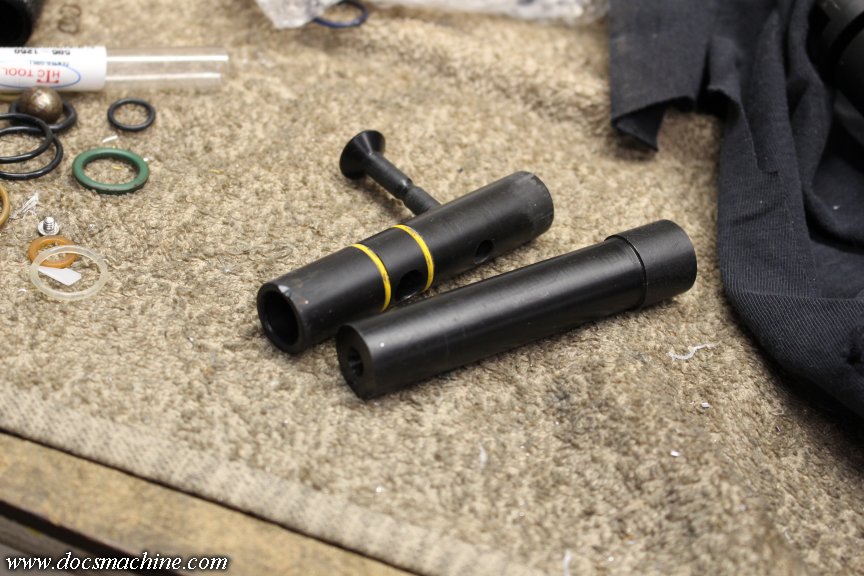
So I grabbed a chunk of black Delrin, and poked and prodded it 'til it looked like a close copy of the original Black Magic bolt... except smaller.
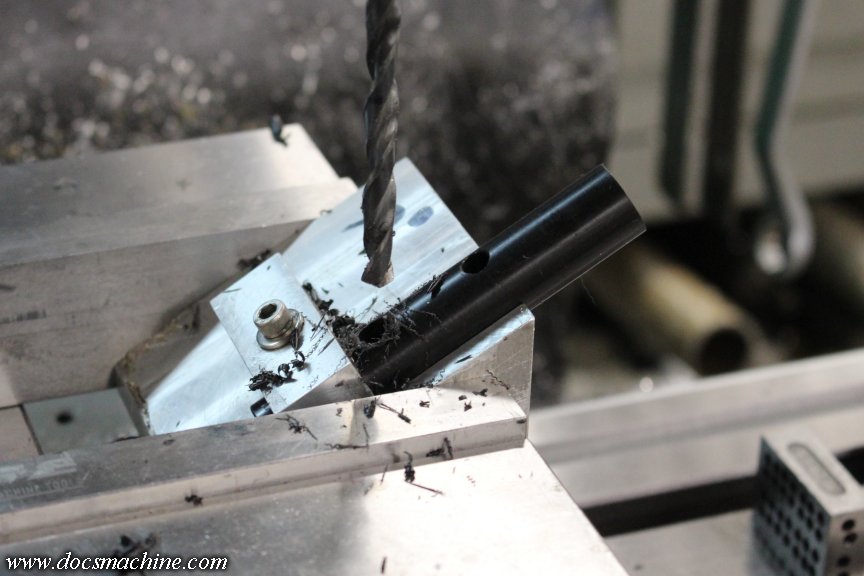
Here's another trick for you; I made this fixture approximately a million years ago, to be able to drill the exhaust port in 'Cocker bolts at an internal angle- the theory being a small degree of "porting", making the turn a little more gradual.
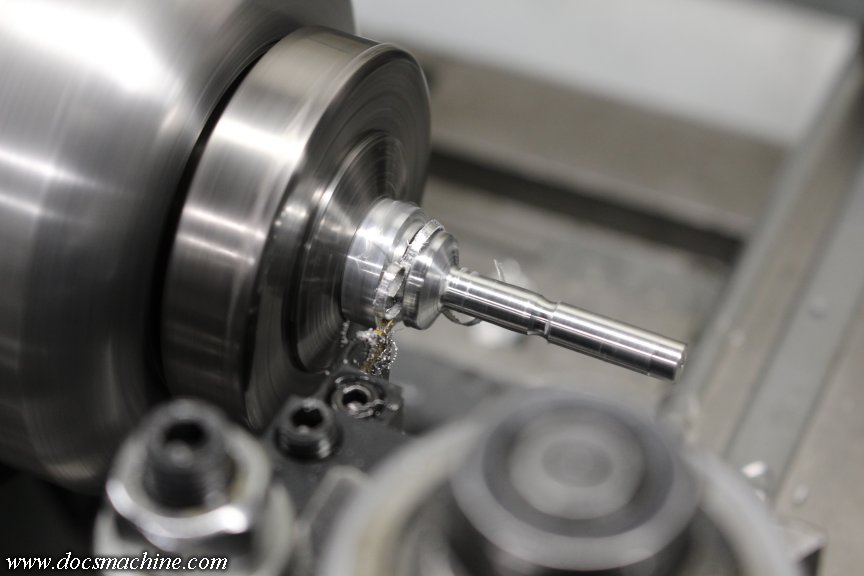
The stock bolt had a Delrin pull pin, and I didn't want to take that apart to run the new bolt (I wanted to be able to try them side-by-side) so I turned a new one from aluminum.
And the proof, as they say, is in the pudding. Conventional player wisdom says the right-hand bolt is the "better" one- bigger hole, more airflow, right?
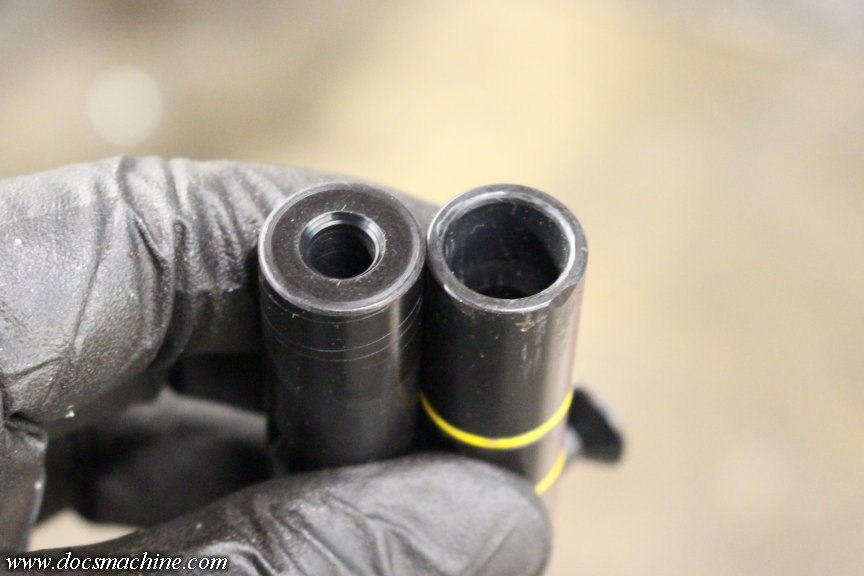
Nope. The left hand bolt is worth 20-40 more FPS, tested, proven and repeatable. Why? It's not "airflow", it's conservation of energy. A compressed gas has energy because it's compressed- like compressing a spring. The less that gas is allowed to expand before it can do work- in this case, accelerate the paintball- the more energy it maintains for that task.
The original bolt has roughly three times the volume- close to four- over my custom bolt. All that space does is let the gas charge expand, doing no work, before it hits the ball.
Now, I'm sure there's valve and marker combinations where the bigger bolt gives better velocity. But in this case, and in my experience almost any 'Cocker with a more-or-less stock configuration poppet valve, a smaller-bore bolt is usually worth a nice boost in speed, with no other changes necessary.
To be continued....
Doc.Doc's Machine & Airsmith Services: Creating the Strange and Wonderful since 1998!
The Whiteboard: Daily, occasionally paintball-related webcomic mayhem!
Paintball in the Movies!Comment
-
That bolt is very interesting would love a couple of 2k lengths to try. -
I've heard from a couple of people, including Bud himself years ago, that they've found out the same thing, but that nobody will buy the bolt. They were stock on 'Cockers for years- and players would rip them out, throw them away, and replace them with the most cavernous bolt they can find. I did the same thing with the Fastbacks years ago, and can't count how many times I saw guys online showing how they swapped out that "restrictive" original for one out of an Impulse or Bushmaster or something.
Everyone thinks it's all about "airflow", and the bigger the bolt, the more air it can flow. Ev-Er-Y-One. Bud eventually gave in and put a big bolt in 'Cockers- and the players still replace them, with even bigger ones.
Doc.
-
-
The other little thing on this build was I had no dovetail rail to mount the customer-supplied ASA. I dug through my stashes and found a small drop-forward that worked, but it wasn't compatible with my tank:
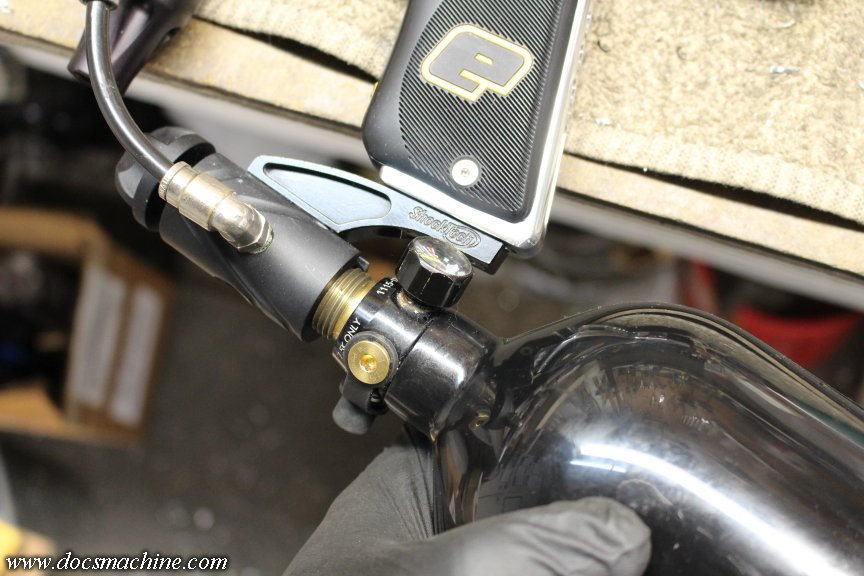
Both the gauge and the fill nipple hit the drop, and I had no other suitable rail- at least, not that wasn't already earmarked for another build. The customer told me he had a longer regulator on his tank, which probably would have fit, but I figured what the heck, it's not like I haven't made drops and rails before, and I thought it'd make for a cool little write-up, making a comparatively simple part.
So, I took the old ShockTech drop and found a suitable scrap of 3/4" 'lunimum plate from the leftovers bins...
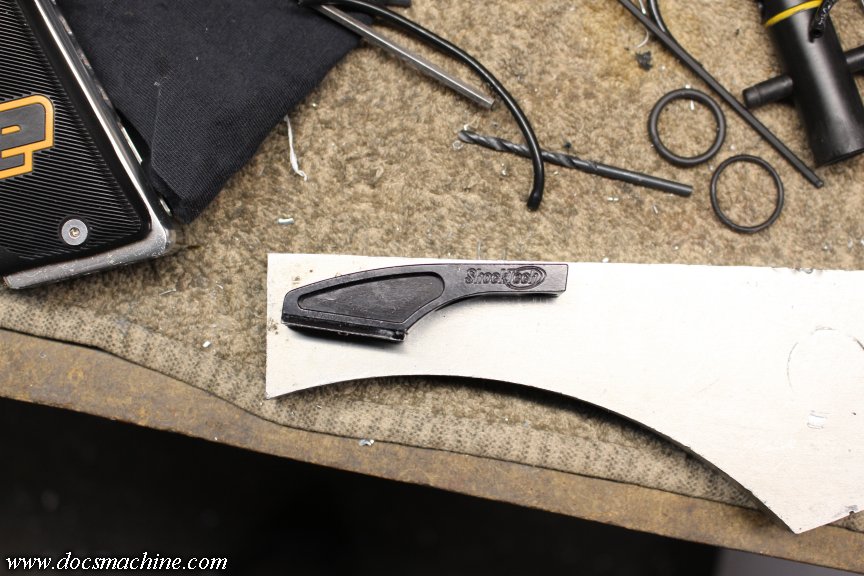
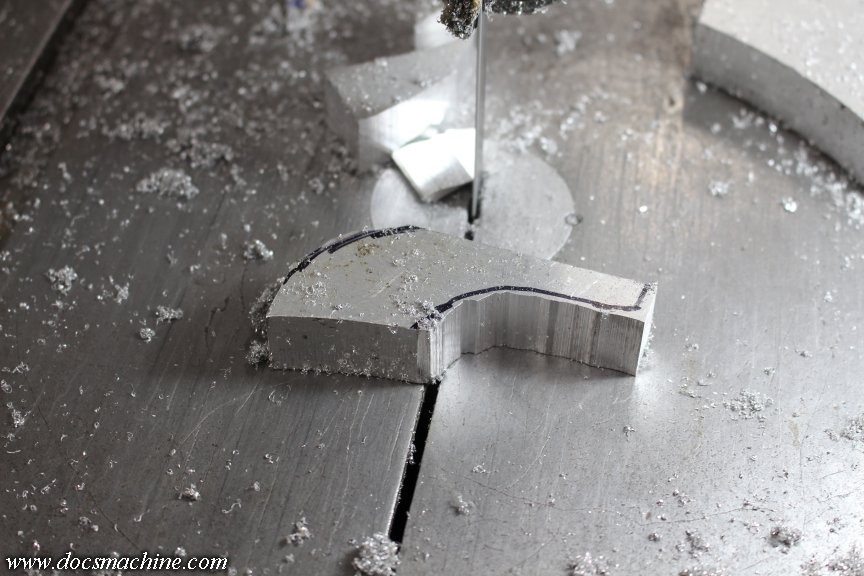
Rough-sketched the shape in Sharpie, and even rougher bandsawed it more or less to shape.
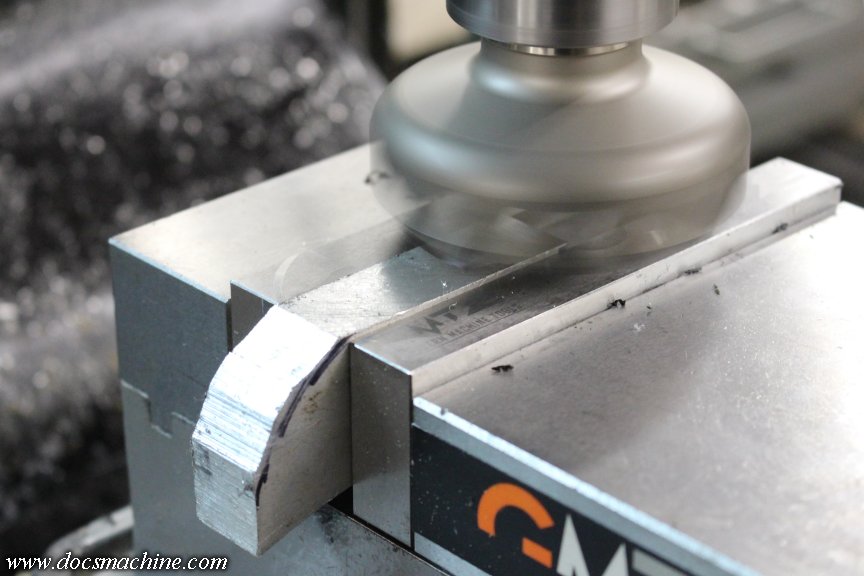
Milled a few of the reference surfaces flat....
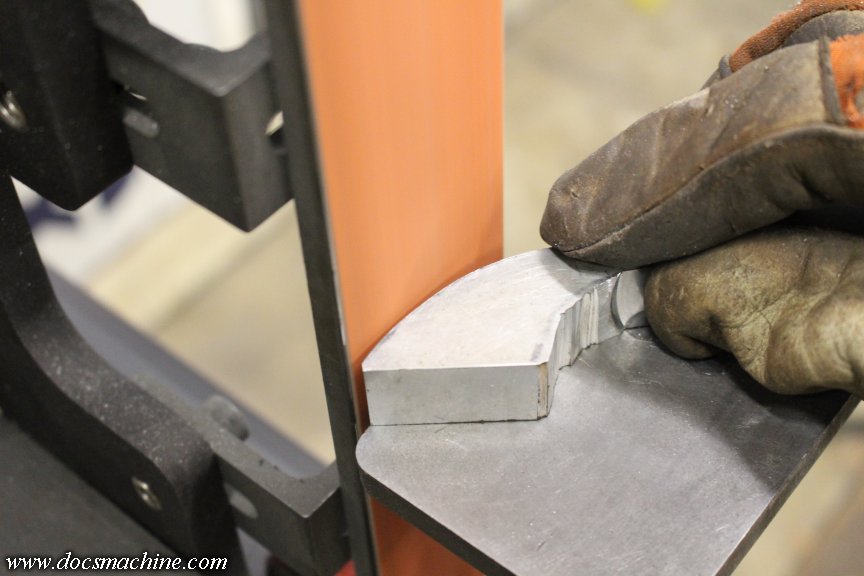
And got out the belt grinder to do some shaping.
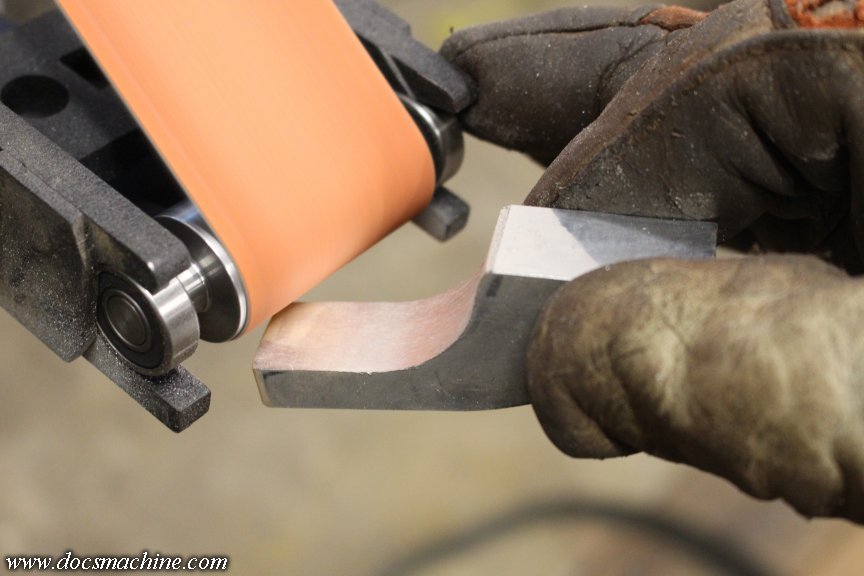
Deburred all the sharp edges....
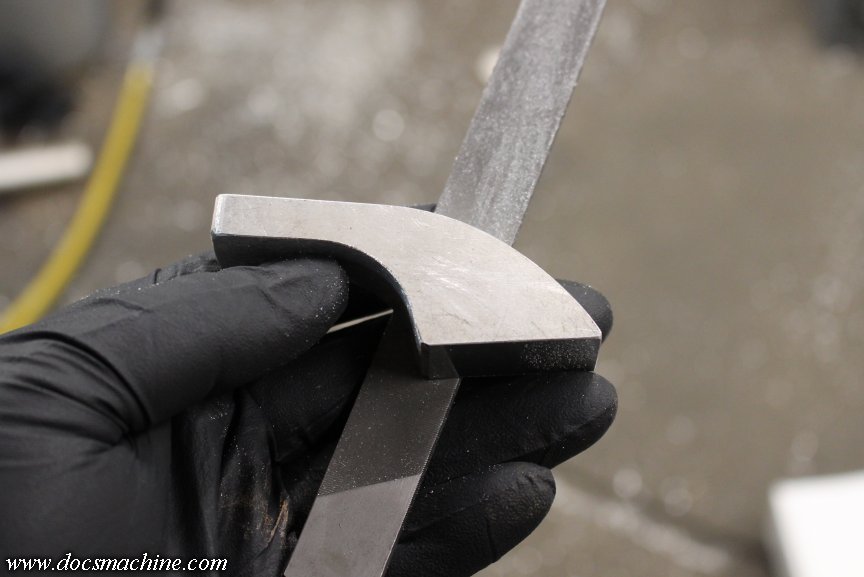
Poked a couple of countersunk mounting holes...
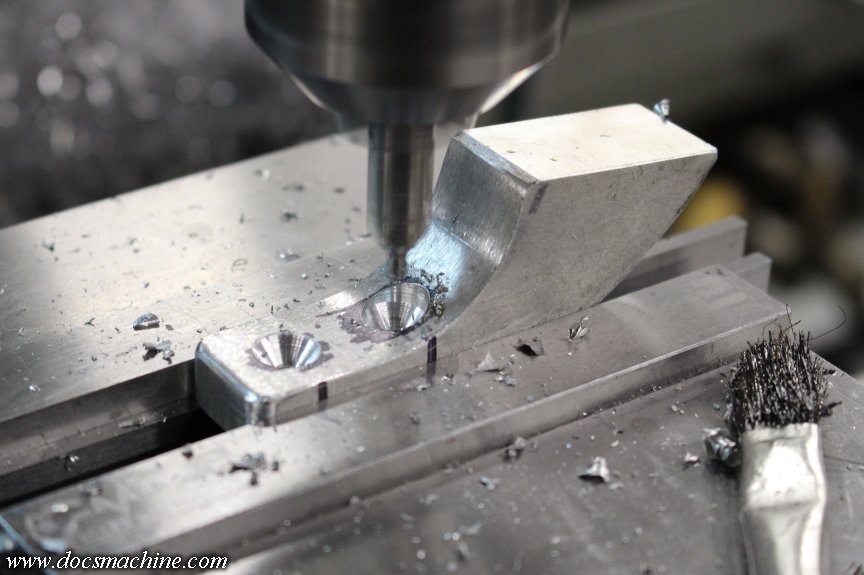
And milled the dovetail to fit.
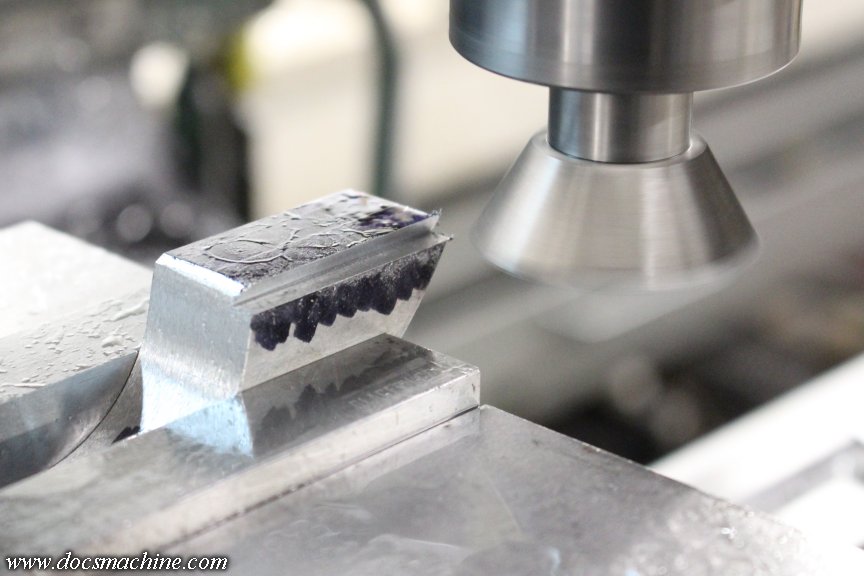
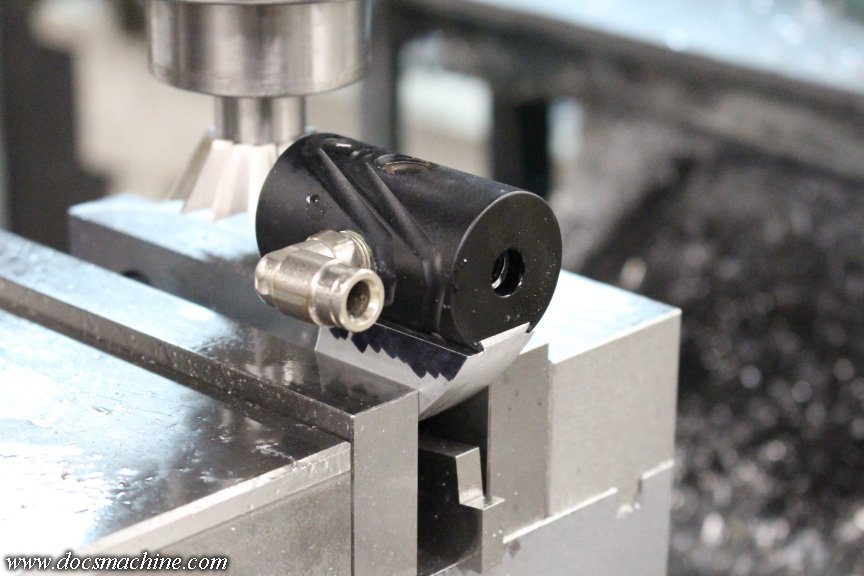
Then drilled and tapped a couple of thru-holes...
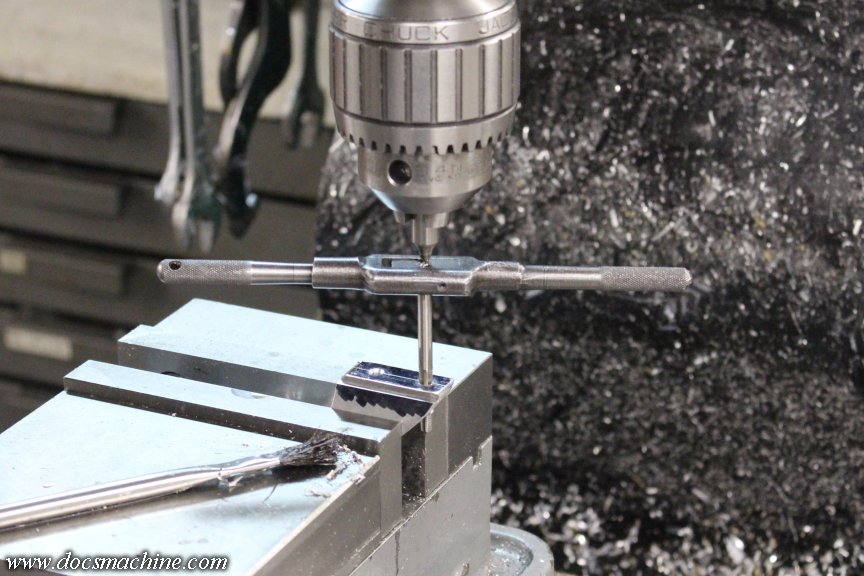
And counterbored those for a pair of capscrews.
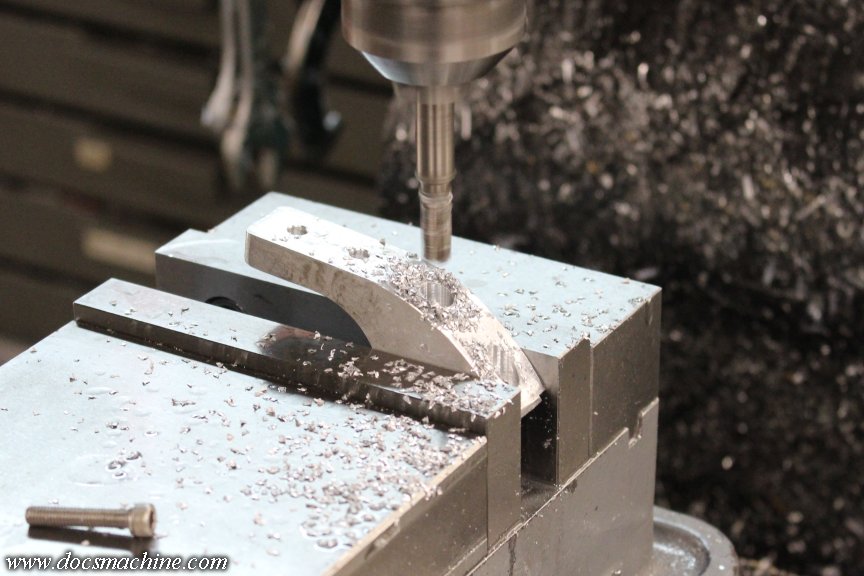
Et Voilá.
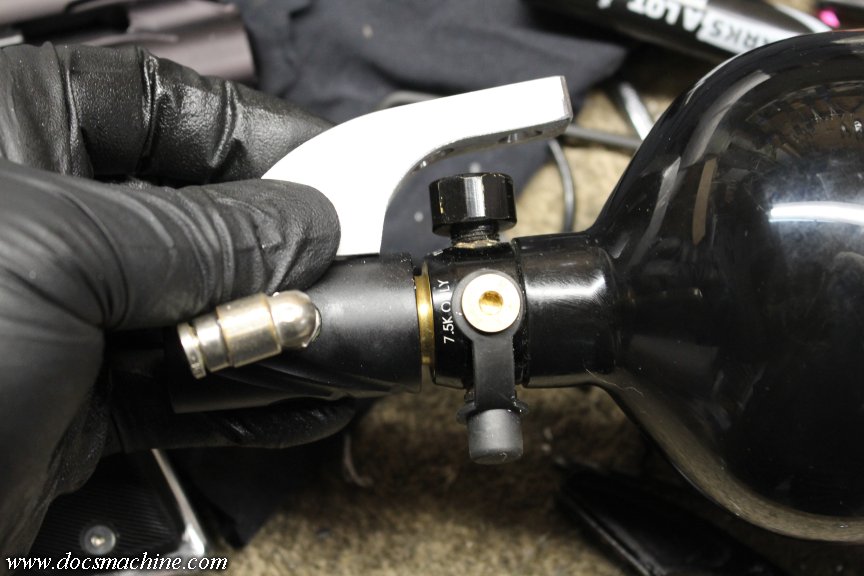
Roughly the same length, a better fitting dovetail, screws less likely to strip out, and clearance for any tank/reg the client might wish to use.
And, assembled, leak-tested, function-tested and should be home by now.
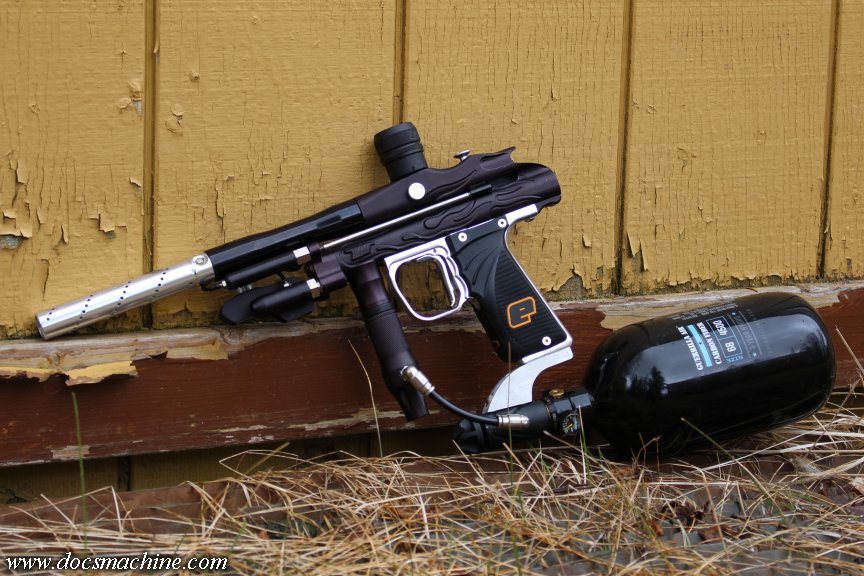
A pretty simple overall job, but I thought you might like a look.
Doc.Doc's Machine & Airsmith Services: Creating the Strange and Wonderful since 1998!
The Whiteboard: Daily, occasionally paintball-related webcomic mayhem!
Paintball in the Movies!Comment
-
Man, time flies even when you're not having any fun at all.
Sorry I haven't had much by way of updates lately- it's not that I haven't been doing anything, it's just that what I've been doing isn't all that photo-worthy. You lot have seen my lathes and turning centers before.
That said, I scrounged through my camera cards and found a few things. A couple of weeks back, I finally finished up a contract run...
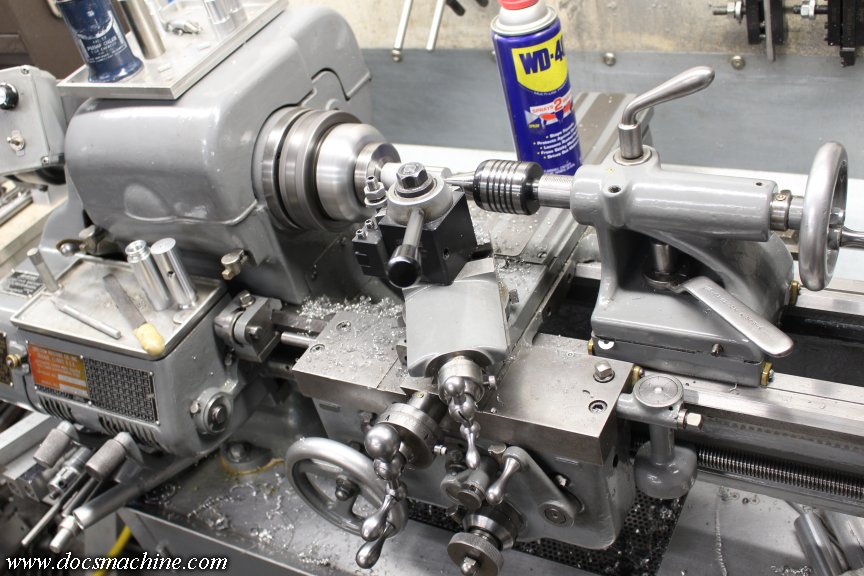
... Of a part some of you may recognize and will hopefully shortly be up for sale.
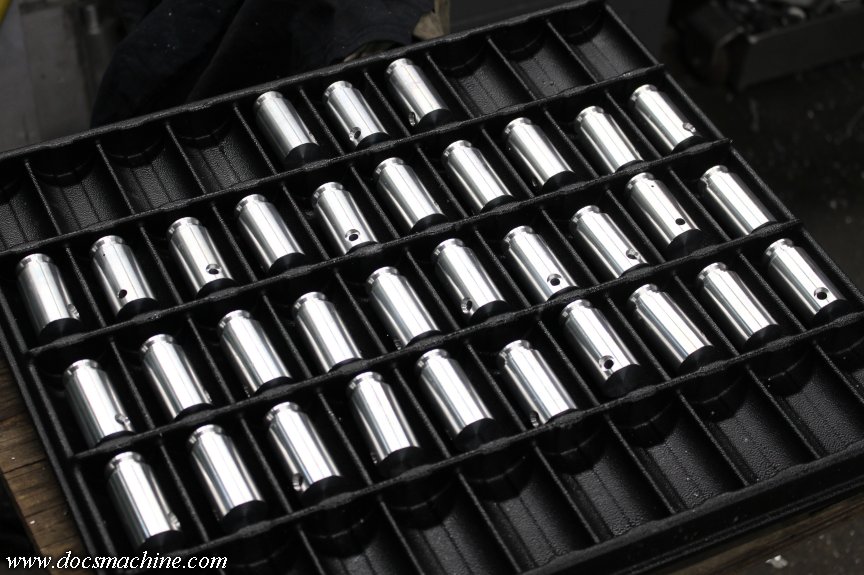
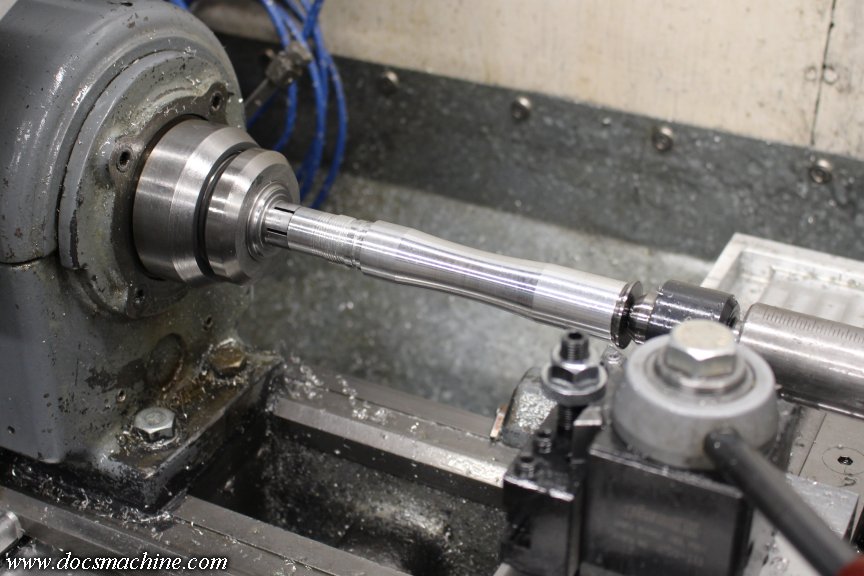
Most everything else was more turning...
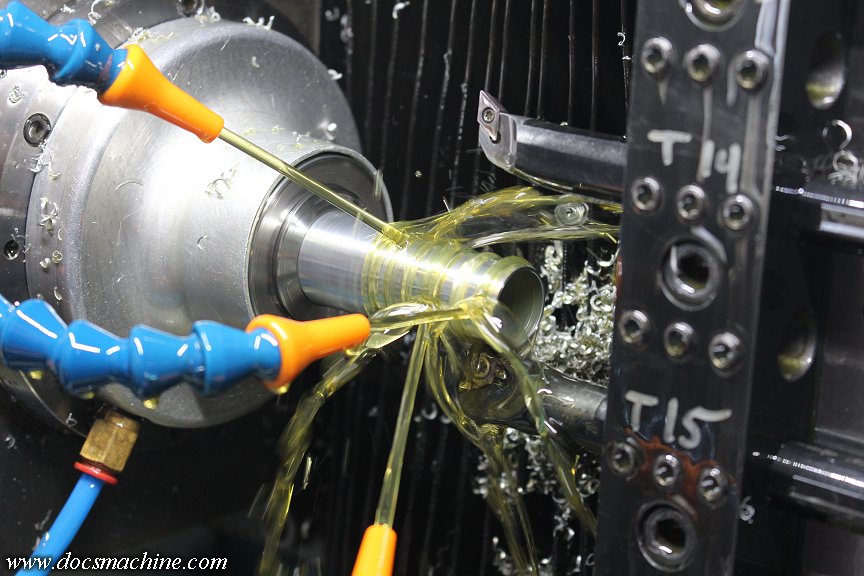
Yet more turning...
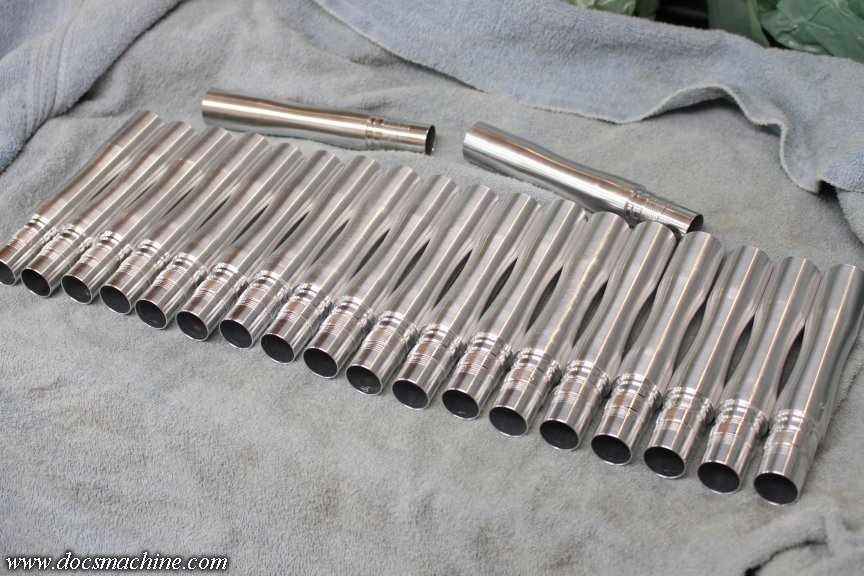
And then scrubbing and boxing, ready to ship off to the anodizer.
One fun bit was I made a special collet, to give a part a little more support. I started with a well-used extended-nose machinable collet, one out of a big batch I got off eBay a while back...
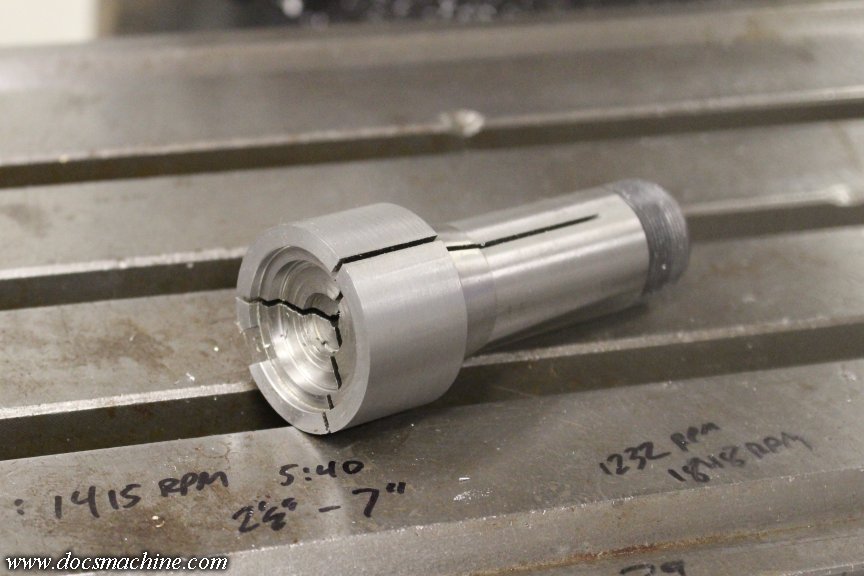
And set that up on the Sheldon lathe. These collets for some reason weren't machined for the usual spacer pins that let you tighten the collet into the taper, but not collapse it closed. I made do with three stainless washers from the bins (as they were thinner than the regular steel ones.)
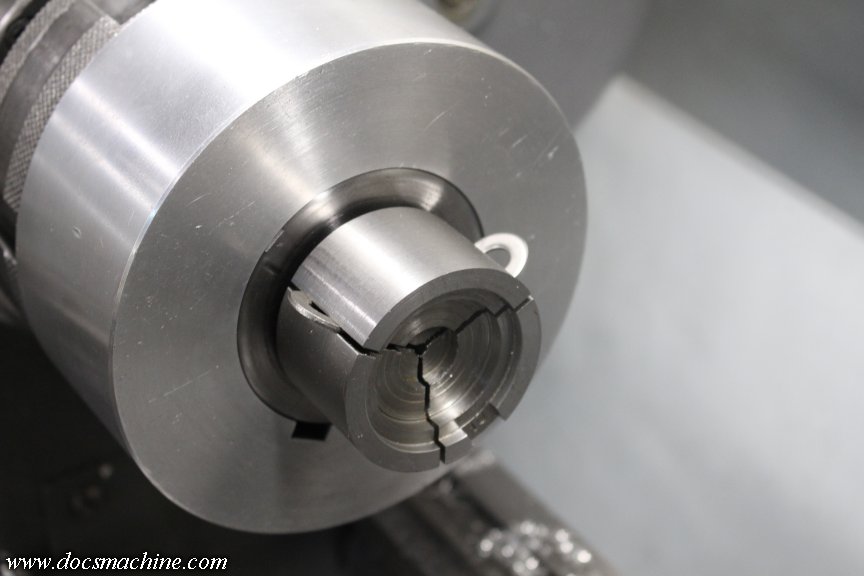
That got drilled out...
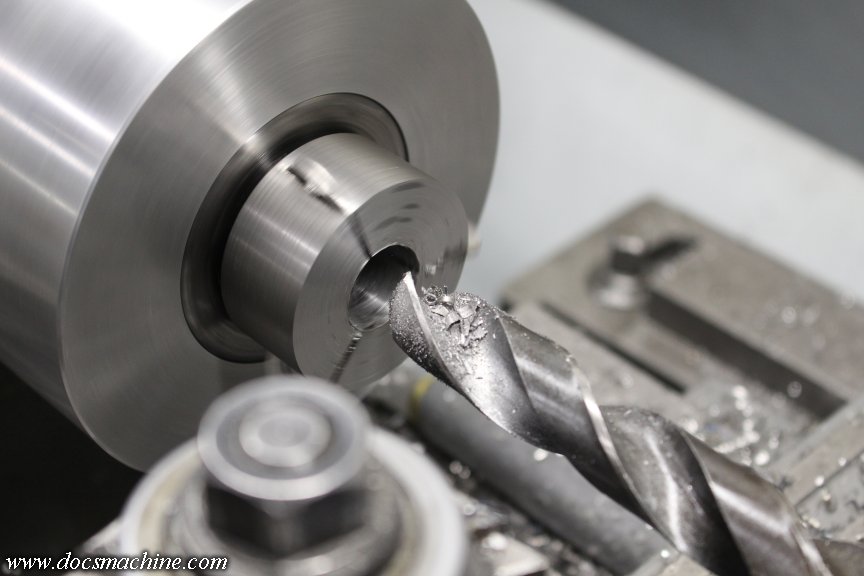
Bored precisely to size (1.004")...
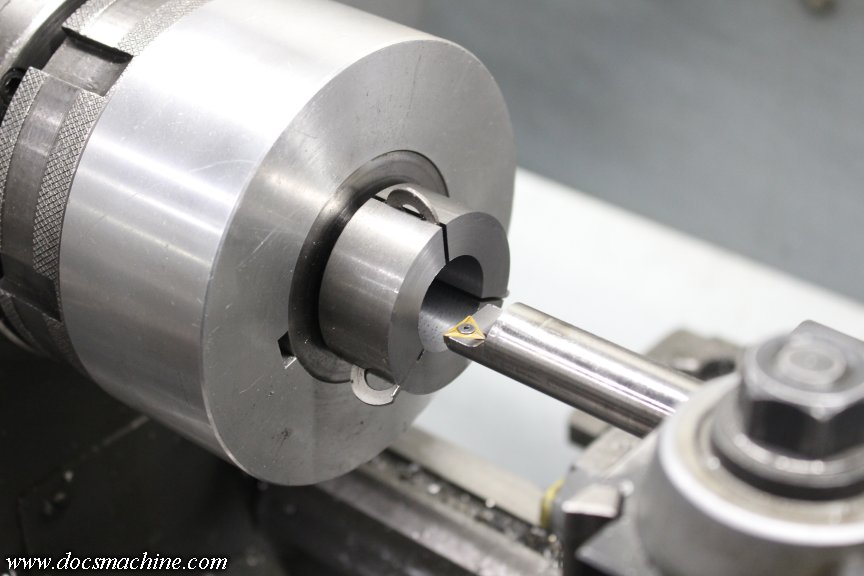
And checked for fit. Damn near perfect, if I do say so myself.
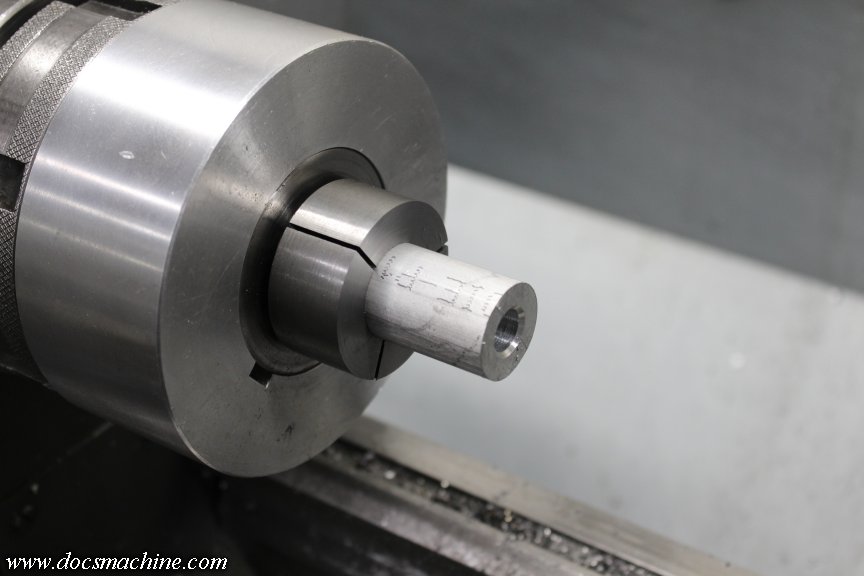
For a little panache, I kicked the compound over 'bout thar, and trimmed off a bit of superfluous metal.
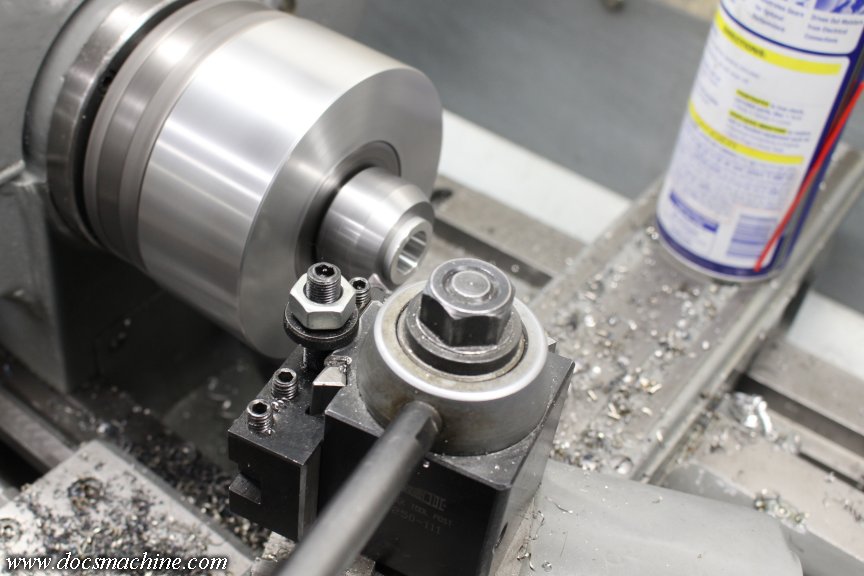
Like so.
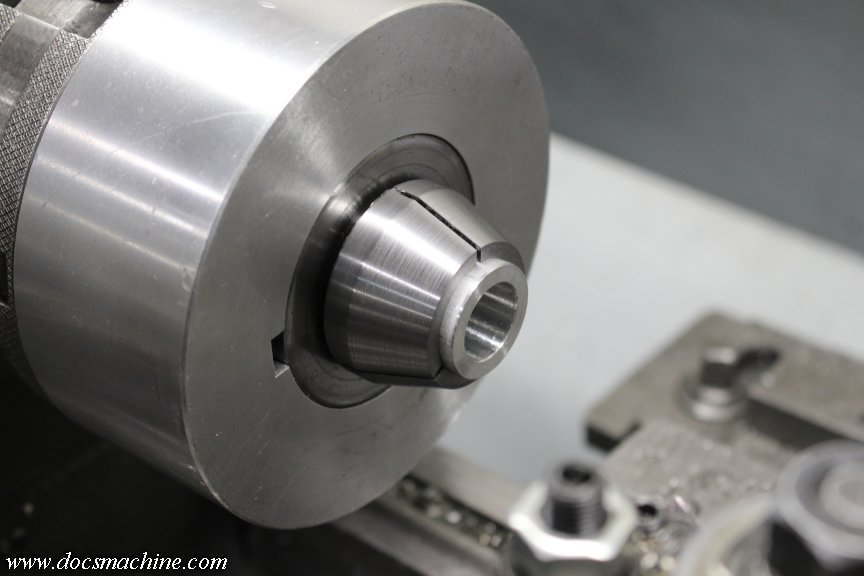
Why? The collet protrudes almost an inch more from the spindle face than a standard 5C, and so helps support a longer part that sticks out a little more than others. Besides helping support the part itself, a happy extra is that the part moves away from the spindle, giving a little extra room, in some cases, for certain odd tool setups on the gang-tooled CNC.
I've only had that happen once so far, but this collet would have helped with that, too.
And so, cleaned up, deburred and buffed a little...
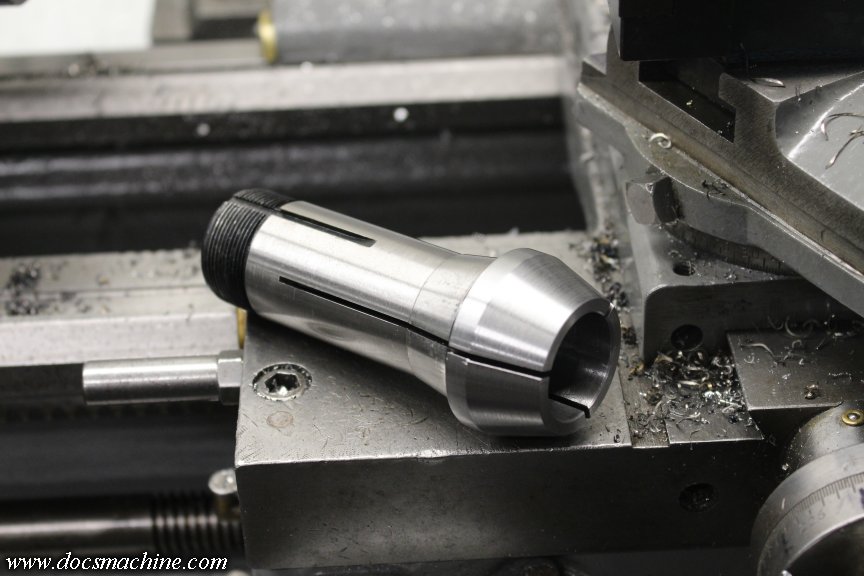
And installed.
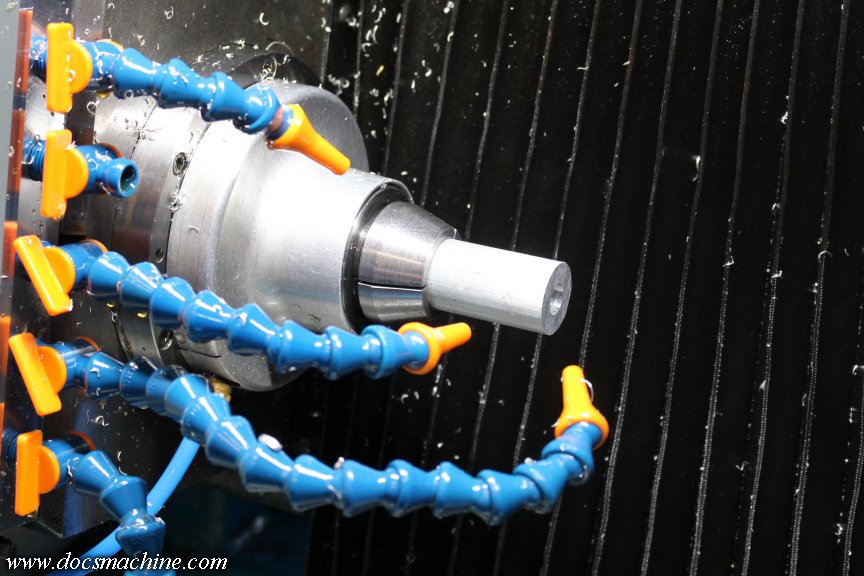
I only had time after that to just start on programming the part, and I still need to make another tool (or more accurately, finish one I started more than a year ago. ) but hopefully in the next couple of days I can get this basket of parts...
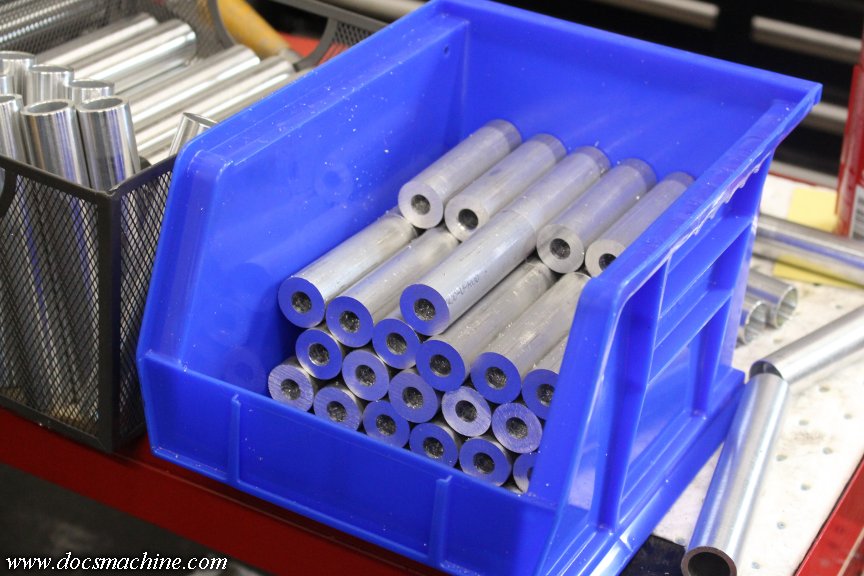
...Run, finished and boxed up, and get all of it off to the anodizers.
Lots in the works this week. Probably not much worth showing off, but it's all still progress.
Doc.Doc's Machine & Airsmith Services: Creating the Strange and Wonderful since 1998!
The Whiteboard: Daily, occasionally paintball-related webcomic mayhem!
Paintball in the Movies!Comment
-
Guess what just came in today, all the way from China!
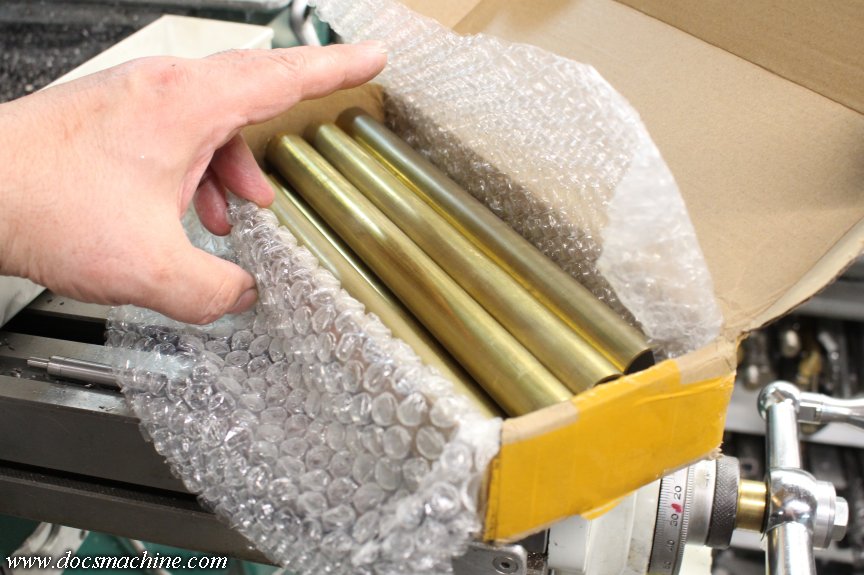
You do not want to know how much it cost...
Doc.Doc's Machine & Airsmith Services: Creating the Strange and Wonderful since 1998!
The Whiteboard: Daily, occasionally paintball-related webcomic mayhem!
Paintball in the Movies!Comment
-
It's strange that, no matter how many tools you have, you still never seem to have the right ones.
For this project I'd already modified a collet, and when it came time to run the part, I needed to be able to chamfer an inner passage. The tool block didn't already have a cutter that could do the job, and I didn't want to have to set up and prove a whole new toolset.
What I did have was a 60-degree diamond (shape) profiling cutter...
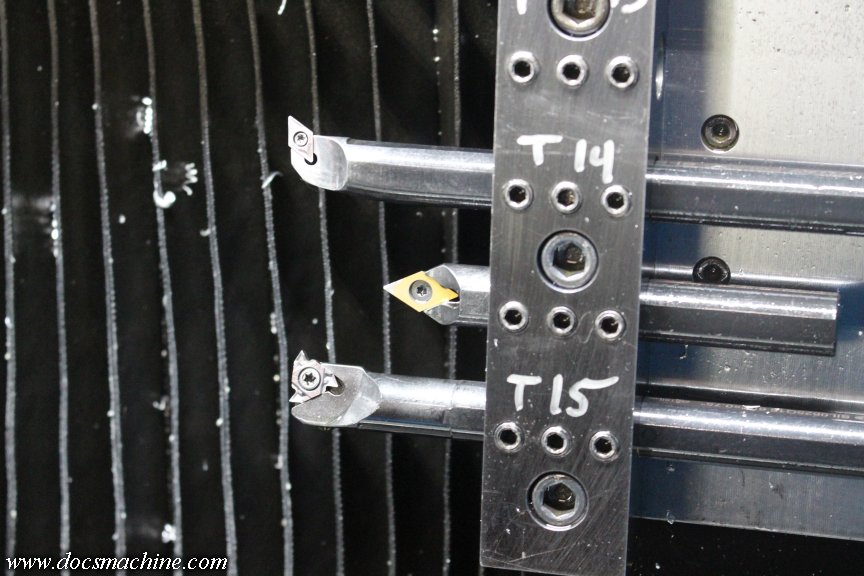
But it's too "thick". It's not meant to fit into small-diameter holes, and so the back of the toolholder hits and 'smears' the metal.
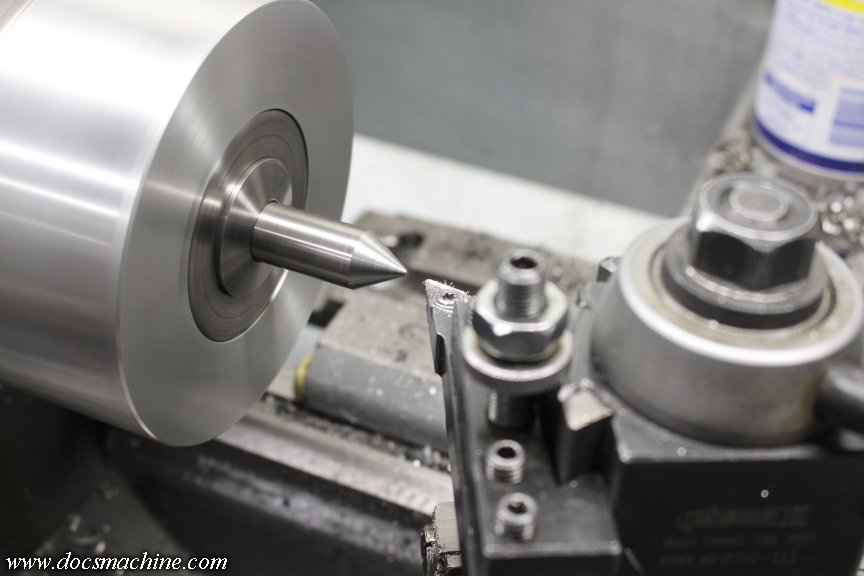
I'd started making a tool for exactly this a while ago, but I'd made it from undersized material. I either needed to whip up an adapter bushing, or just remake the tool. The latter was only moderately easier, so I sawed off a chunk of 5/8" O-1 (oil-hardening) tool steel, and turned a 60 degree point on it.
Set up in the mill, I cut a flat along the top...
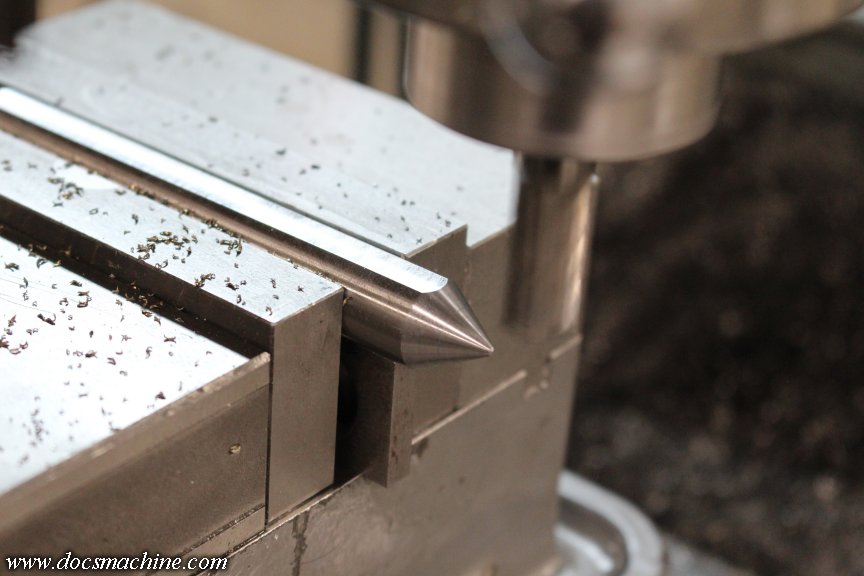
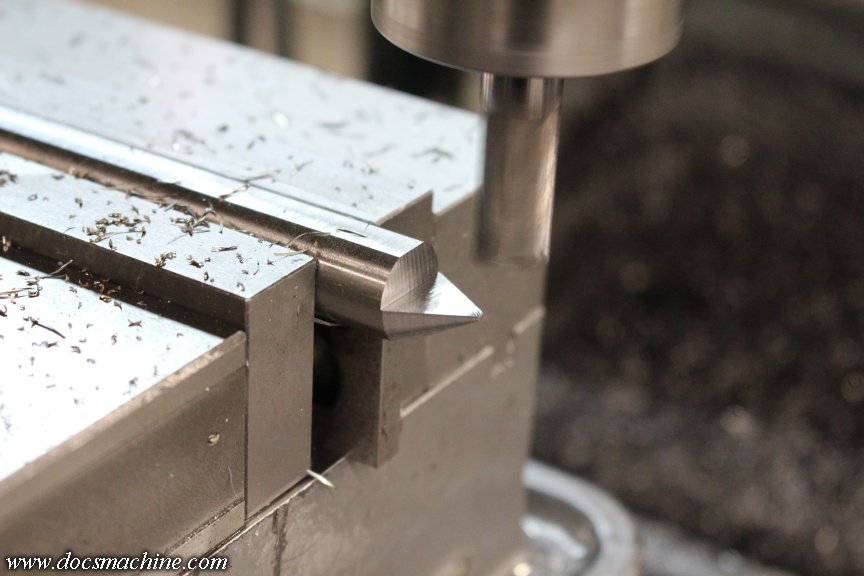
And then milled half the point off.
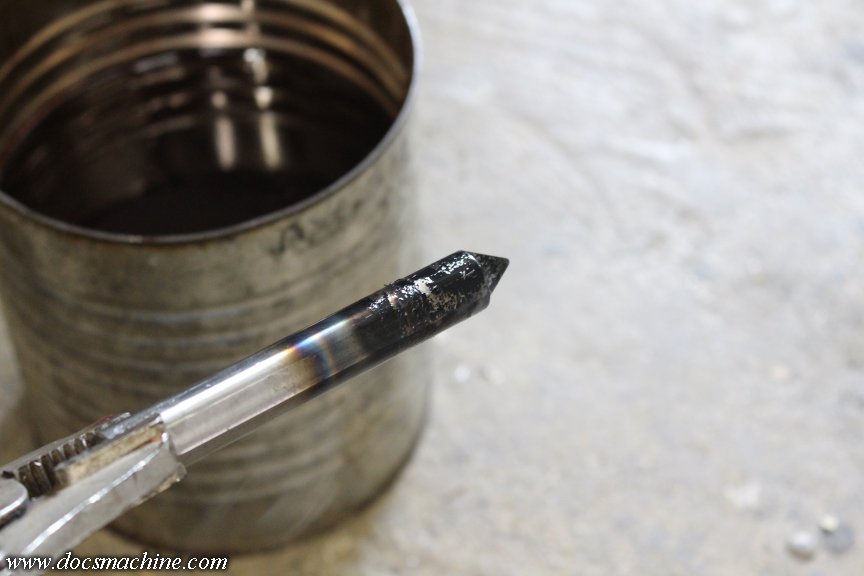
After that, I got out the seldom-used gas-axe, and by lucky chance (and a little laziness ) I had a can of some of the old tranny fluid left lying about. I heated the cutter to cherry red and quenched 'er in the oil- no pics, hard to juggle a lit torch, a bar of red-hot steel and a camera without either melting my face off or, y'know, burning the shop down.
Now, as anyone who has heat-treated O-1 will tell you, it tends to "grow" slightly in the process- in my case, the treated end grew almost exactly .001", and since it was already a snug fit into the tool holder, I had to turn that thou back off, very carefully.
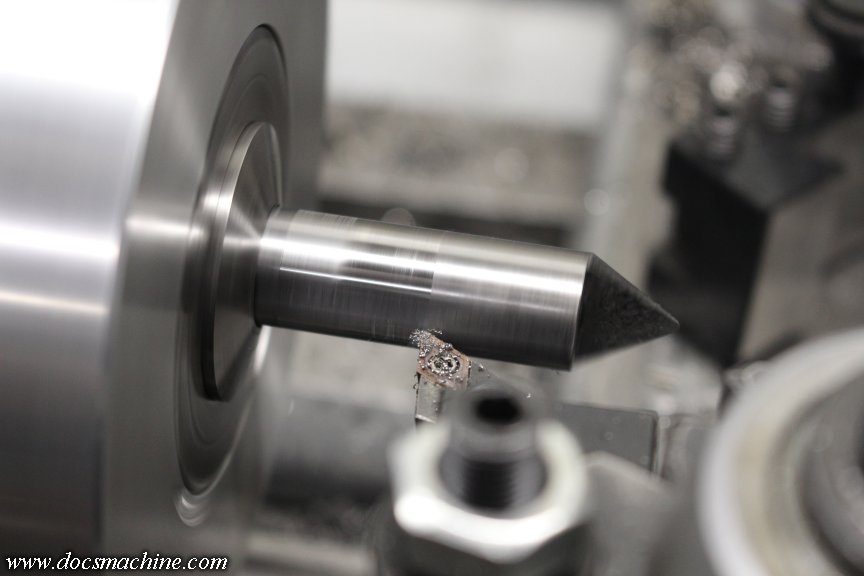
In that pic, the cutter is moving away from the chuck- the thin darker band at the far left is the starting point. The lighter colored dull band is untreated steel, and the shiny band is the heat-treated portion.
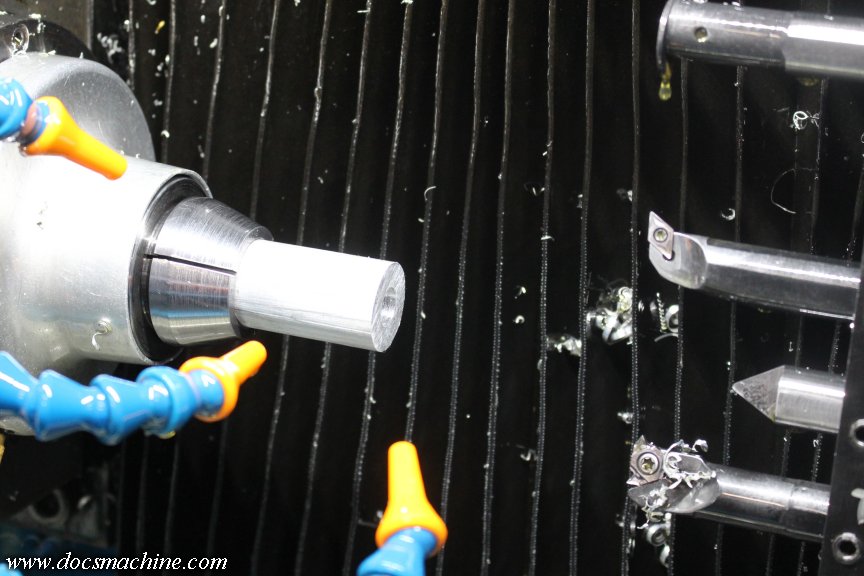
With a little strategic sanding and polishing here and there, it fit nice and snugly. Took a little trial-and-error to get it adjusted, but she works.
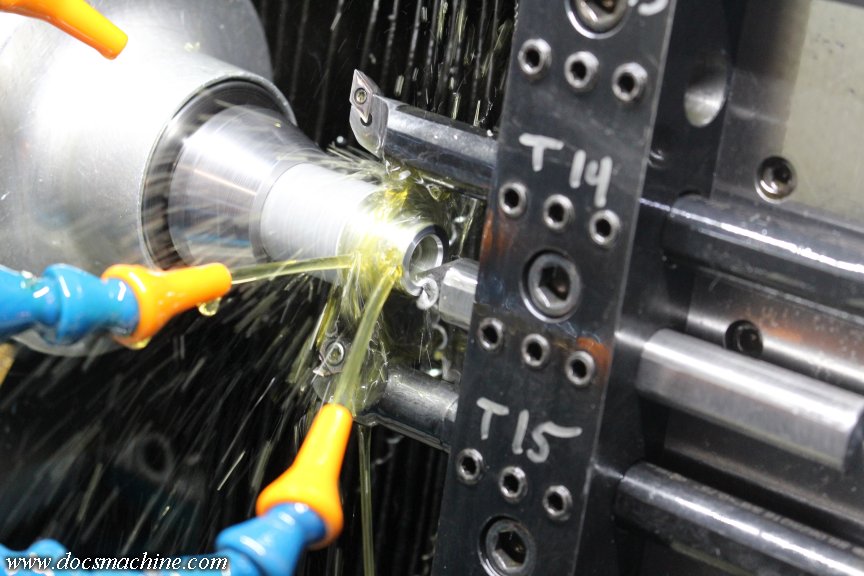
Interesting tidbit there: That tool is a one-off, basically meant just for this one part. Therefore I didn't bother assigning a tool number to it. I'd used the threading tool directly below it ("T15") to very lightly chamfer the outer corners, so I simply sent it down and to the left 'til the new tool went where I wanted it.
And she worked perfectly- which is more than I can say for the camera.
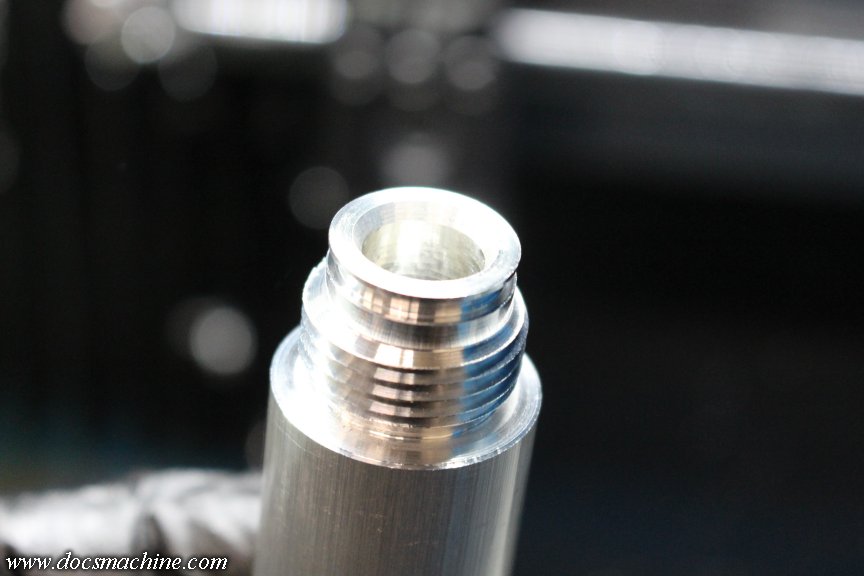
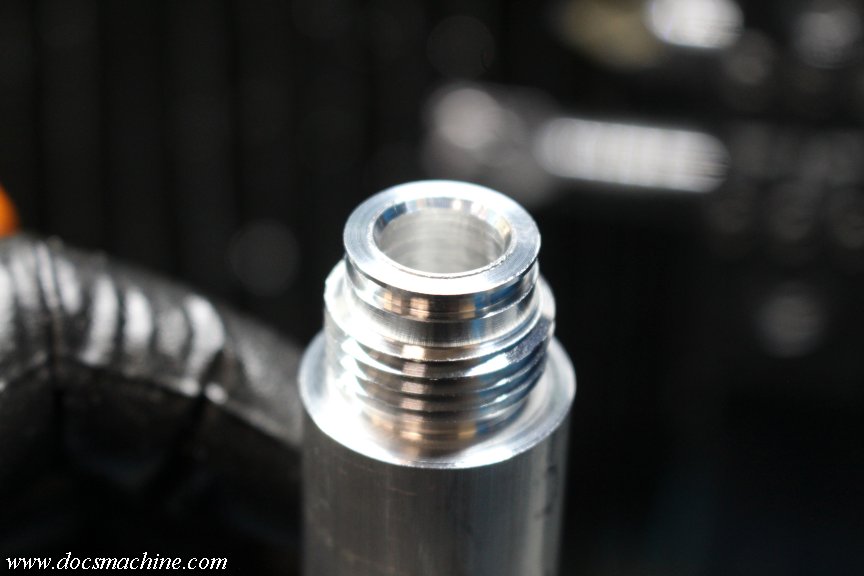
Hard to tell with the overexposure, but that burred, rolled corner from the original tool is gone, with a smooth, proper chamfer in it's place.
After that, I just had to chew my way through the rest of the parts.
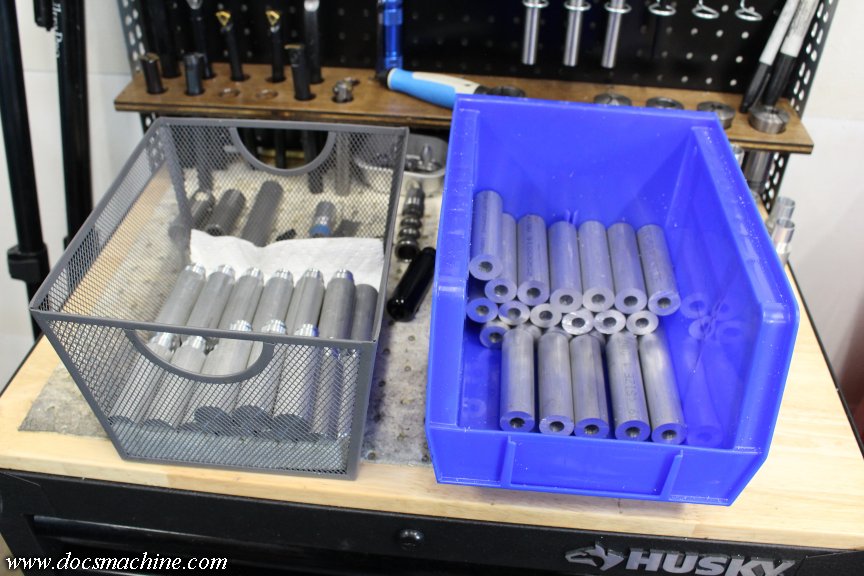
Still a few steps left, but with luck, I hope to have these off to the anodizers by Saturday or Monday.
Doc.Doc's Machine & Airsmith Services: Creating the Strange and Wonderful since 1998!
The Whiteboard: Daily, occasionally paintball-related webcomic mayhem!
Paintball in the Movies!Comment
-
Looks like it'll be Monday.
Whipped up a fresh program to round off the distal end...
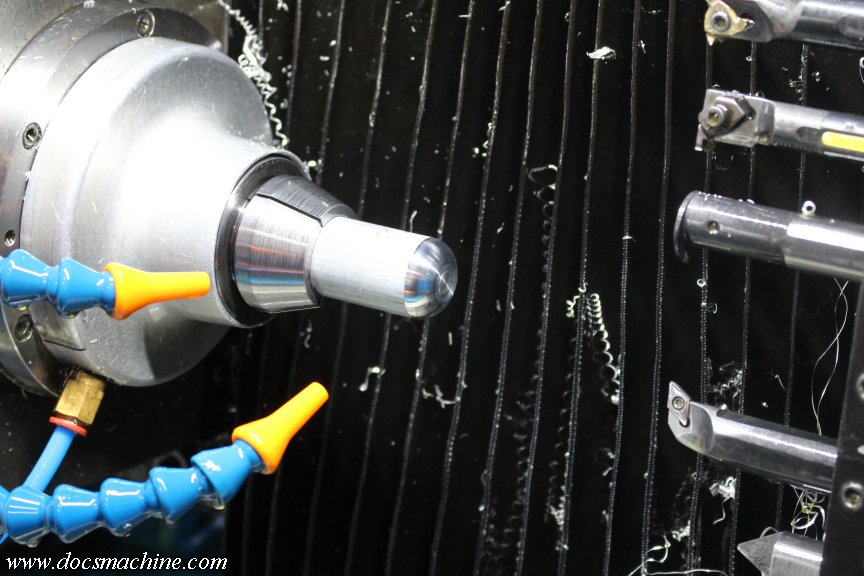
And ran the whole lot through. Nice little run, less than one minute cycle time, everything ran smoothly.
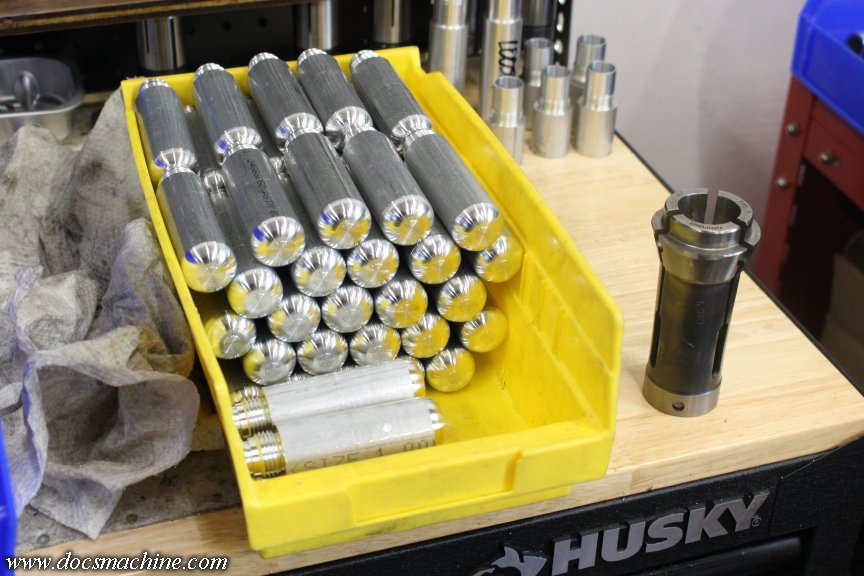
After that... allow me to pontificate a bit. The last time I ran this part, I did the drilling on the CNC, but threaded the end (female 1/8" NPT) on the turret lathe. That was because the Omniturn can't rigid tap, and I didn't, and still don't, have a floating tap holder big enough to hold an eighth-pipe tap- and, you know, actually fit in the machine. The two I have for the big turret are the size of a soda can and weigh about three pounds each.
In this case, I've been switching over to pre-set tool sets, to make programming easier, and enabling re-running previous parts just by switching to that program. (That is, without having to re-install, re-zero and re-prove a new tool set each time.) And, of course, I don't have one set up for drilling yet- point in fact, I'm not 100% sure how I'm even going to do that yet.
But, I do still have the two turret lathes, and those are easy enough to set up, especially just for drilling, and both were designed to run things like releasing tap holders.
I'd planned to use the big Warner & Swasey, since it has the functional flood oil, but I ran into a problem. The bar stock I'd used for this run was slightly on the large size- 1.003" to 1.004", which this stuff is usually .998" to 1.000". That doesn't sound like much- and it's not, generally speaking- but in the case of the big turret, the collets it uses and the collet mechanism have very little tolerance, and no real adjustability. I can get it to lock on this material, but I have to really lean on the mechanism- using a lot more force than I'd like.
With the 5C- far more common- I have something like five different 1" collets, ranging from about .999" to around 1.005", due to variations in manufacturer tolerances- and, since I got most of them used, possibly a touch of wear. And, the 5C system has an inherent adjustment built in- you can run it a touch loose for larger material, and a touch tight for smaller- although we're talking a few thousandths of an inch.
So, I instead opted for the smaller Rivett turret- which hasn't gotten enough use this year so far anyway. I still had to use one of the big tap holders- that big black thing pointing away from the camera, on the turret.
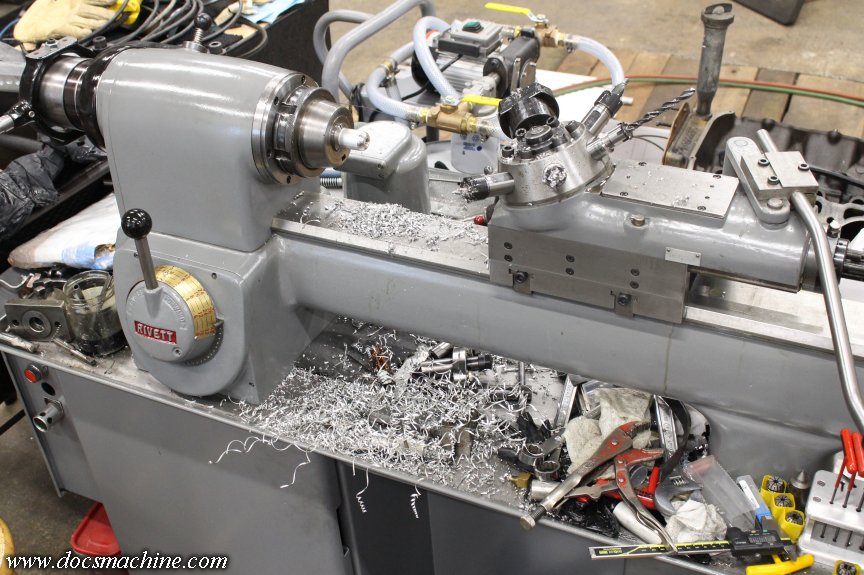
But, this is the kind of process this sort of lathe was designed for, and I still find it kind of fun to run these old analog machines.
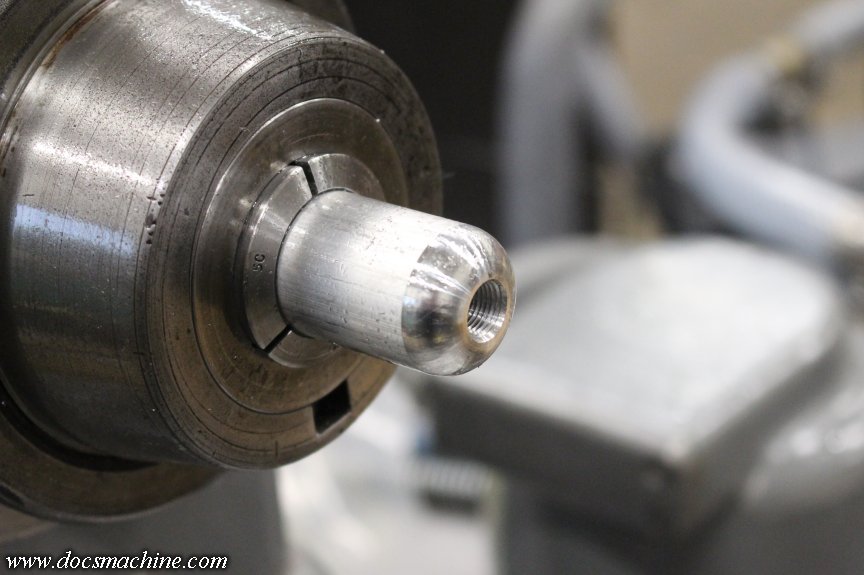
Would have been faster if I had the flood oil set up on this machine, but I've been reluctant to do so since the layout and position in the shop, doesn't lend itself well to containing the splash.
Anyway, griping aside, the whole lot is done, and just needs one more finishing step. I could easily be able to have these out the door Monday morning.
Doc.Doc's Machine & Airsmith Services: Creating the Strange and Wonderful since 1998!
The Whiteboard: Daily, occasionally paintball-related webcomic mayhem!
Paintball in the Movies!Comment
-
Today (Sunday) was comparatively easy. For this current run, all I needed to do was turn the OD of these parts down a few thou. So, as per long-established procedure, I chucked up a hunk of scrap in the Sheldon, turned a 60-degree point on it in place (ensuring concentricity) and proceeded to skim them down one at a time.
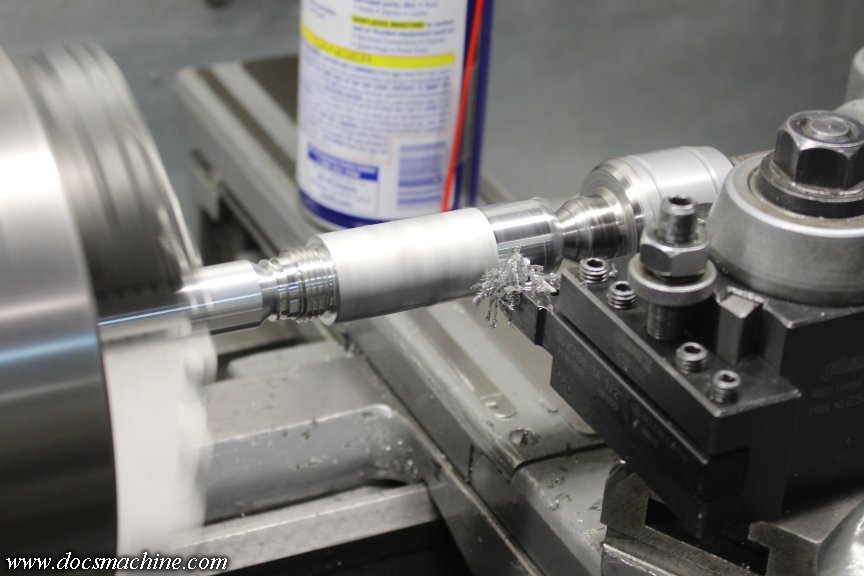
After a couple of hours, I had all of them run- except a couple I'm saving for something- and got them cleaned up, wrapped and boxed.
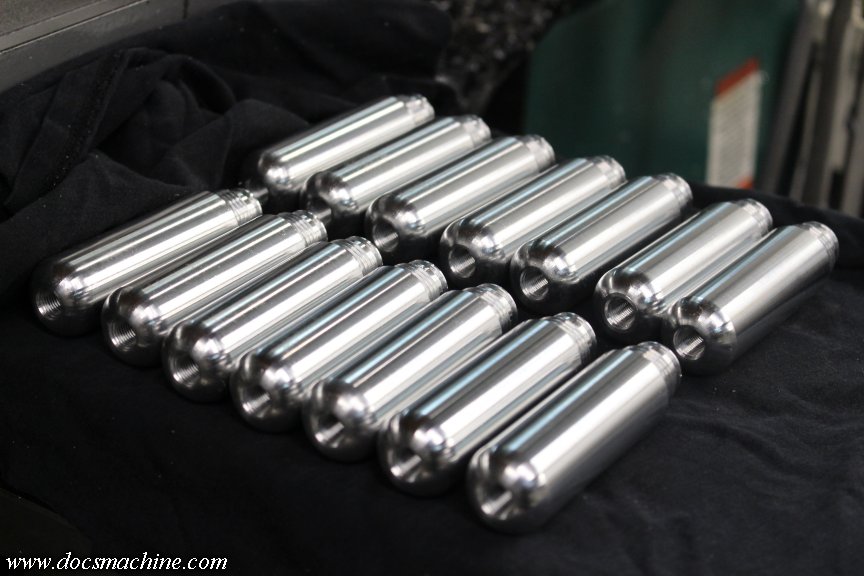
Said box, along with two other small batches of parts, should be on it's way in the morning, and it's time to move on to the next thing!
Doc.Doc's Machine & Airsmith Services: Creating the Strange and Wonderful since 1998!
The Whiteboard: Daily, occasionally paintball-related webcomic mayhem!
Paintball in the Movies!Comment
-
Doc's Machine & Airsmith Services: Creating the Strange and Wonderful since 1998!
The Whiteboard: Daily, occasionally paintball-related webcomic mayhem!
Paintball in the Movies!Comment
-
Doc's Machine & Airsmith Services: Creating the Strange and Wonderful since 1998!
The Whiteboard: Daily, occasionally paintball-related webcomic mayhem!
Paintball in the Movies!Comment
-
I spent a fair chunk of last week trying to get a handle on my inventory, which has outgrown the wire shelf racks I had it on, a year or more ago. That's not to say I have a ton of inventory- what I have would fit comfortably in a small hatchback. But due to busyness, neglect, laziness and a rather glaring lack of activity on the part of my secretaries, shop assistants and foremen, all of whom I have yet to hire- which is clearly not my fault- the shelves and bins have gotten rather disorganized of late.
Early last week I got tired of it- and, as it turns out, in part caused me to ship the wrong item to a customer- so I splurged what funding I could scrape together, on some shelving pieces from Homey-Dee.
I started by completely emptying the "random detritus" closet in what I laughingly call my "office":
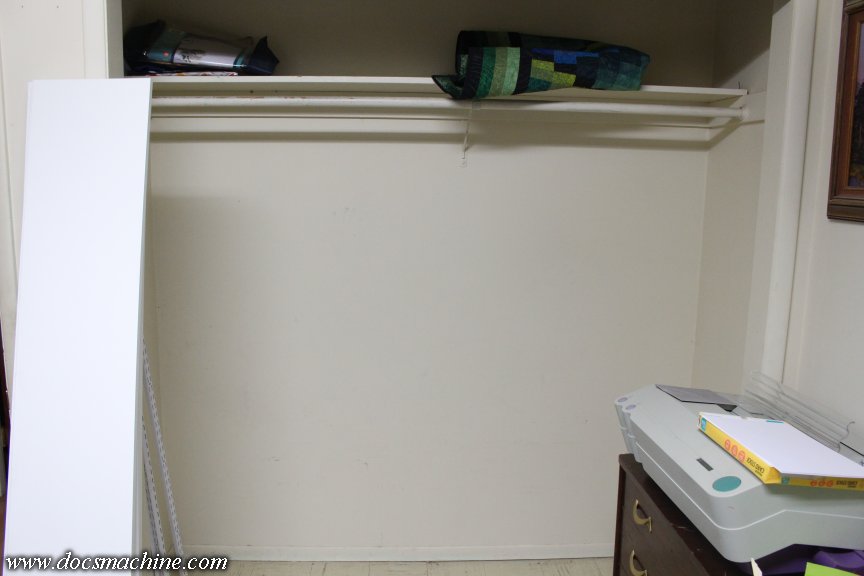
You don't want to know what all is piled- and in some cases oozing- behind the camera.
After that, it was simply a matter of finding the studs (after first testing the finder on myself- a ritual as mandatory as clicking the barbecue tongs twice before lighting the fire ) - and tack-welding the uprights in place.
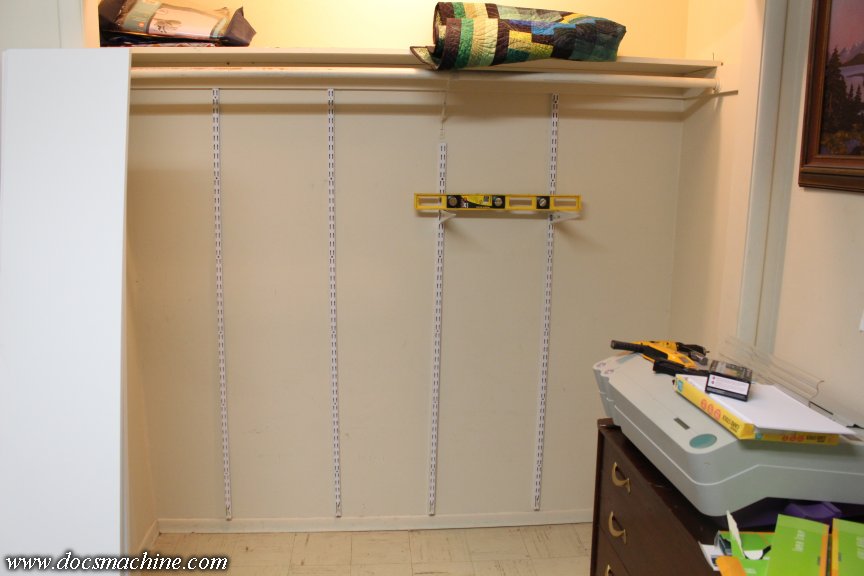
Then, throwing up some shelves, the entirety of my inventory, and my complete marker collection.
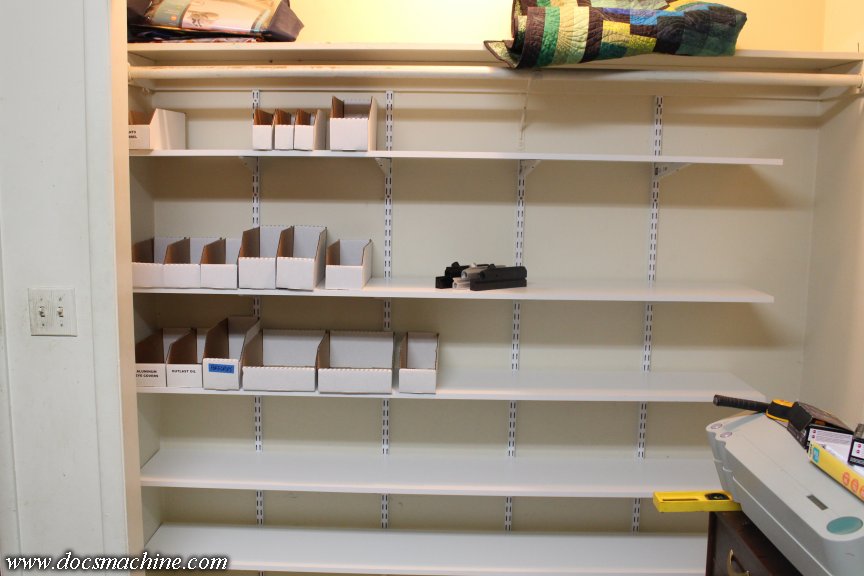
I then went to the beach for a well-earned tropical rum drink and to ogle the hula girls for a while.
... That's the last time I order Peyote Gummies from Alibaba.
Slightly more realistically, over the next several days, as time and werewithal permitted, I re-sorted boxes of inventory, added a few more shelves, picked up a few more bins, and generally updated my inventory records.
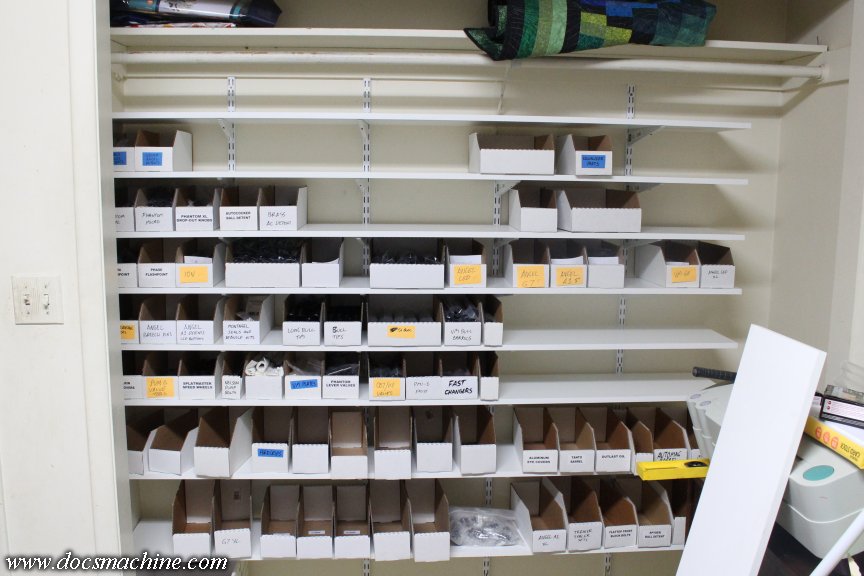
That's not all of it, but I ain't gonna blow any smoke up your skirt either- there's not a whole lot more. Note the labelled-but-empty boxes. That's stuff I'm out of, probably 2/3rds of which I really do need to make more of.
And speaking of, I haven't exactly been sitting on my duff in the meantime, either- one of this weekend's other projects was another run of 'Mag adapters...
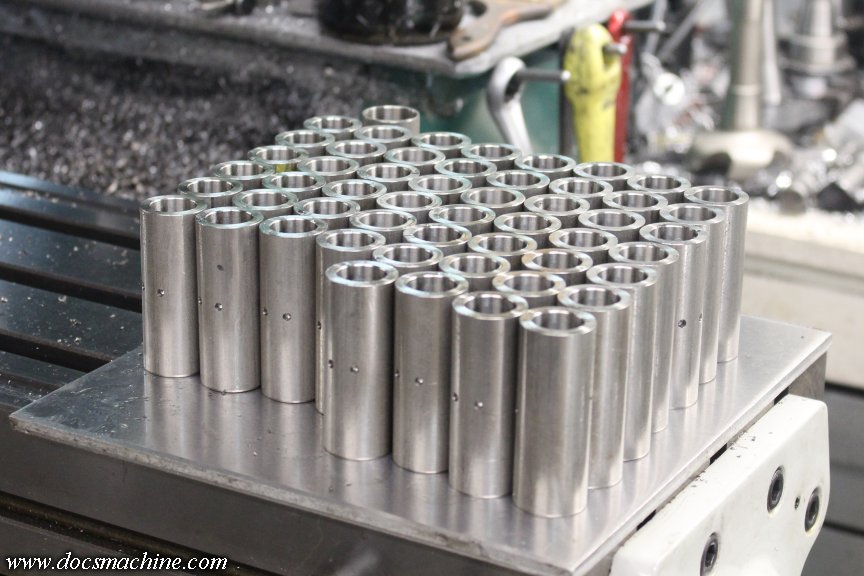
And I hope to get a nice big box of anno in this week, but no promises.
Doc.
Doc's Machine & Airsmith Services: Creating the Strange and Wonderful since 1998!
The Whiteboard: Daily, occasionally paintball-related webcomic mayhem!
Paintball in the Movies!Comment
Comment