This is a repost from MCB 2.0 for folks that wanted to know what RTing a Pro Carbine or Carbine entails... Enjoy!
Hello,
This post is for the Low Brow Show Down Contest. See Flier:
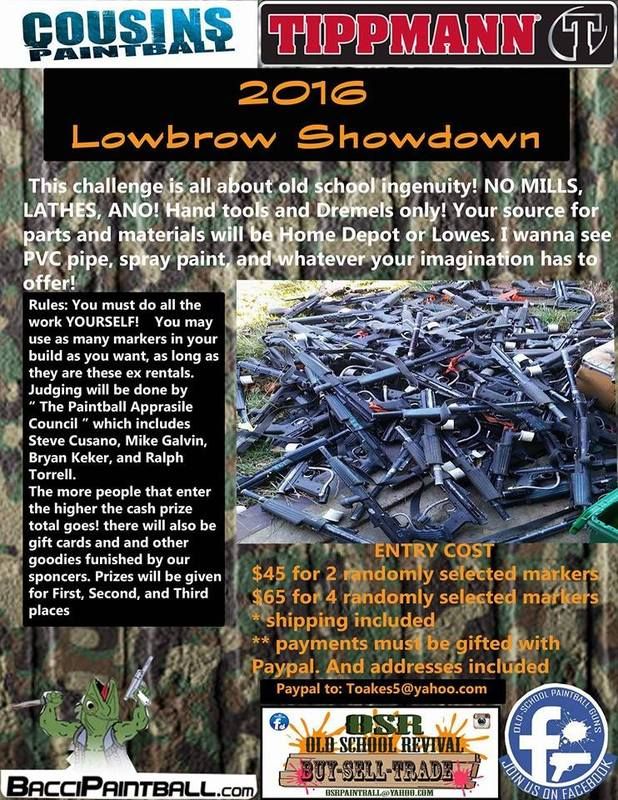
The jist of the contest is that everyone gets the same markers - either a Tippmann Prolite or Tippmann Procarbine. The Pro Carbines are of the 3rd and 4th generation of Carbines that are circa 2000-2002 judging by the serial numbers of the ones I have seen. These markers are old and retired rentals from a massive paintball field (Cousins Paintball). Supposedly, there were over 700 of these markers that were retired.
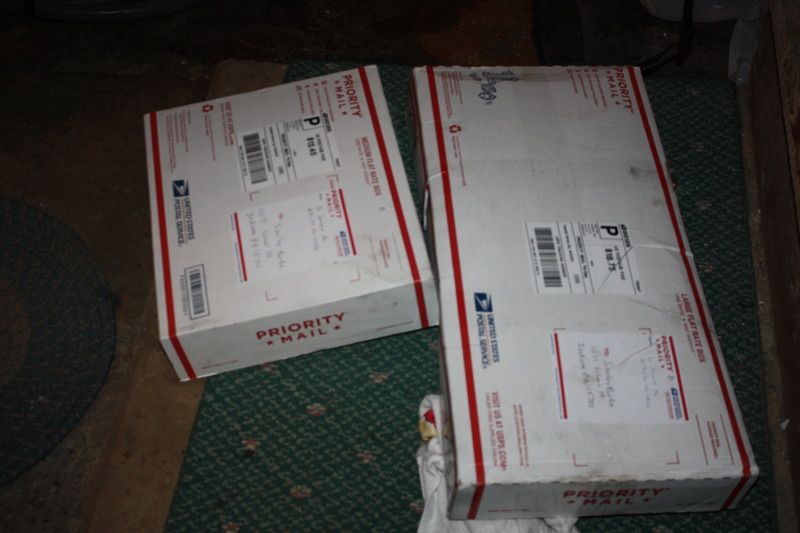
Parts for these Tippmanns are a bit hard to come by these days. Tippmann no longer carries most of the parts, except for what crosses over to other marker model platforms. This is why each contestant would get a minimum of two "randomly picked" Tippmann markers. Cannabalize one marker to make another work. I personally chose two packages of 4 randomly picked Tippmann markers at $65 each and this gave me two entry spots. The original plan was to take two markers from the bundle to enter as two entries and give the other six Tippmann rentals to students and novice airsmiths so they would have a marker and also coerce them into participating in the contest. Plus, tinkering is way more fun with other friends working on the same projects. I had no intention of cannibalizing parts from my markers and I wanted to make both of my markers work. The bonus was that I got to give away six markers to folks that needed gear.
The contest is called "The Low Brow Showdown". Emphasis on "low brow", meaning that each contestant was to assume the mentality of a semi non technical person who could not machine or 3D print new parts from scratch. And all the work has to be done by the individual contestant. Other stipulations are the following:
- No lathes;
- No Mills (CNC)
- Hardware store parts are acceptable;
- JB Weld and other epoxy's are welcomed
- Replacement parts are good;
- Parts and upgrades from other models of markers is acceptable;
- Welding is acceptable;
- Heli-coil is acceptable;
- Taps and die are acceptable;
- No Annodizing permitted;
- Paint and or polishing is permitted;
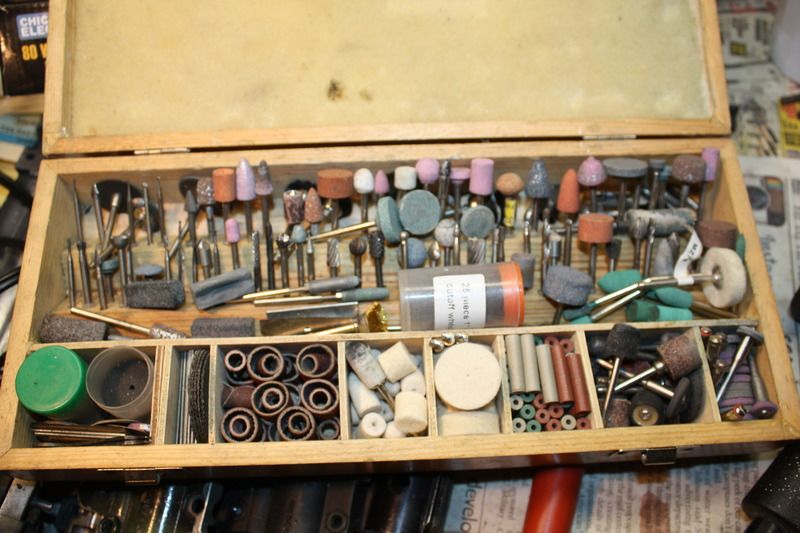
- Rotary Tools like Dremel or Harbor Freight specials are allowed;
- Power Tools are acceptable;
- Melting Plastic is totally cool.
- Hand tools are allowed.
To put it simply, the contestants had to assume that they were some poor schmuck or student who acquired cheap rental crap, and has to fix it up as cheaply as possible to be able to compete on today's paintball field against today's technology. Awesome, right?
So before going any further, some context should be shared. I, personally, have never owned a new marker. Could never afford it or justify the purchase. I've always had used gear, beat up gear, or rental rejects which I modify to make the monster stuff that I kick butt with on the field. I've gotten so good at it that I supply and arm a massive paintball crew called the Merry Band of Brothers and the student organized Indiana University of PA Paintball Club. I've also been in the sport since 1987, and airsmithing since 1995. So, for me, I wanted to do something that is one of two ends of a spectrum for someone who finds themselves in a real life situation of fixing up junk to survive. One end of the spectrum being to make a aesthetically pleasing custom Carbine with conventional upgrades available today in 2016; and the opposite end of that spectrum being something sinfully custom and most likely ugly. Think of my two entries as examples of Yin and Yang.
This is what was sent me - 8 markers:
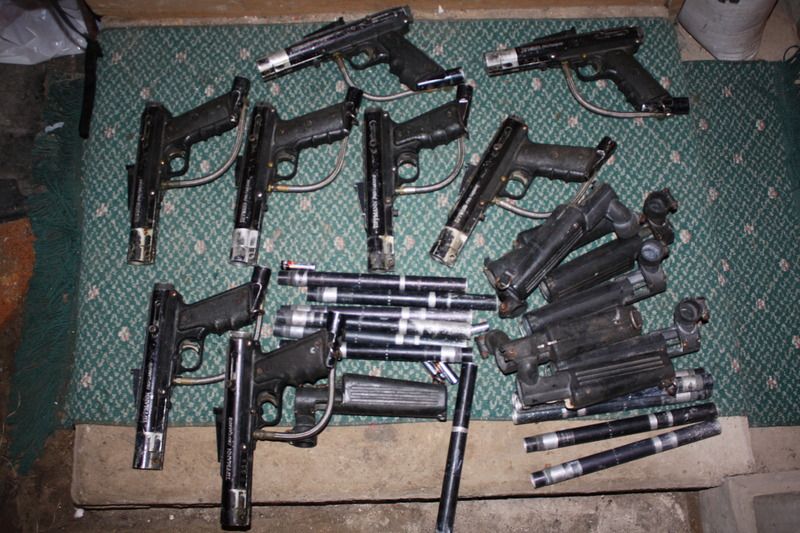
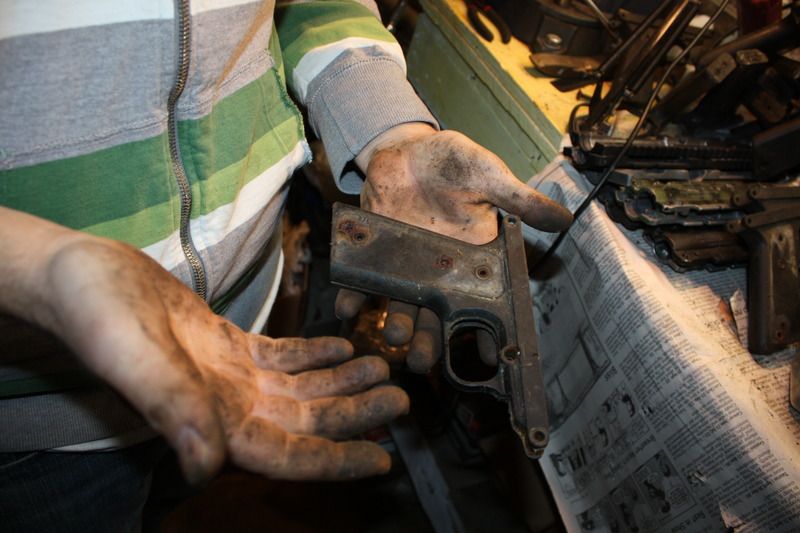
AND they were filthy!! Sand, grime, dirt, rust, and dried tar, AKA Valken Infinity paint. Just handling the markers did this to my hands:
Entry #1 is a "typical" Custom Pro Carbine build if one were to build one of these today with legit upgrades for the marker. Since the Pro Carbine hasn't been made in almost 15 years (at the time of this write up) much of the upgrades are rare like "hens teeth". Some are expensive. Some are laying about in a junk bin at the neighborhood paintball shop. And then there's Ebay.com or places like PBNation and MCB. Even though I own a Carbinethat I used to use years back, I followed the suggestions given forth on Warpig.com's FAQ page or the Tippmann Carbines - http://www.warpig.com/linkout.cgi?ht...n.com/jspharm/
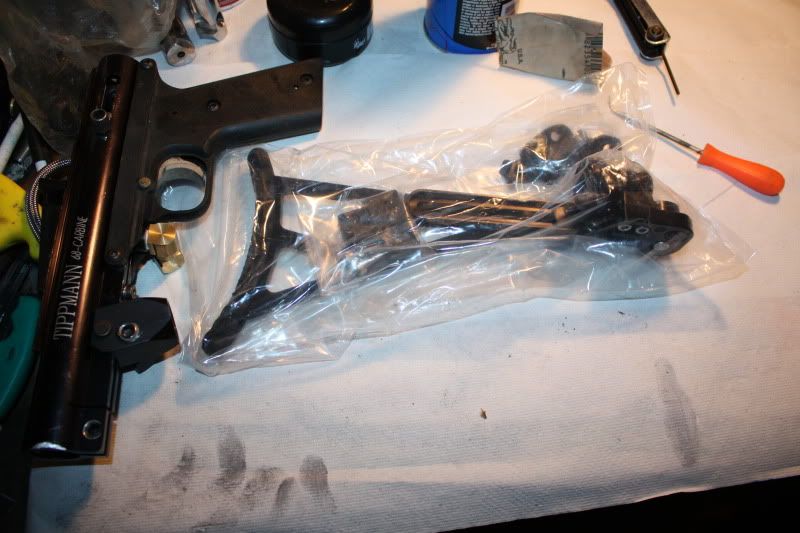
Ironically, some of the upgrades can still be bought from the manufacturer. I still had the number for Blackpoint Engineering AKA JCS Paintball and bought a folding stock for the Carbine for $10. Other upgrades came from junk bins from local shops. The barrels were "new old stock" from another local field - Clearance special. The venturi bolt was an ebay special from a few years back. In short, Entry #1 was built by a person who knew how to use Google to find upgrades. And this entry was meant to be aesthetically pleasing.
I hit a snag early on with Entry #1 Pro Carbine. As I mentioned before, I kept two of the eight Pro Carbines that were sent to me. The remaining six were given away to students from the local paintball club, and also to novice airsmiths attempting their hand at this contest. Cleaning the grime off of the Pro Carbines was proving to be a challenge. It was suggested from someone we trusted very much that we should get the "purple" cleaner stuff in a "purple" jug from the automotive section of Walmart. We did and one student took his disassembled Pro Carbine and stuck it in a pot with one part "purple" cleaner to five parts water and dawn dish detergent; and he boiled the marker. Everything that was plastic polymer came out clean and new looking and needed very little wire brushing. On the other hand, everything anodized aluminum was "stripped" raw and pitting occurred on the inside and outside of he aluminum. WTF?
I felt really bad and decided to give up to the student the body of my Pro Carbine for Entry #1 so he could still get his carbine working. This left me with no Pro Carbine body. I had all the internals and the grip frame, but no body. For Entry #1, I was pretty much screwed until early November 2016 when I was visiting a friend that had a box of Carbine (generation 2) junk. In the box, he had a body, but the body was for the Carbine, not the Pro Carbine which took the shroud/feedneck foregrip. The Carbine body had picanny rails where a feed neck would slide into place over the feed port. One problem, I did not have the elbow for the Gen 2 Carbine body.
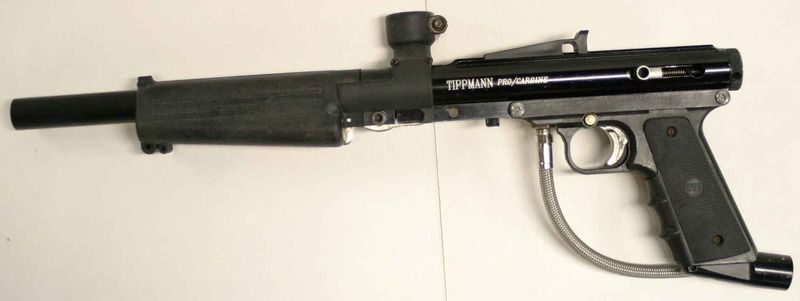
So to clarify with pictures, instead of having a body for the Procarbine -
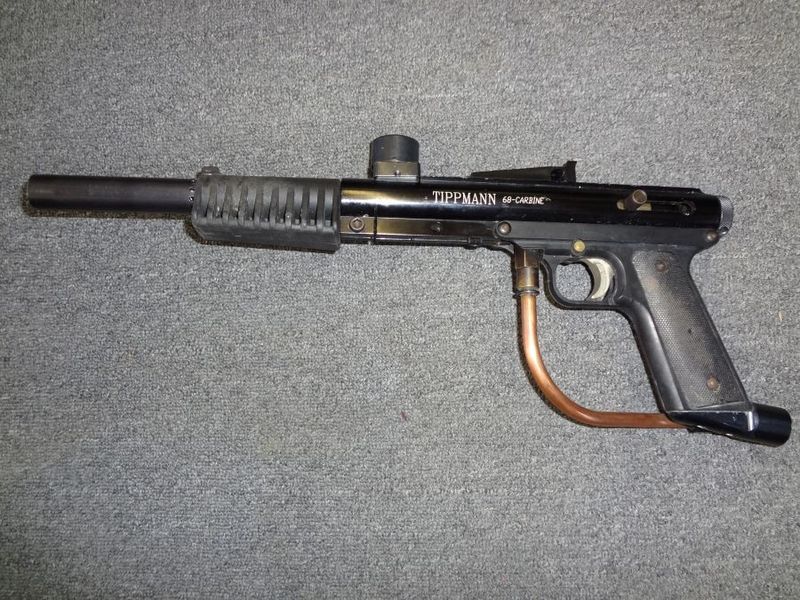
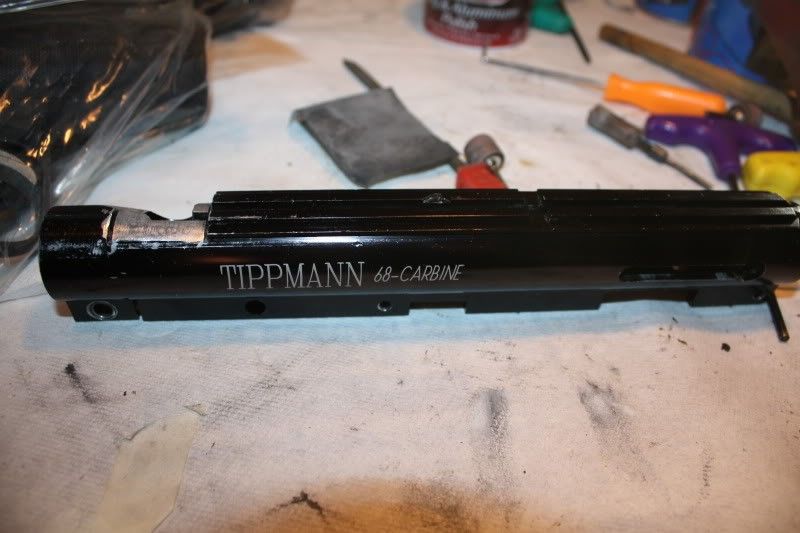
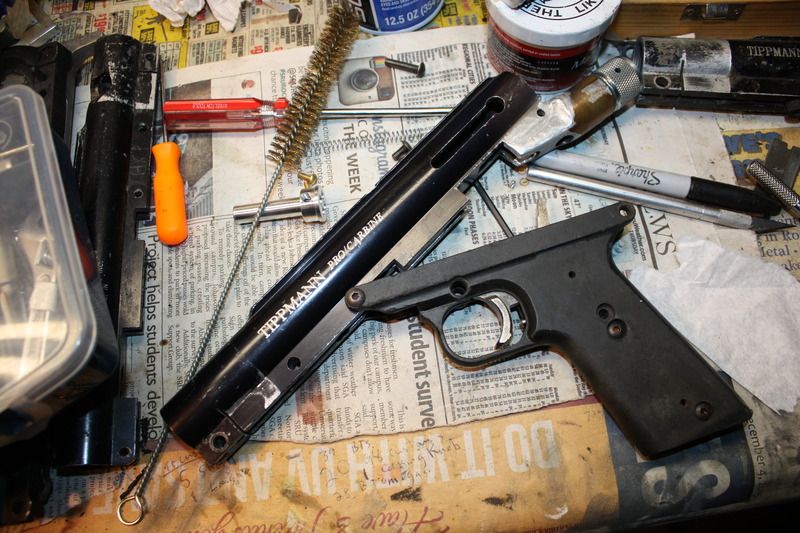
I had a body for the Carbine -
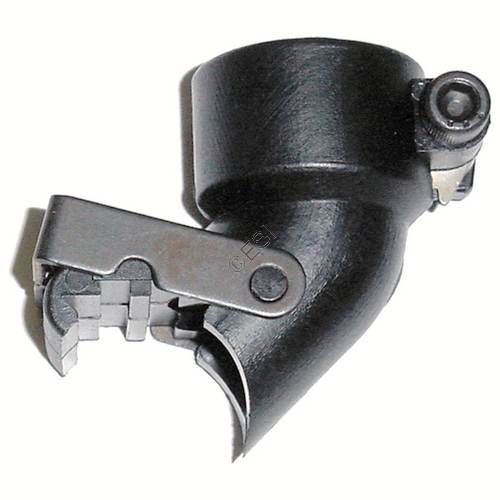
And the Carbine needed this feedneck -
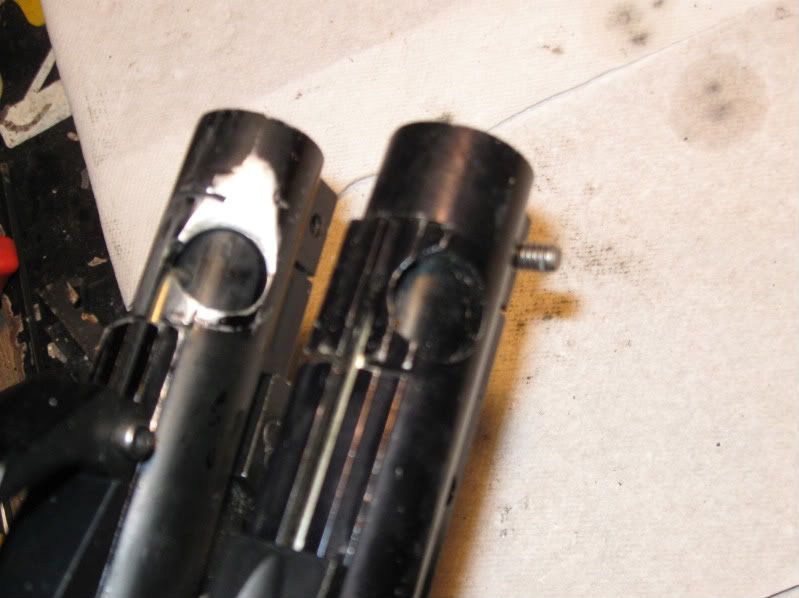
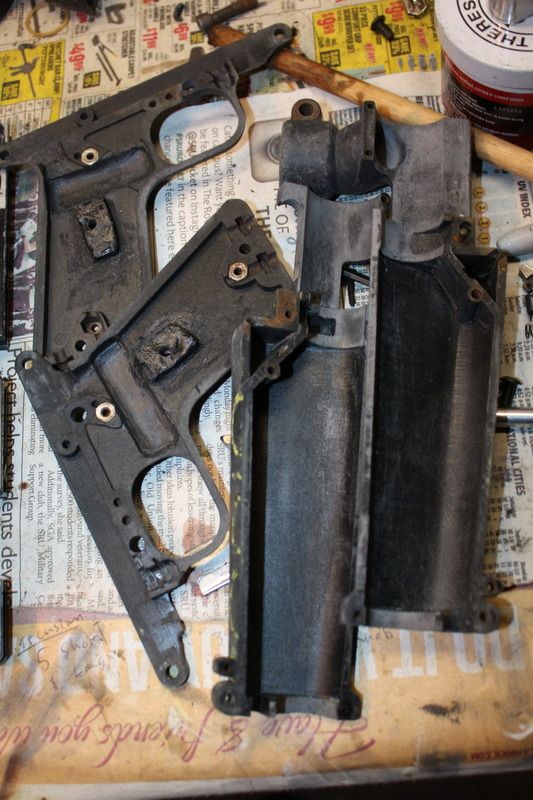
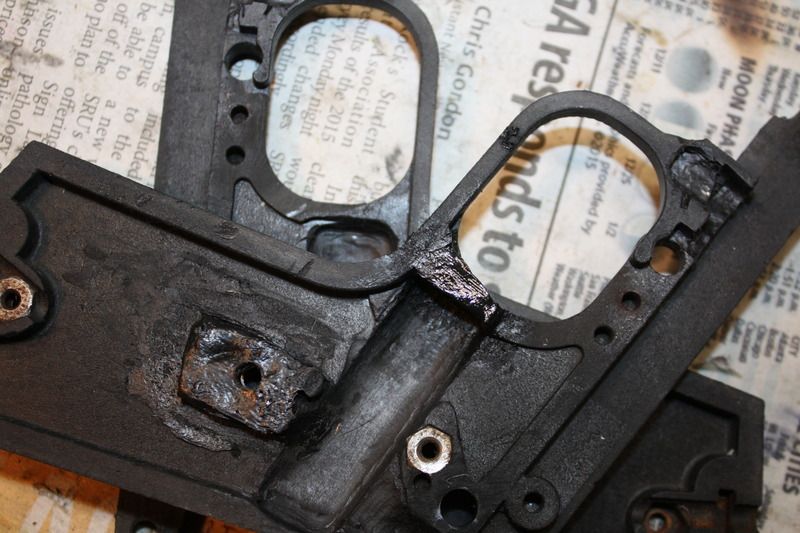
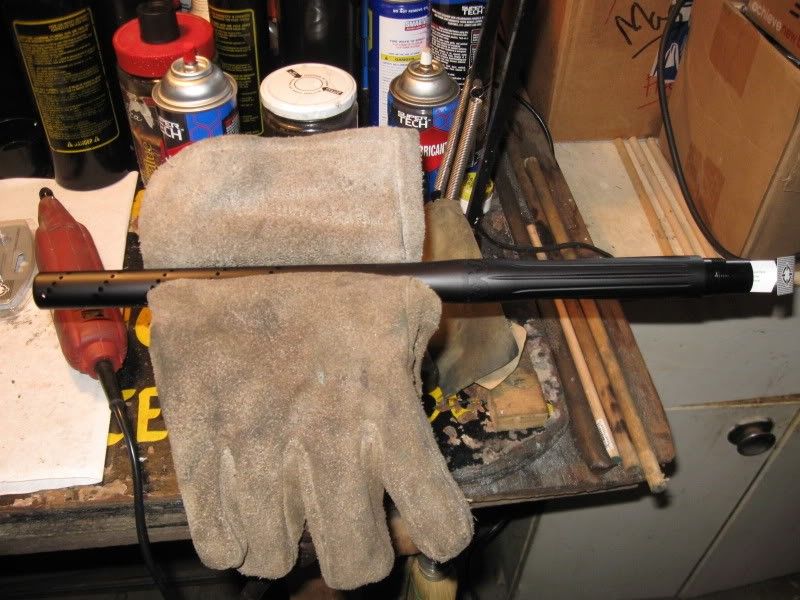
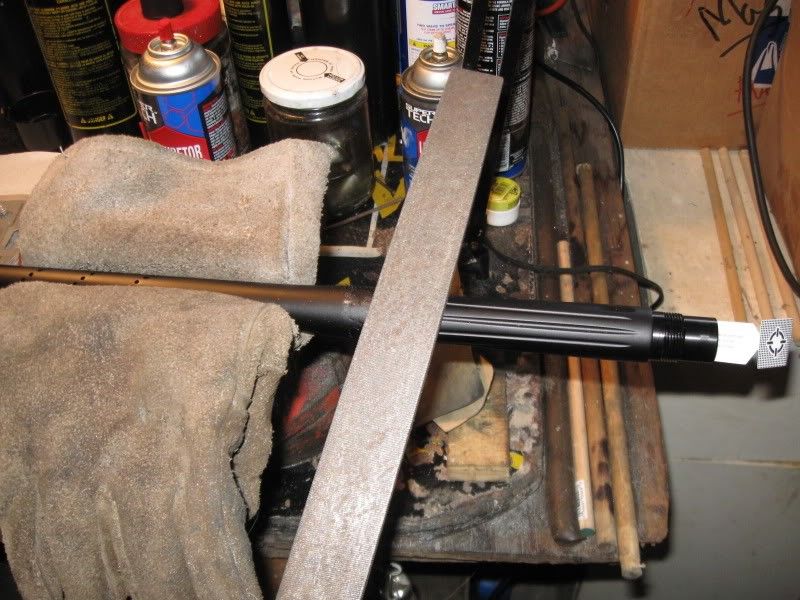
I tried to locate the feedneck through the usual means. No luck. Some folks even scoffed at me for asking. Wow. So this meant that I had to improvise. And out came the file hand tools. In the picture BELOW are two Carbine bodies. One is the actual rental Carbine that belongs to the school club and the other one with the picanny rails for the feed neck have been ground off / filed down and the body had been contoured to work with the Pro Carbine front shroud:
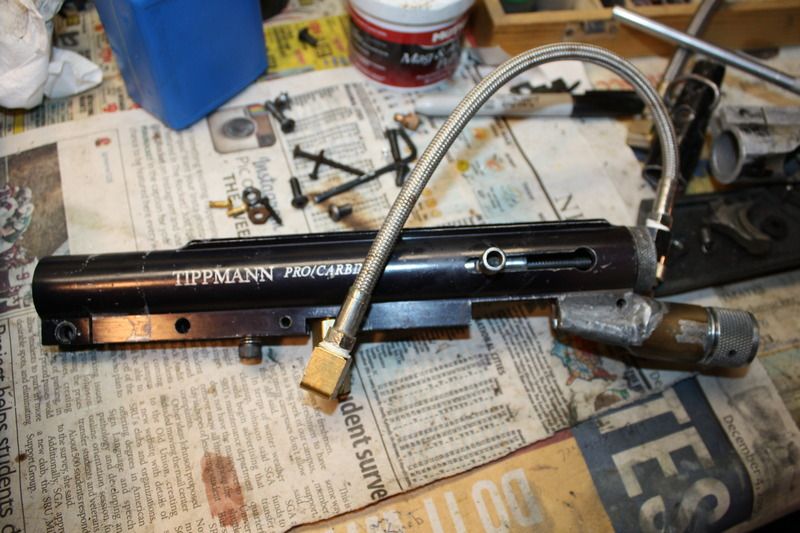
The Carbine body had a lot of black spray enamel paint on it. After a good bit of paint thinner, I had this really nice body:
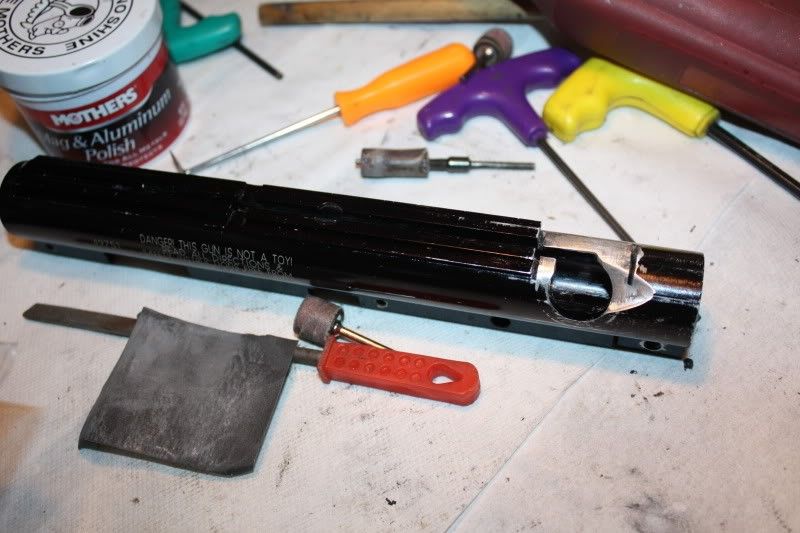
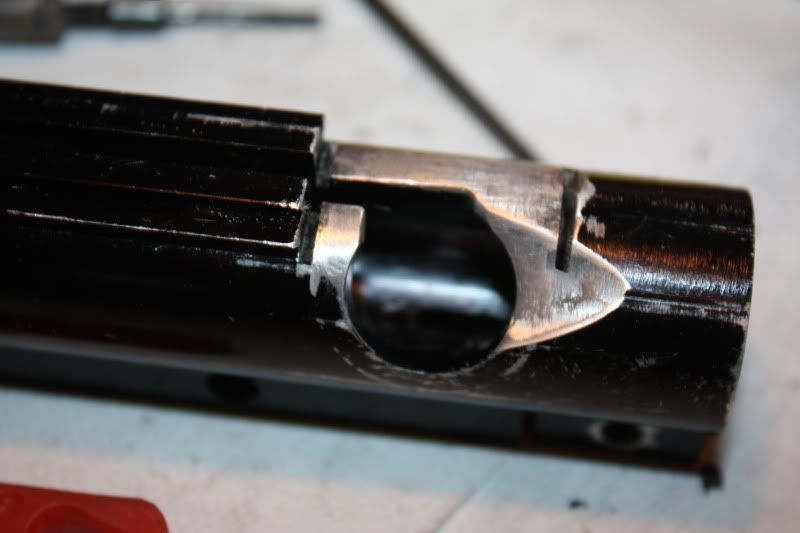
And the shroud now fits and the balls load from the Pro Carbine elbow into the breach of the Carbine body (BELOW).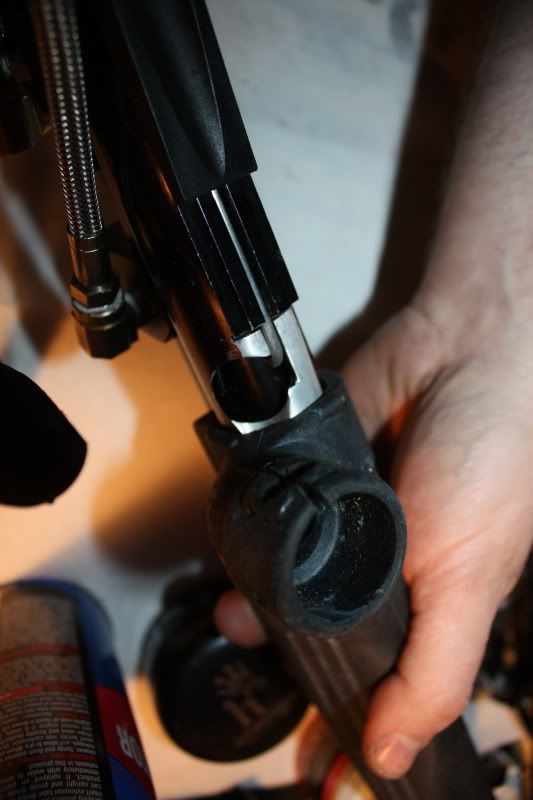
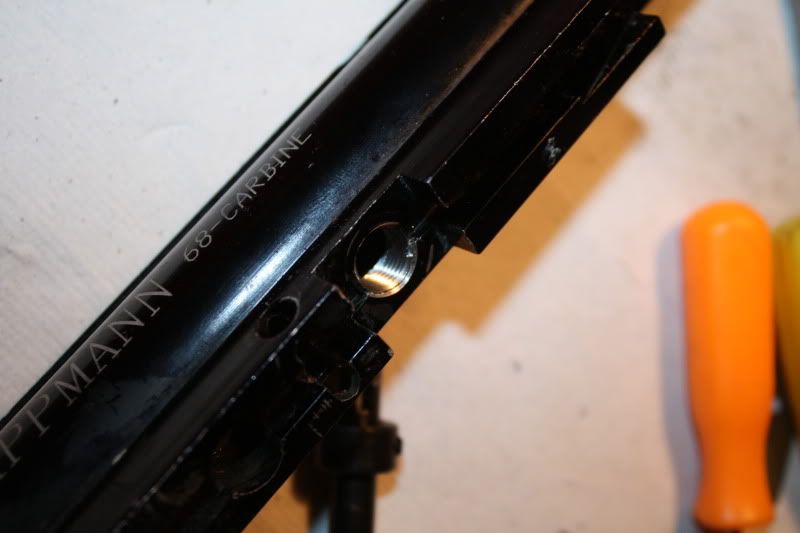
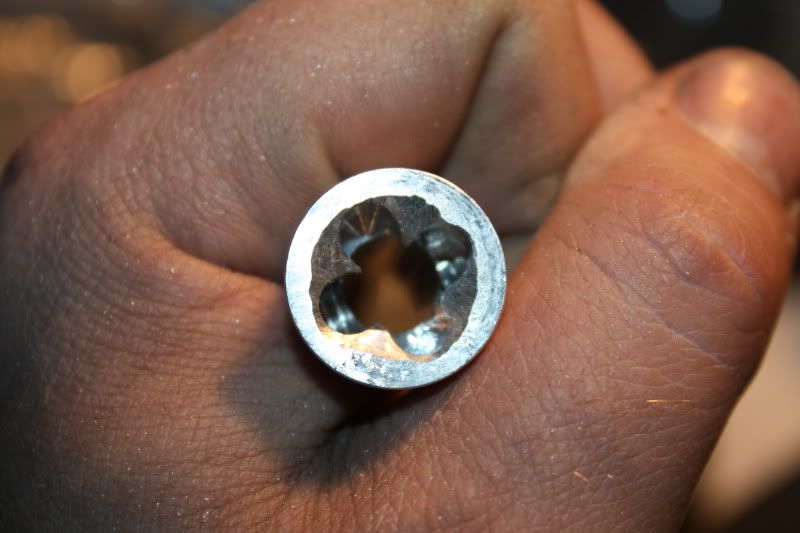
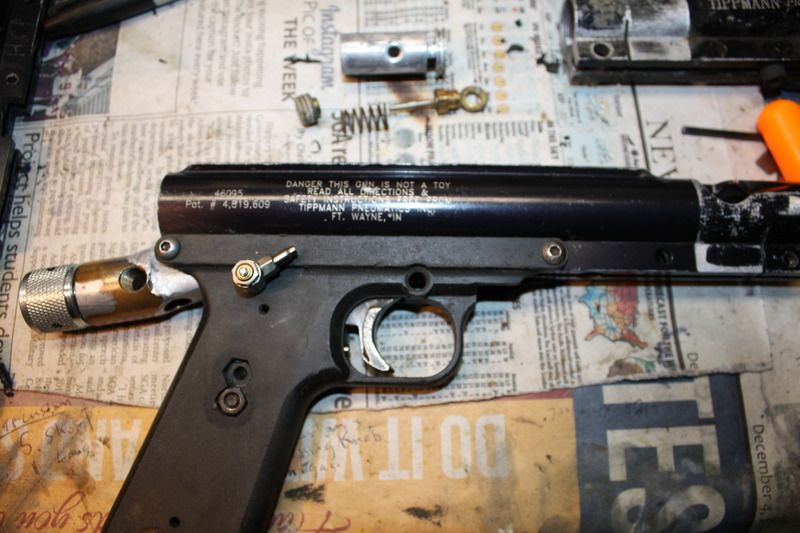
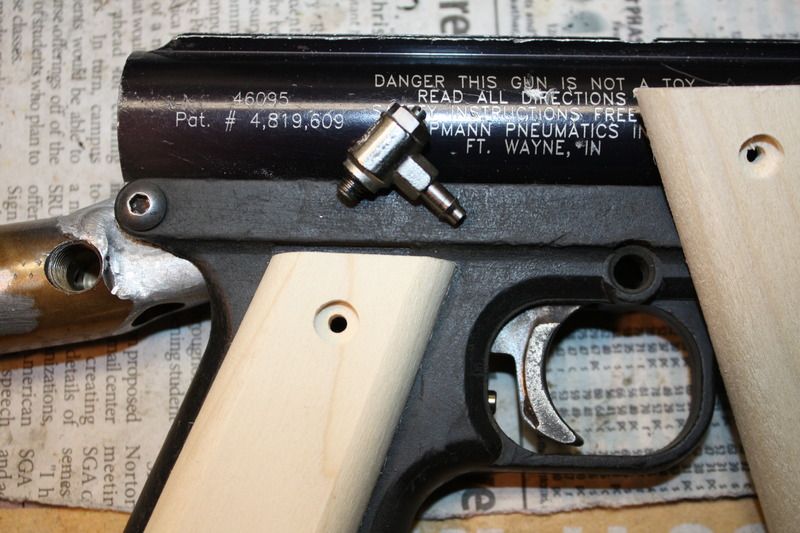
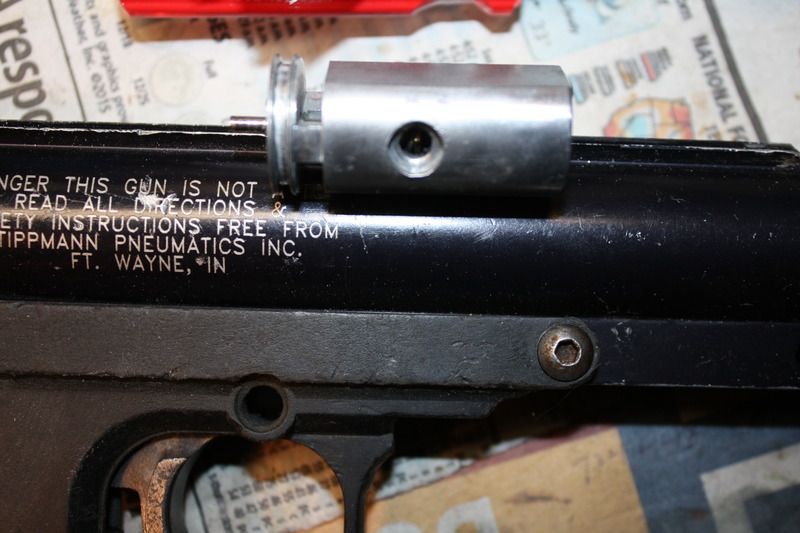
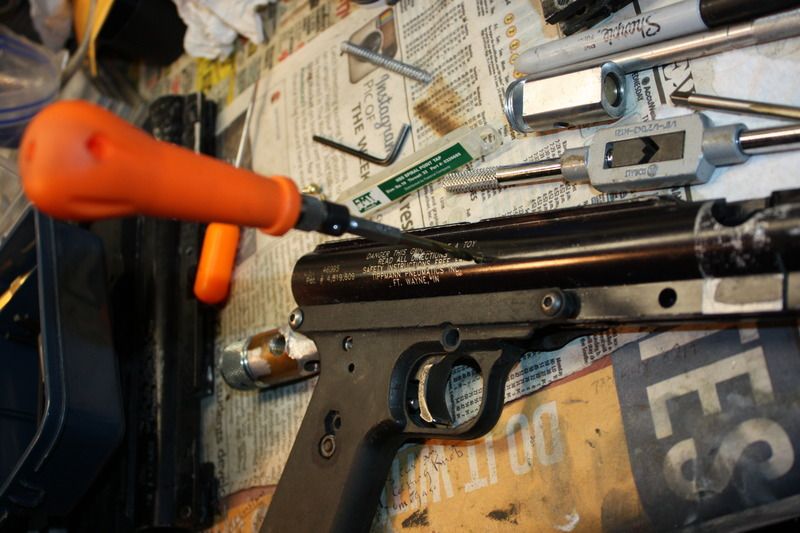
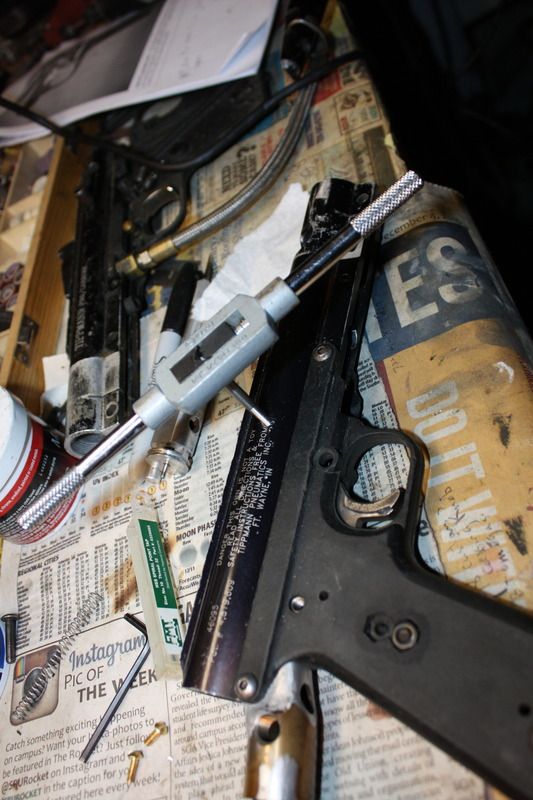
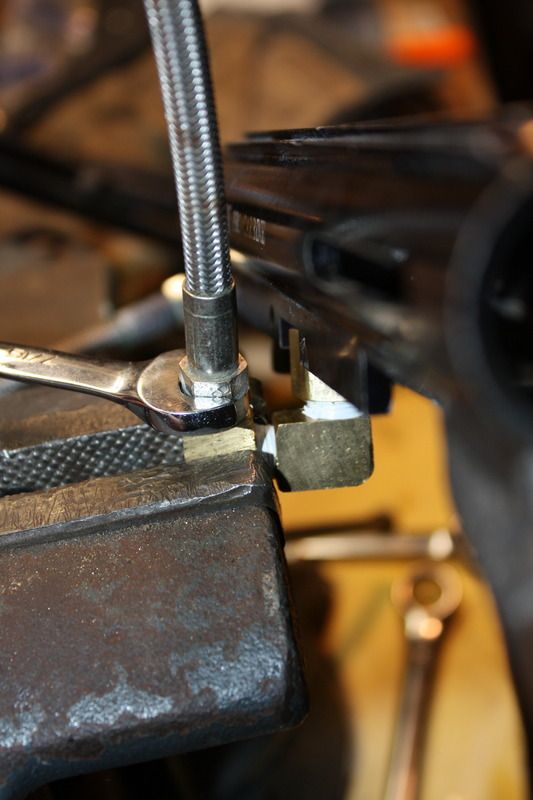
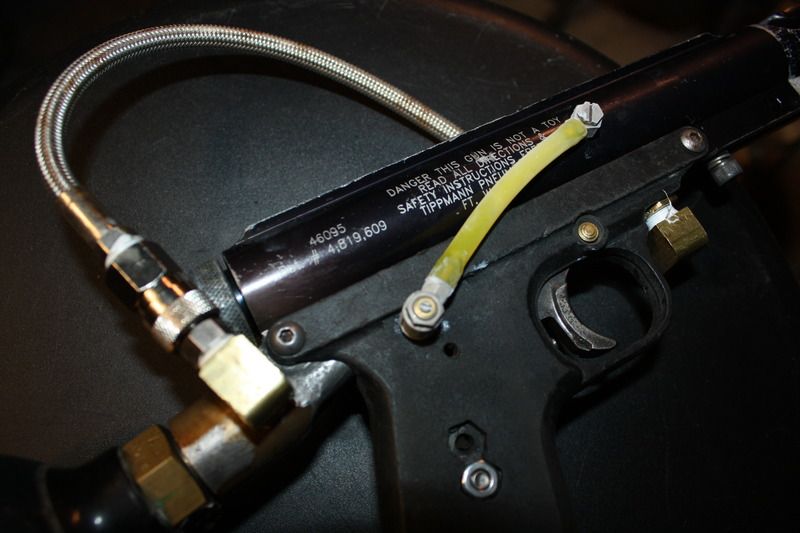
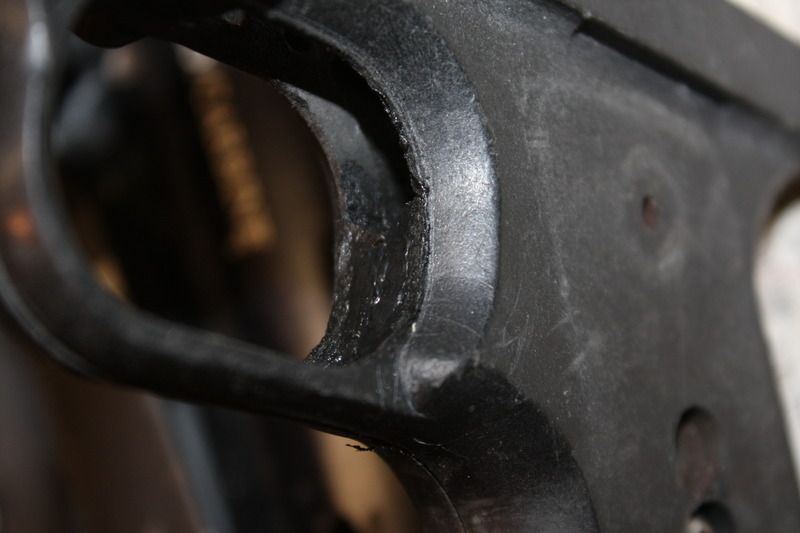
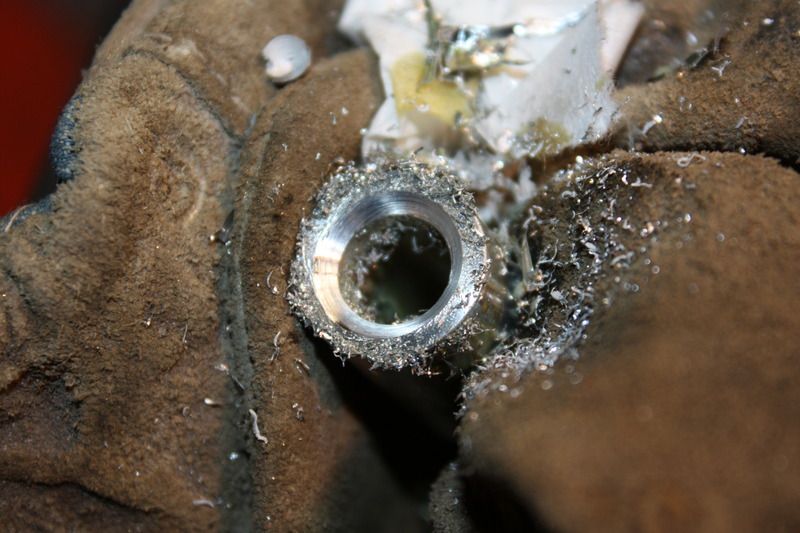
But I still had one problem that I missed when I selected the Carbine body. I ran into a major problem during reassembly. The steel braided line adapter is a pressure fitting that has a face that presses against the oring seal of the valve and makes a seal. The original generation of carbines had a different style of valve that was later redone/swapped out to the CVX style of indirect exhausting. When this was done, the carbine receiver body needed to be converted to take a 1/8 27 thread. Instead of swapping out the body completely, Tippmann just drilled and retapped the body of the carbine to take the 1/8 27 NPT thread. My Carbine was one of these that was retapped. The main issue with the retapping of these bodies was that the threads were un anodized/not hardened. But from years of use - threading in and unthreading, the threads have worn out/stripped from tightening the adapter down enough to get that seal between line and valve to occur.
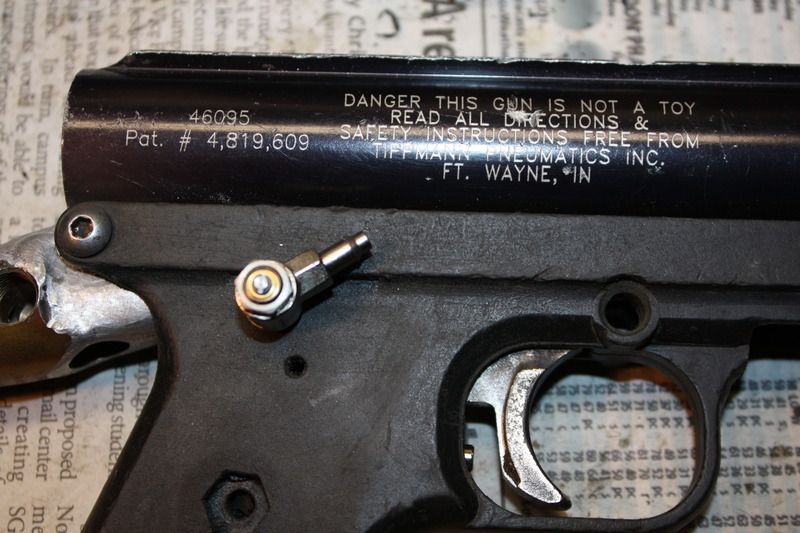
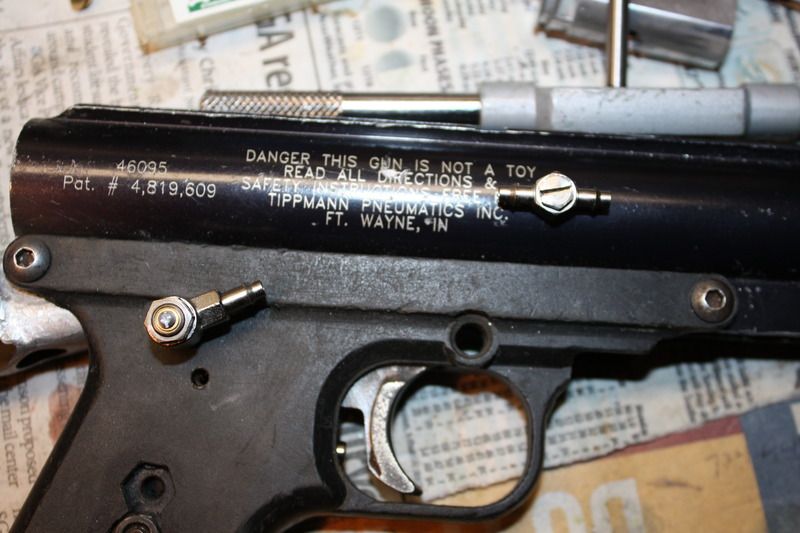
And so, this is what I have to fix - :
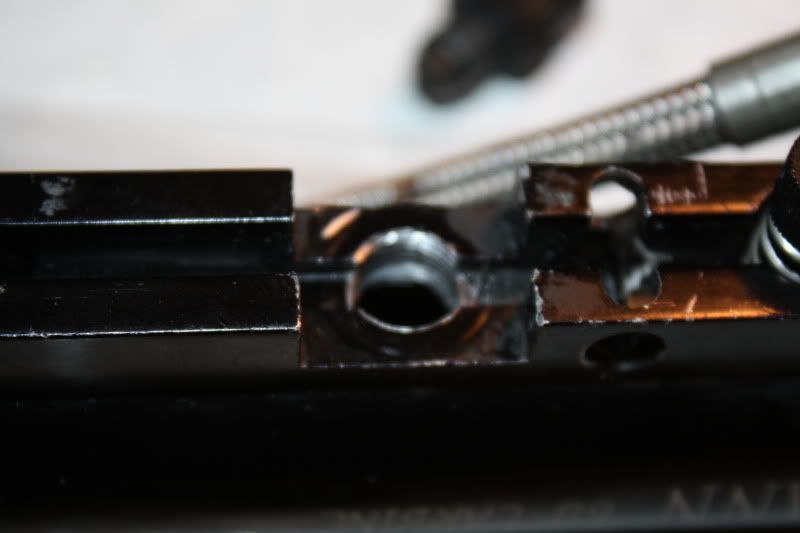
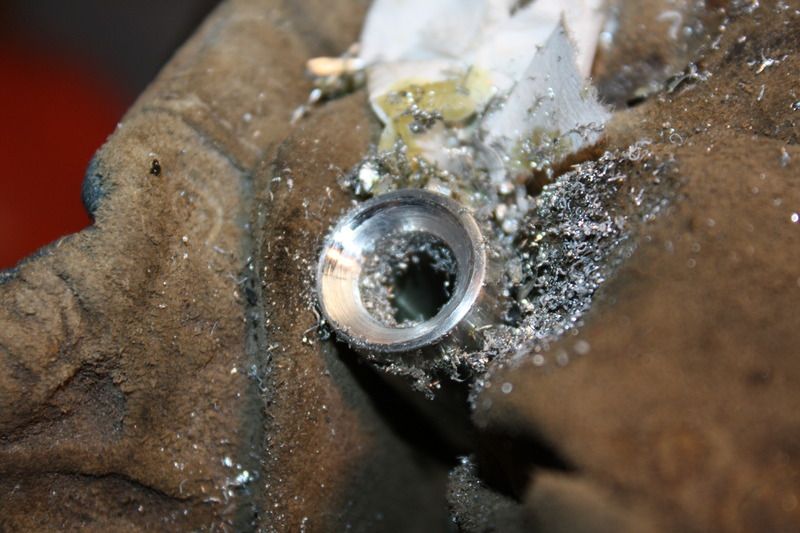
ABOVE: The ASA hose threads are thoroughly stripped out. Hmmph.
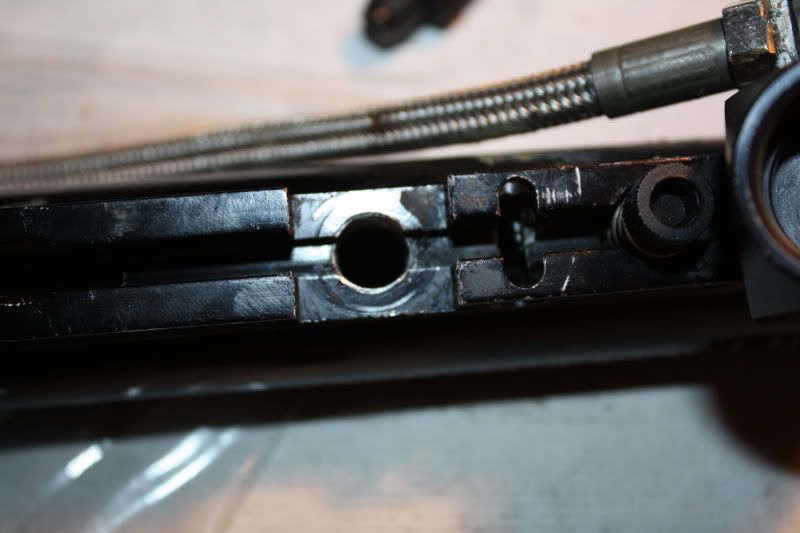
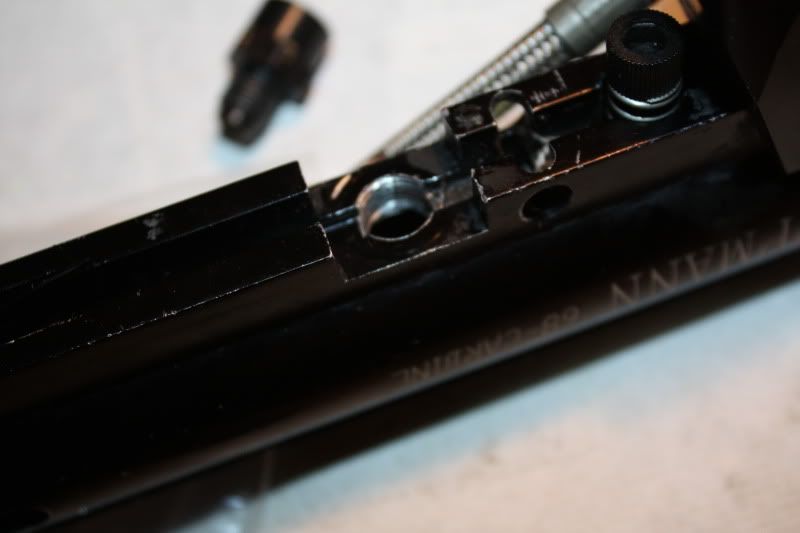
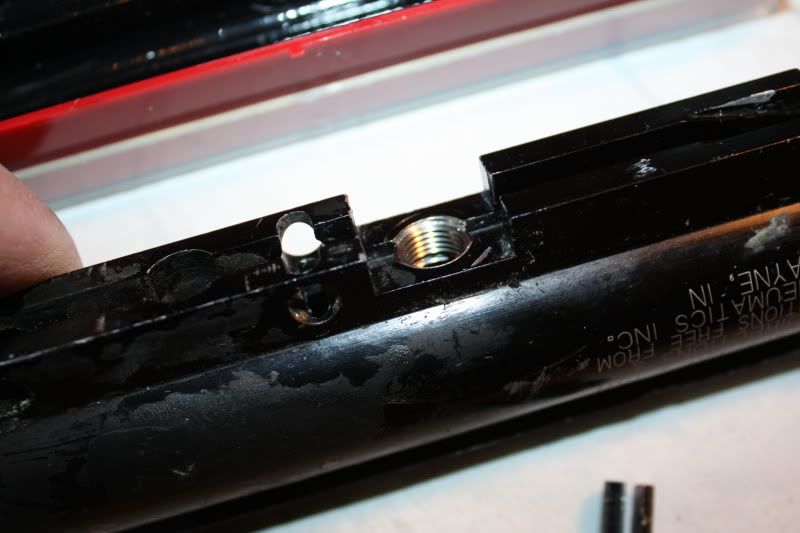
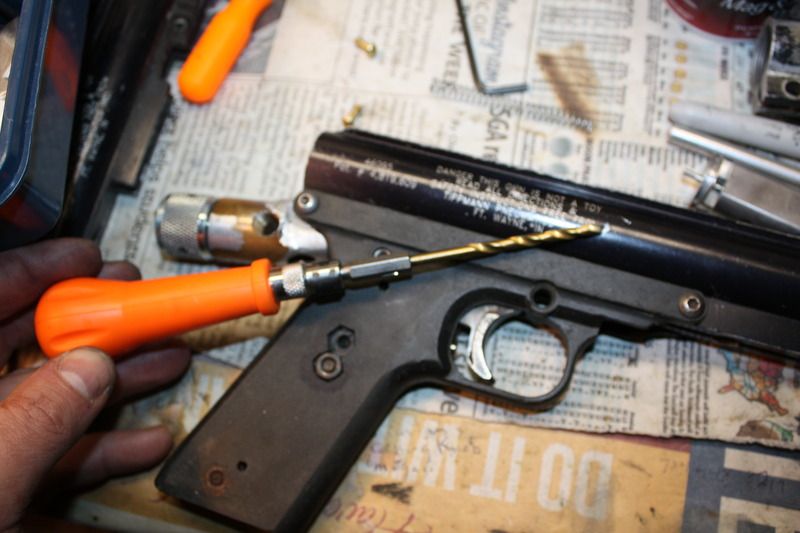
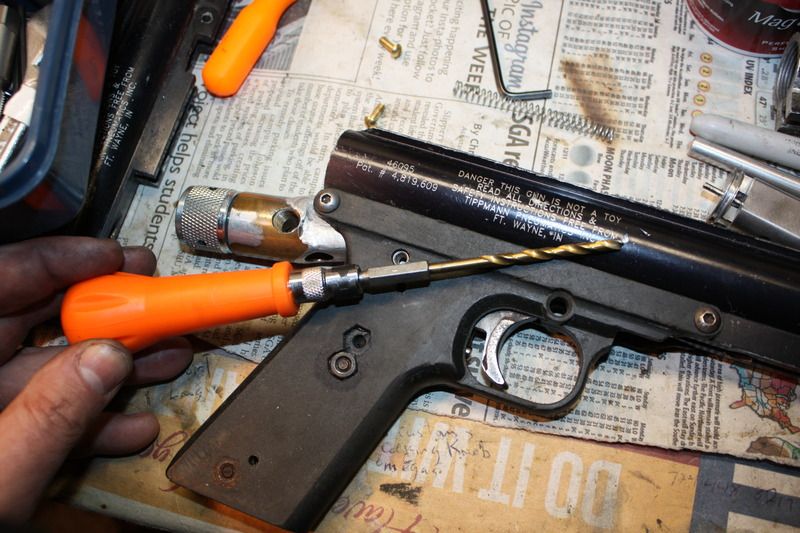
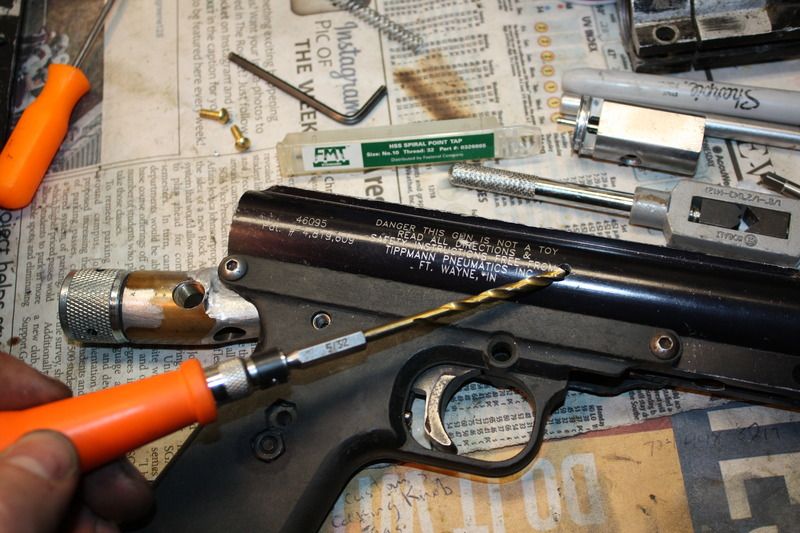
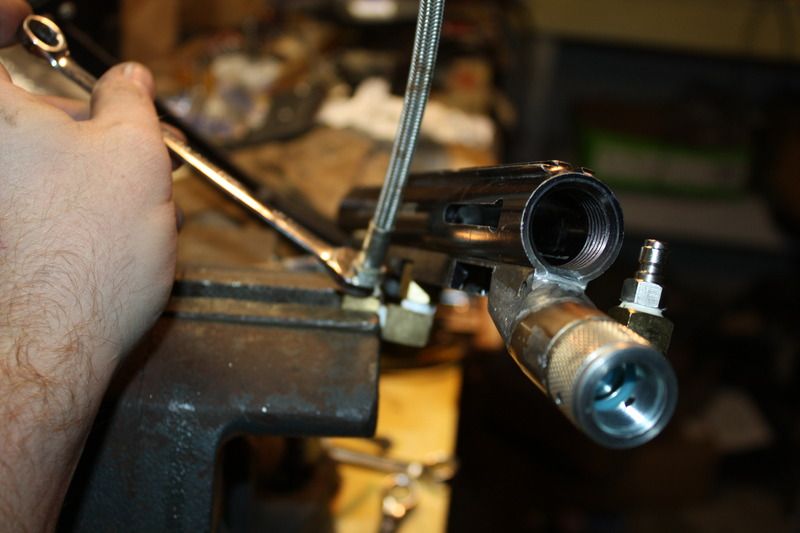
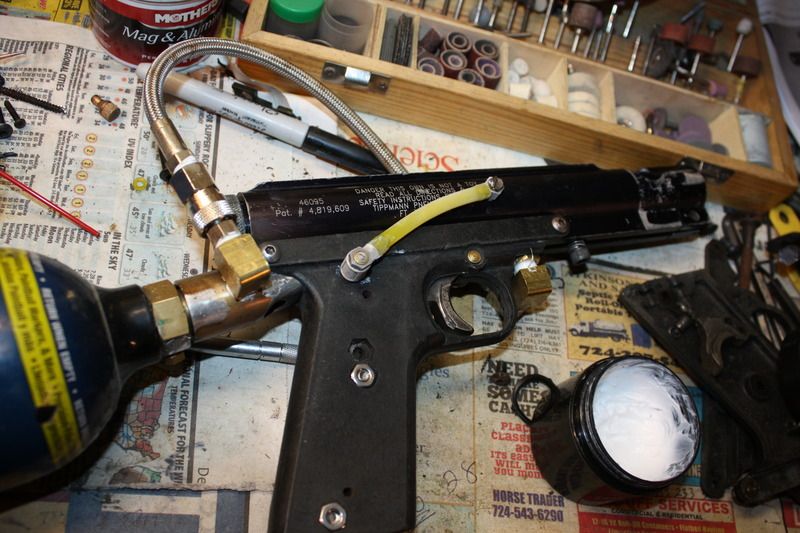
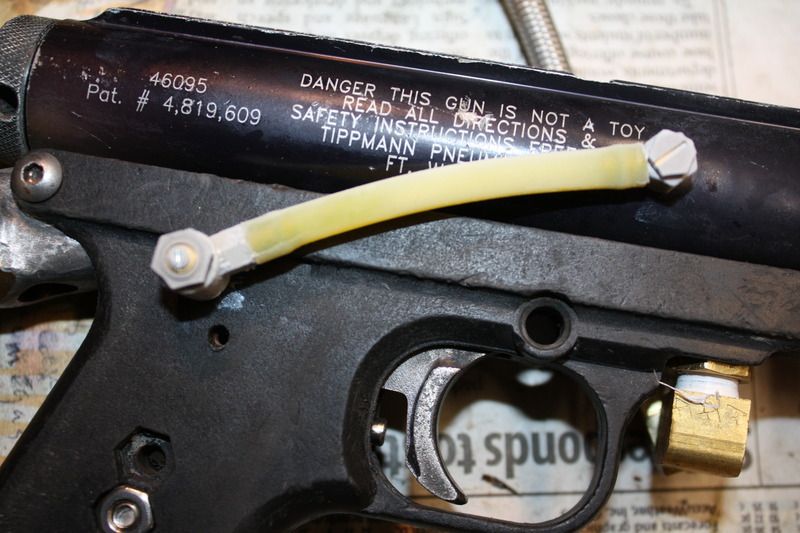
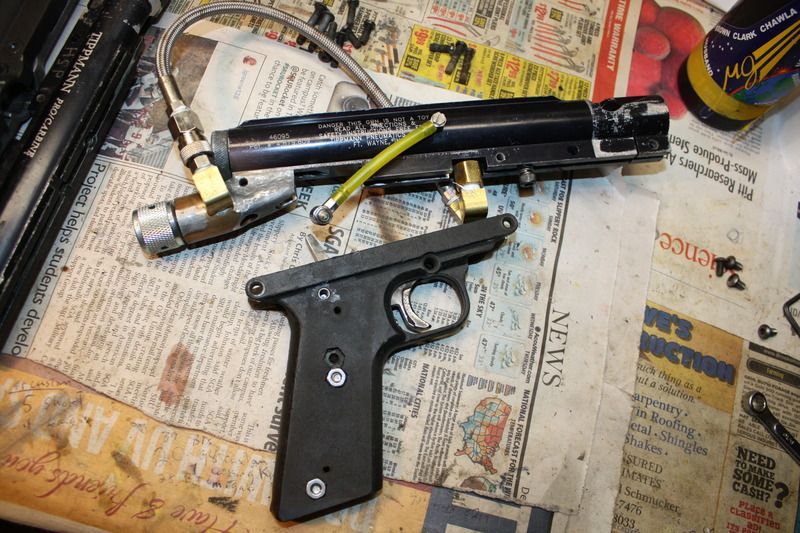
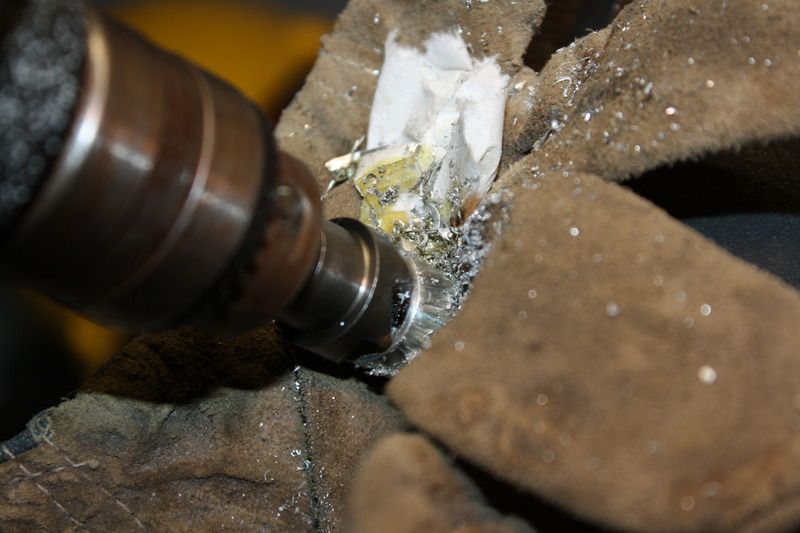
BELOW: More pics of the problem:
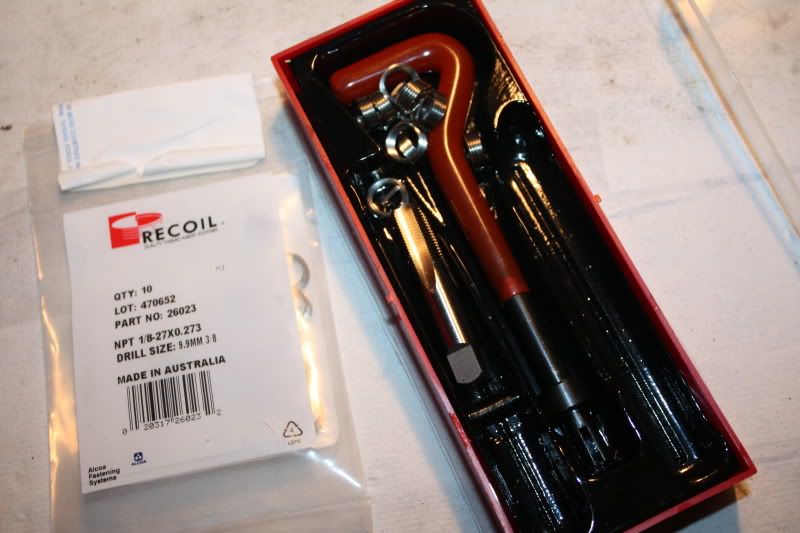
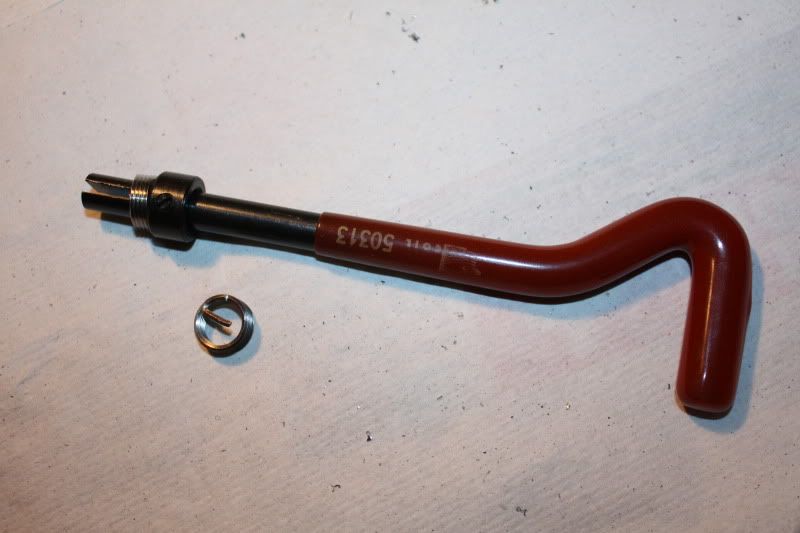
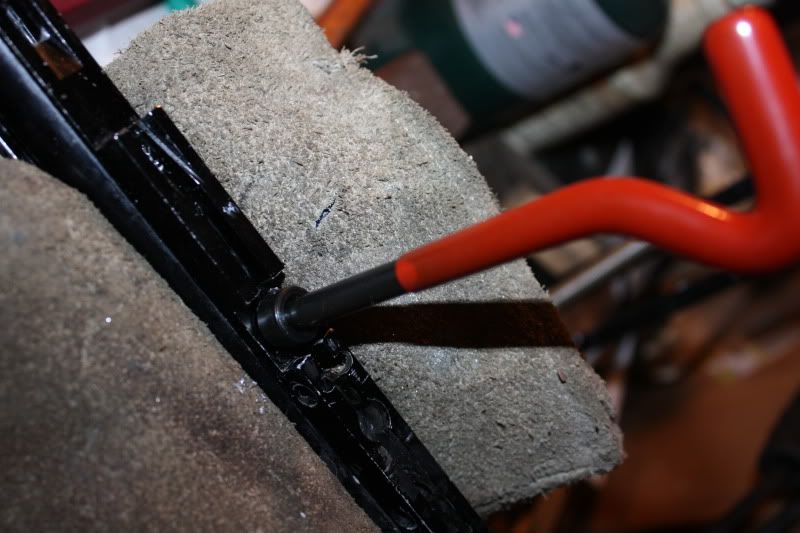
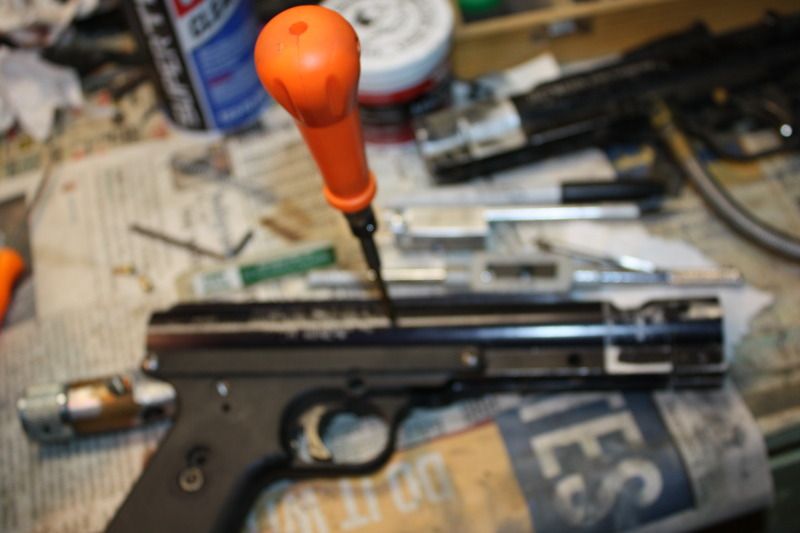
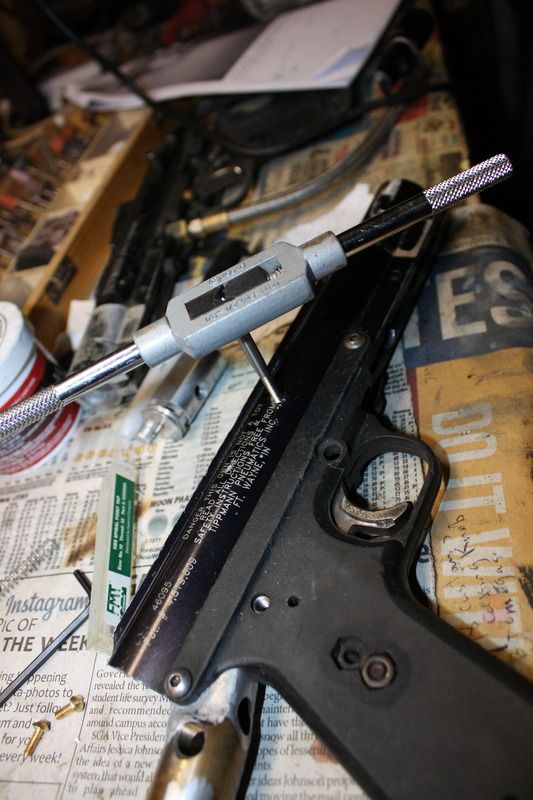
Since the threads themselves are not holding air pressure, I could theoretically heli coil the body / use a thread repair kit. I did check various places for a 1/8 27 NPT thread repair kit. Most places could not order it. The few places that could were industrial places. Fastenal to the rescue:

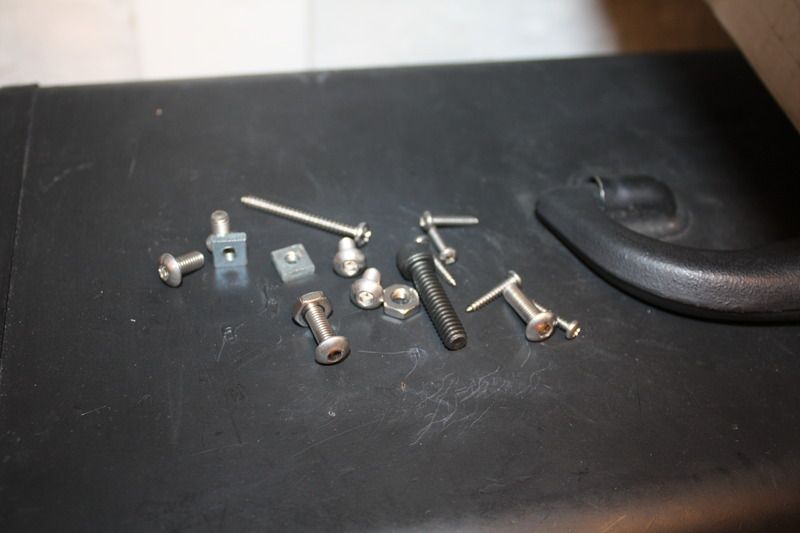
New parts:
And More NEW upgrades from MCB, PBNation, and Ebay. Paid $5 each for the items.
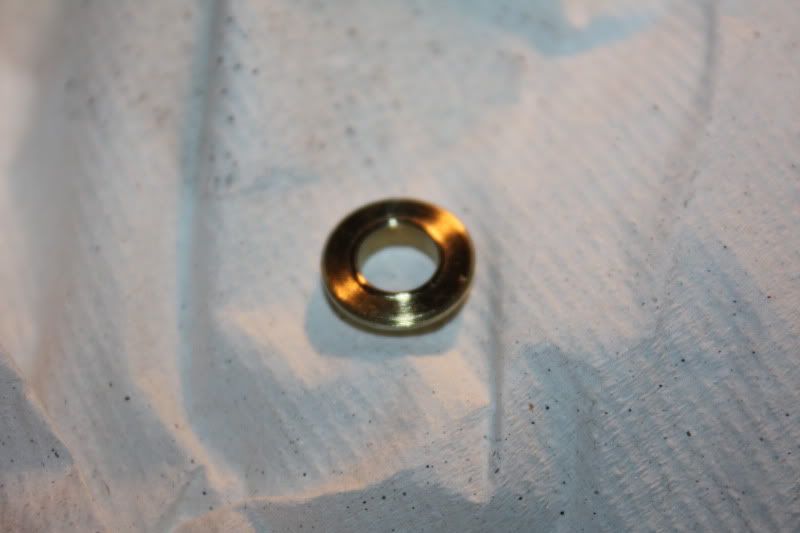
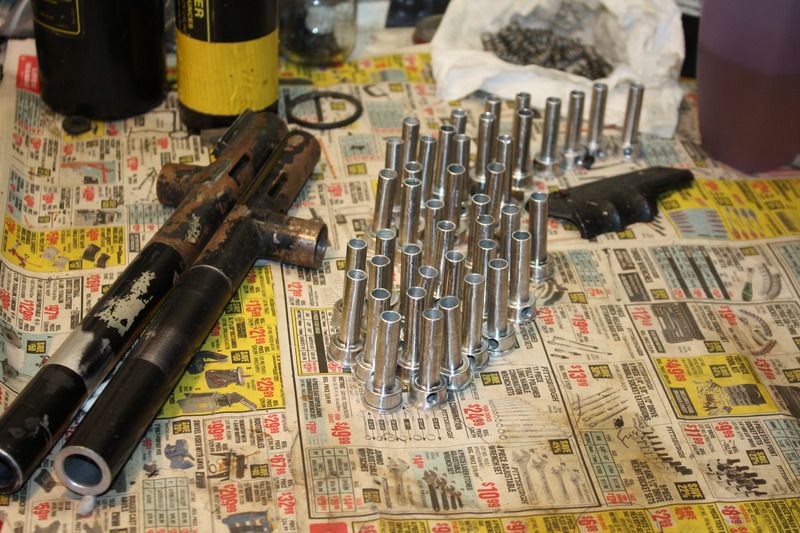
Replaced the front bolt with a venturi bolt:
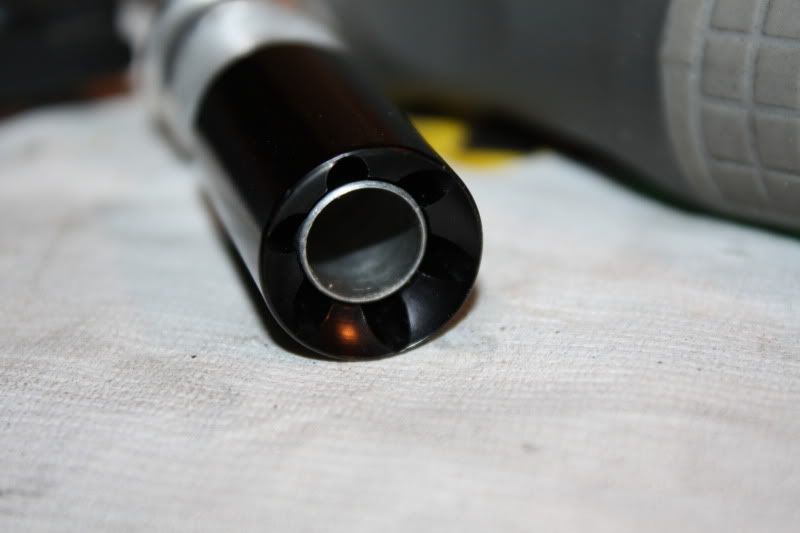
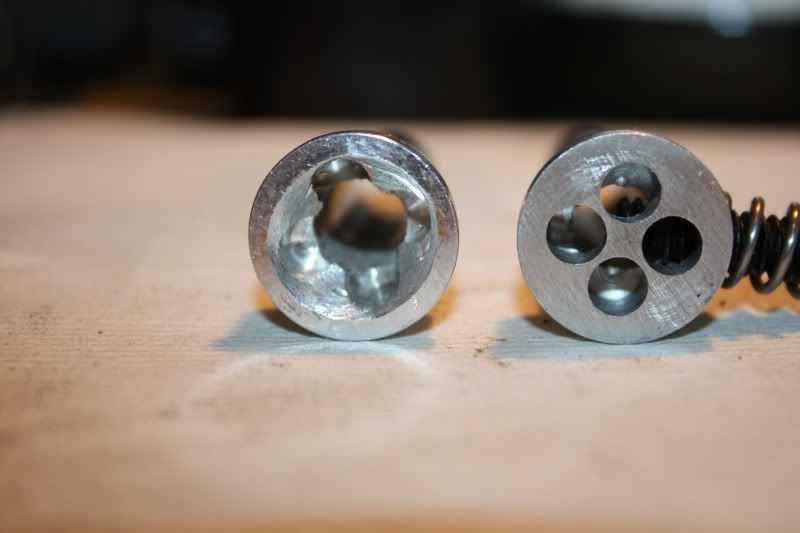
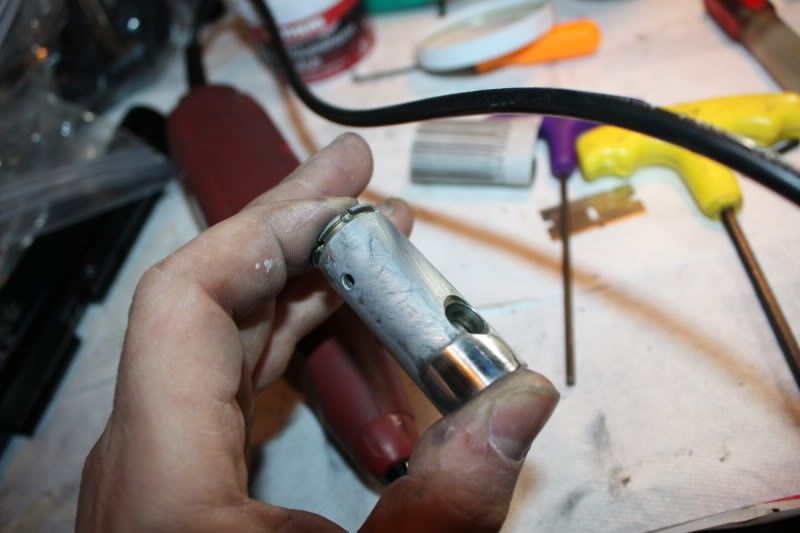
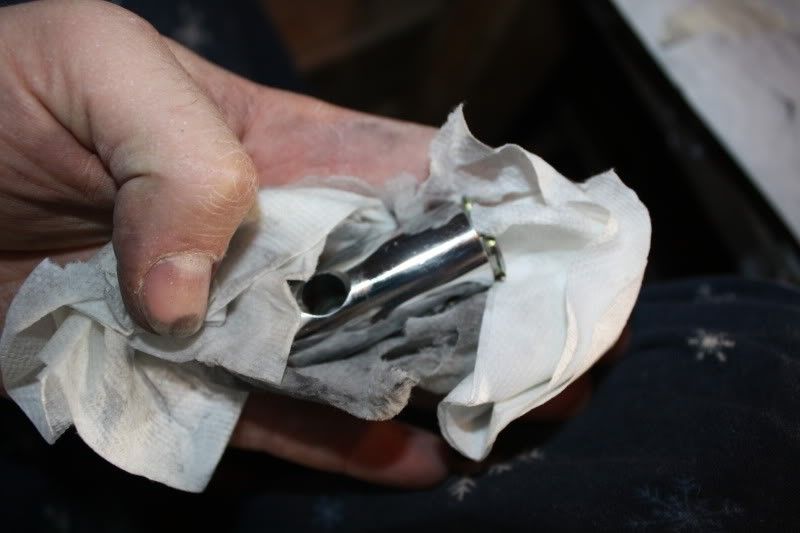
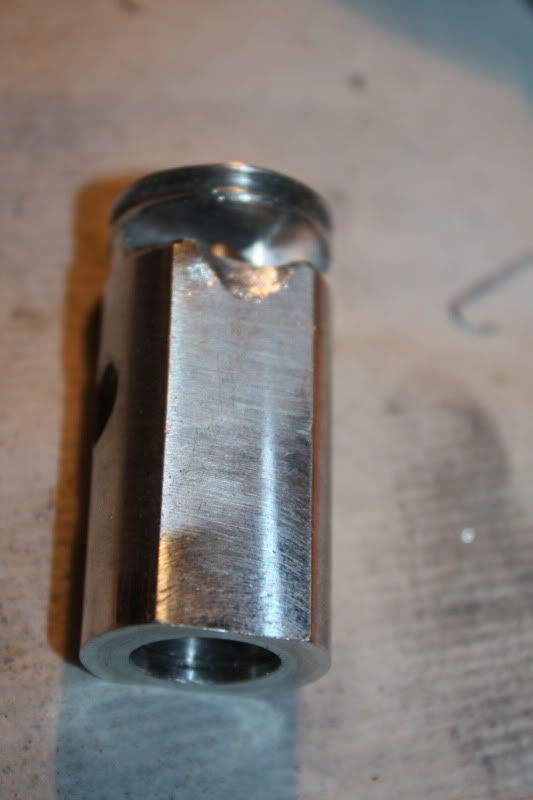
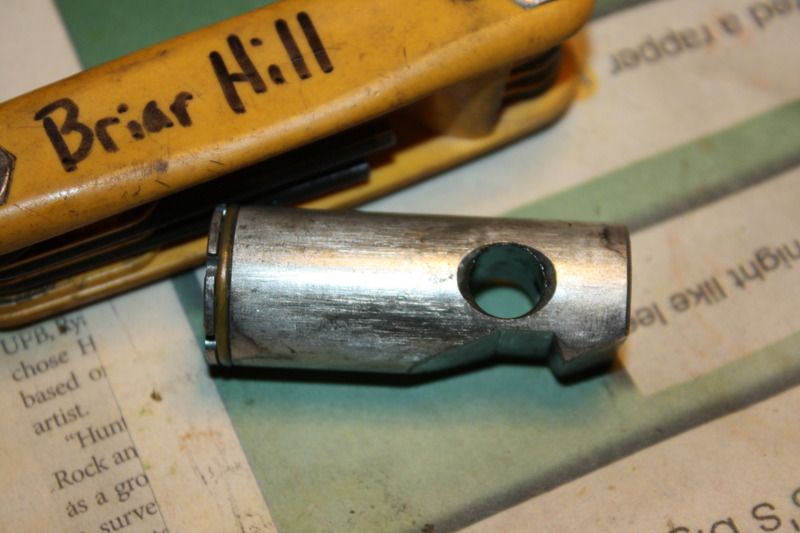
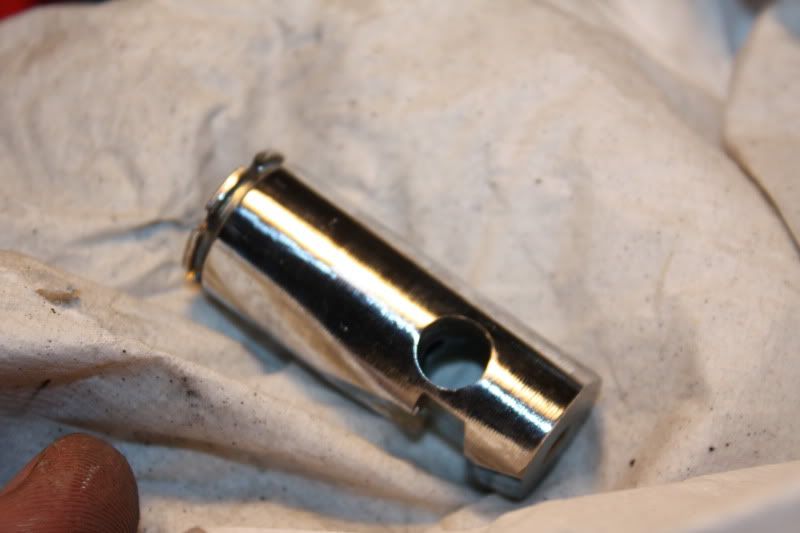
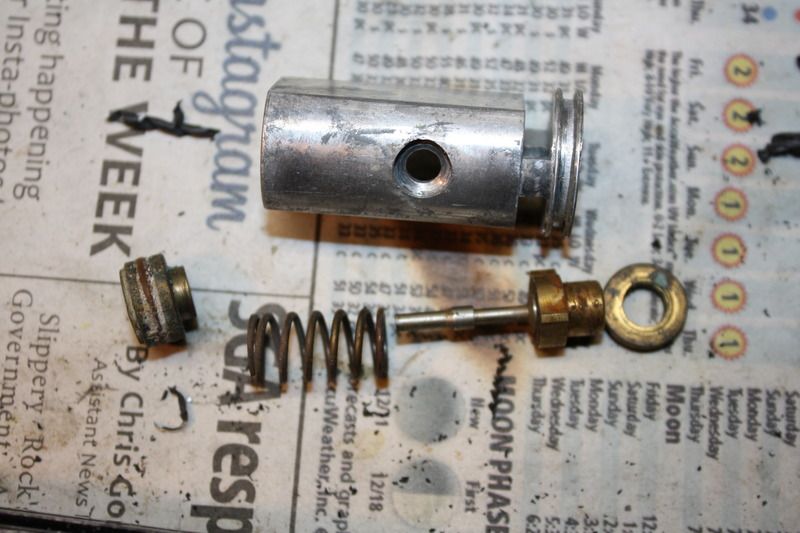
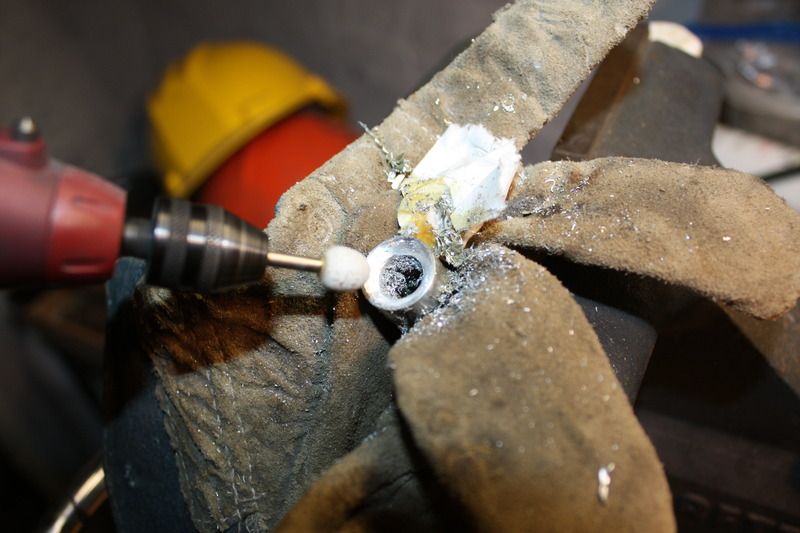
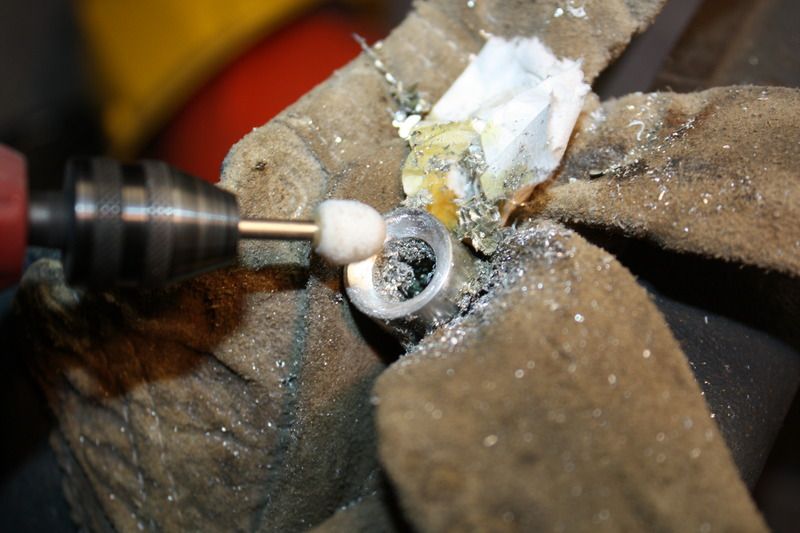
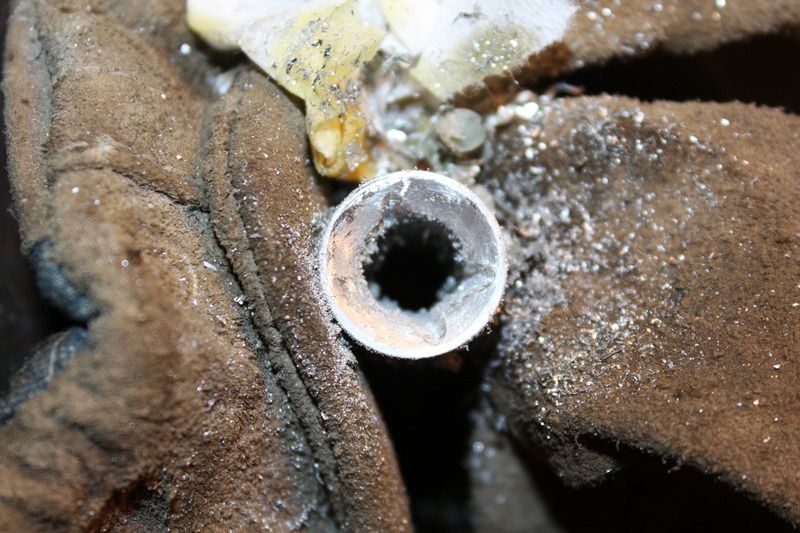
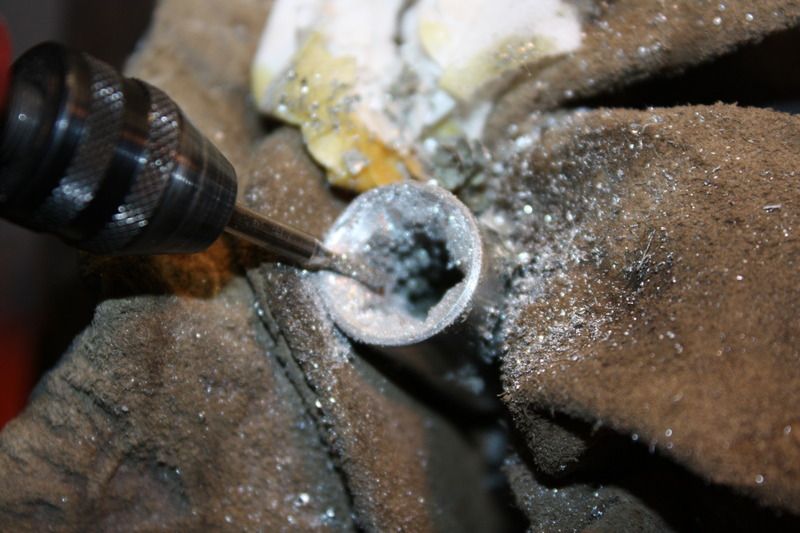
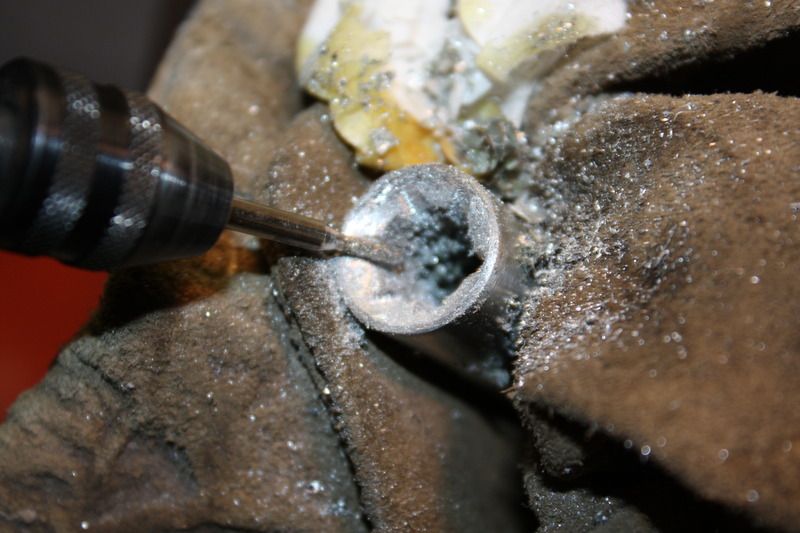
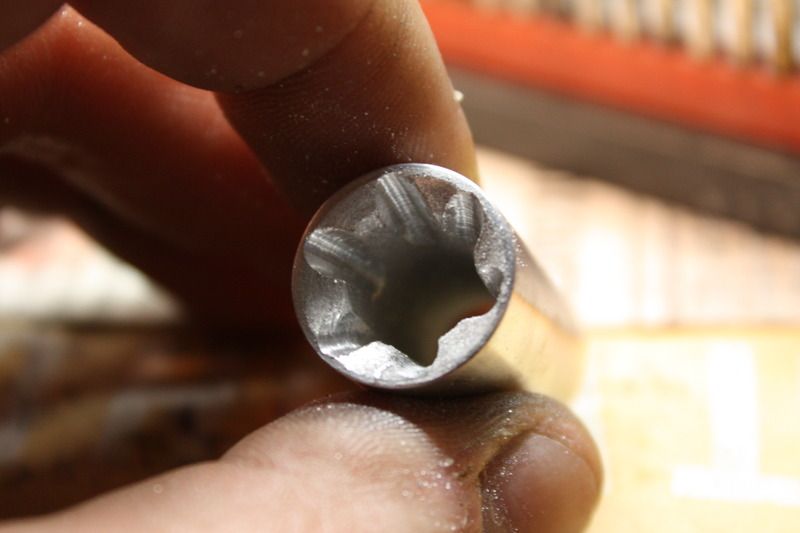
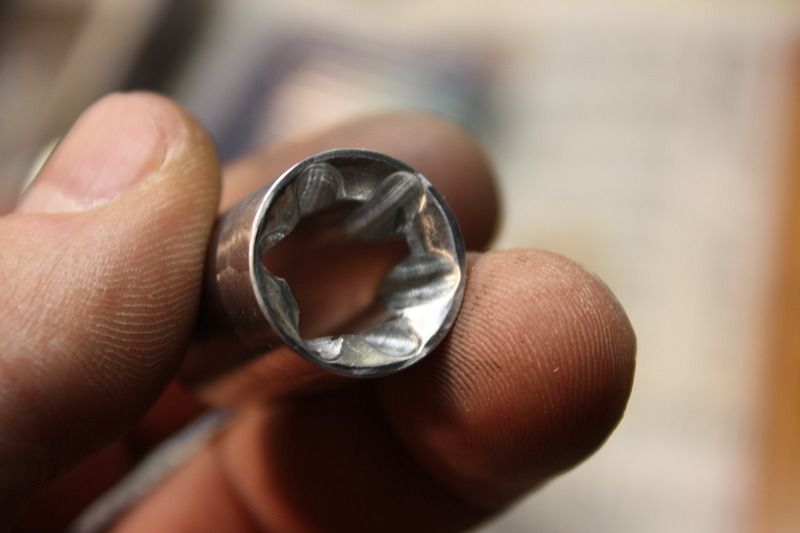
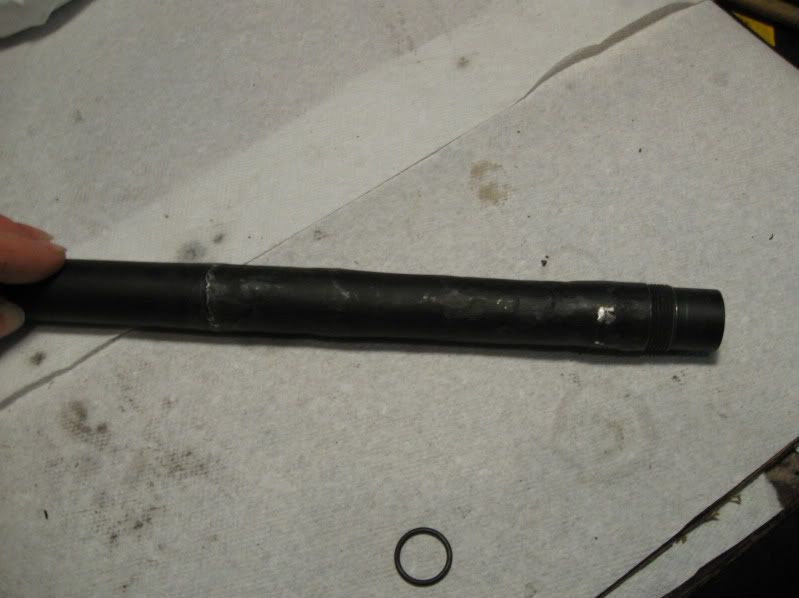
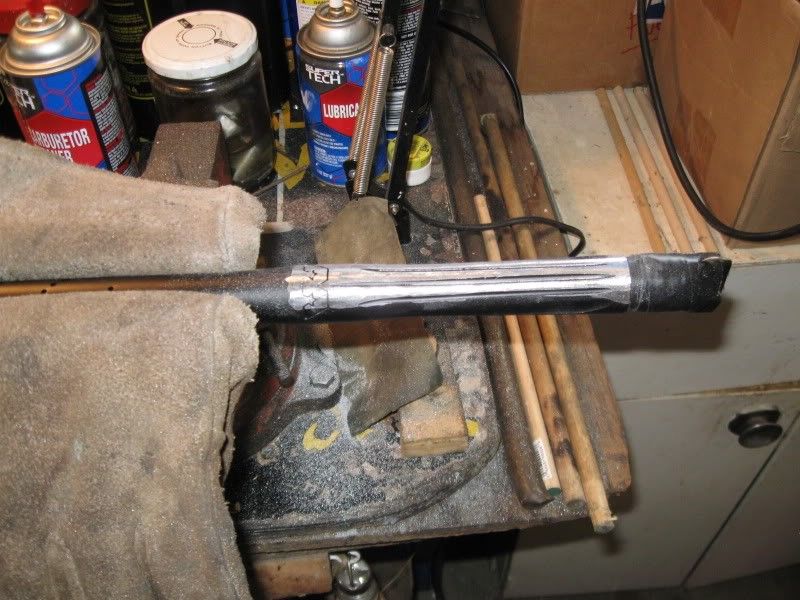
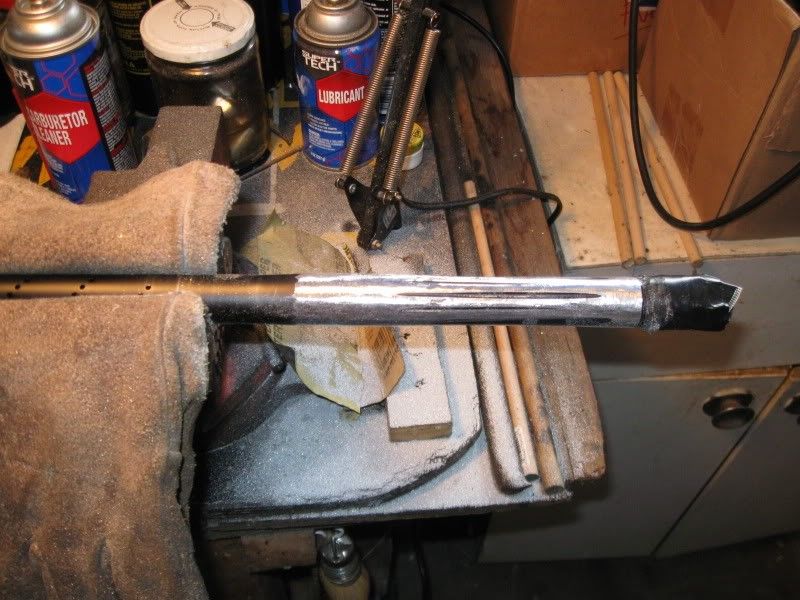
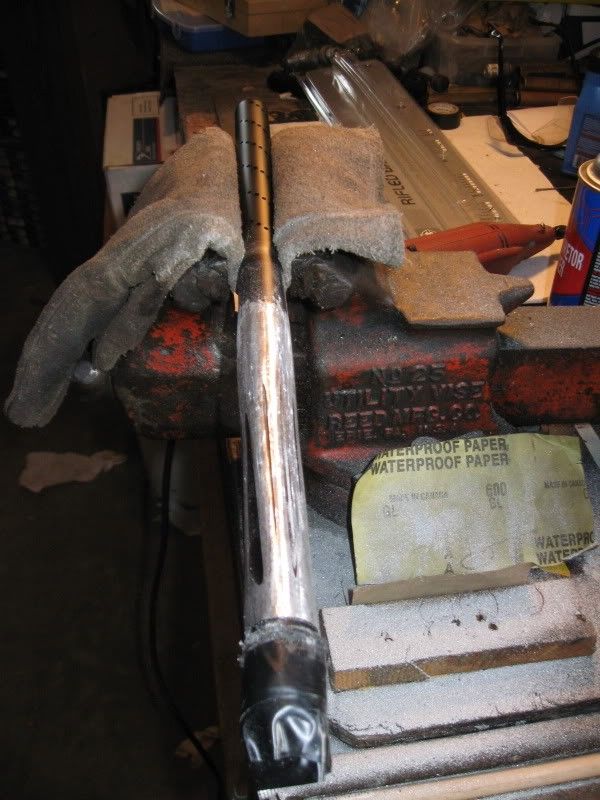
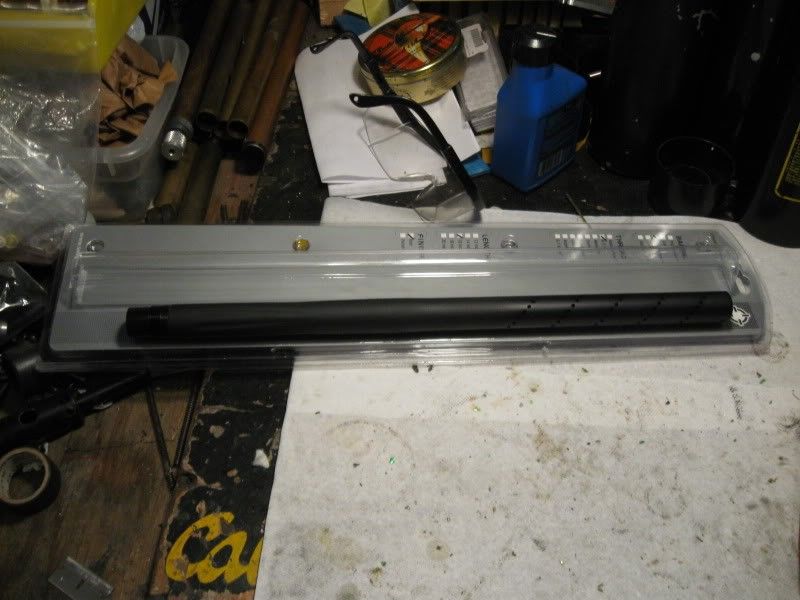
Polished AND cored out the power tube:
Polished (BELOW)
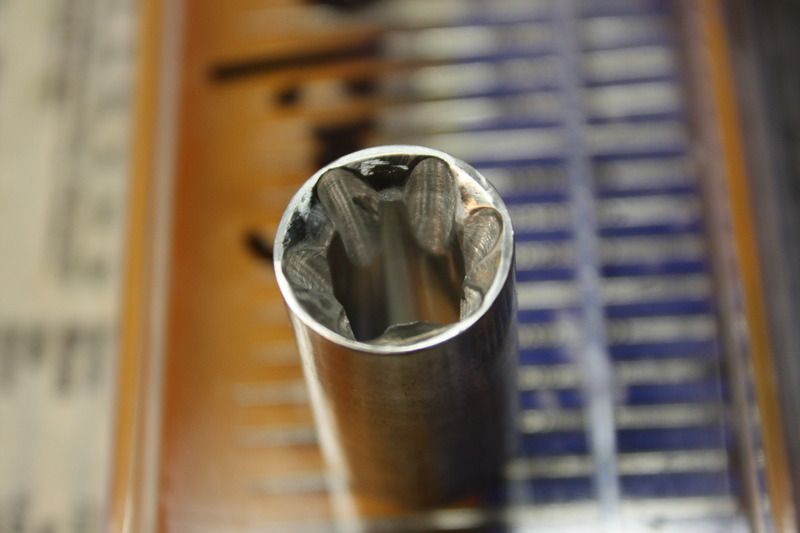
Stock back of the powertube:
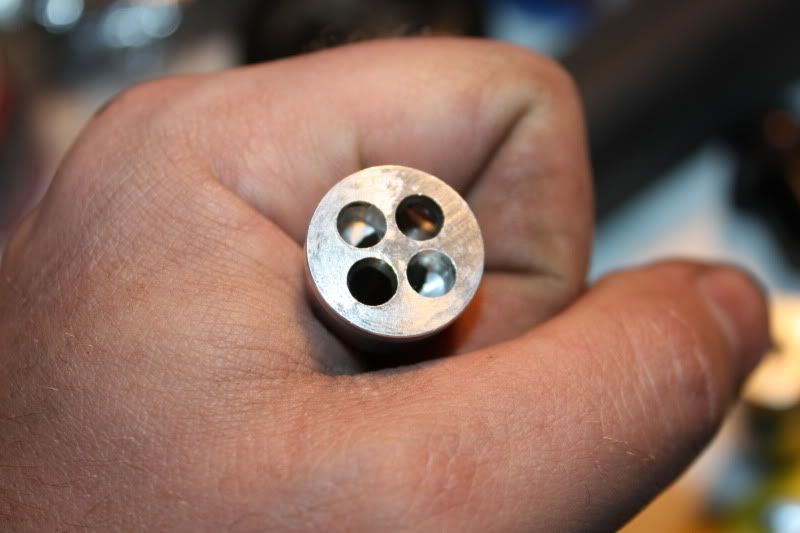
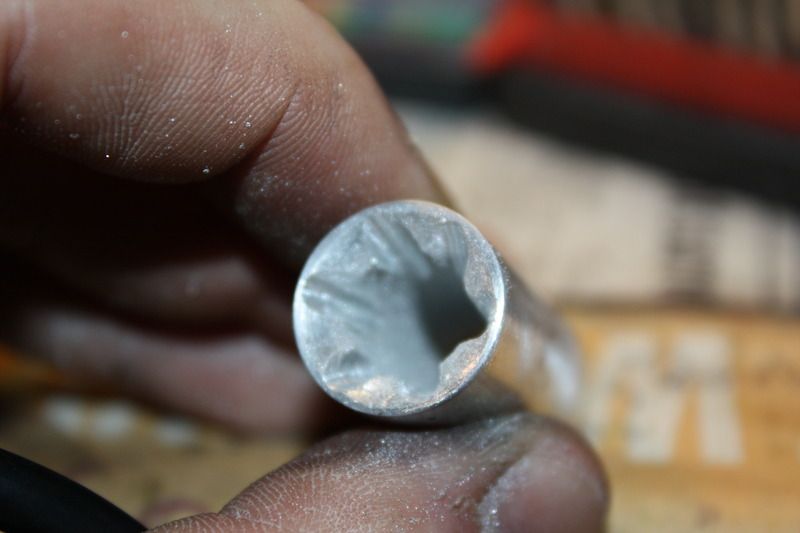
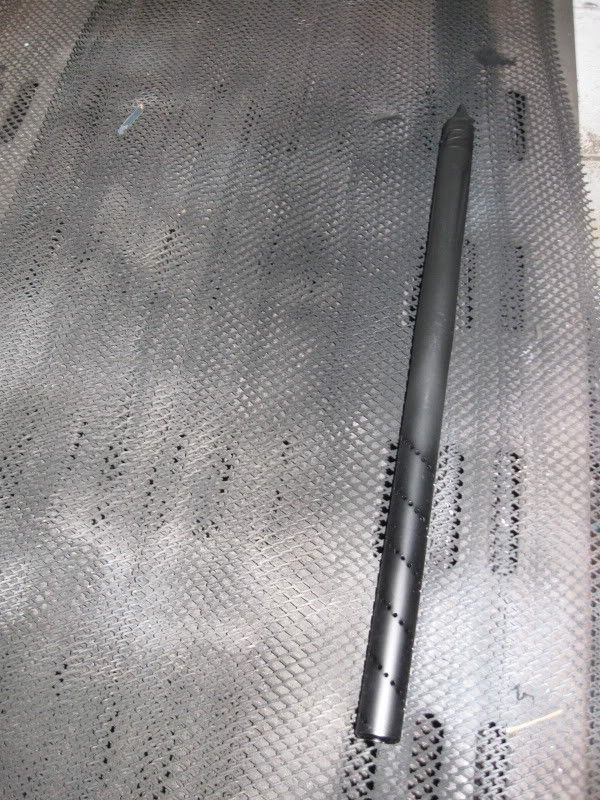
Cored Out for maximum flow:
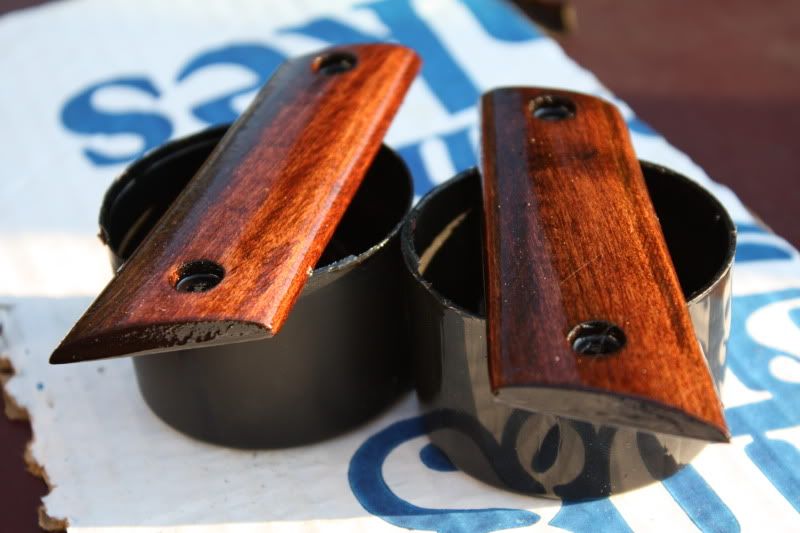
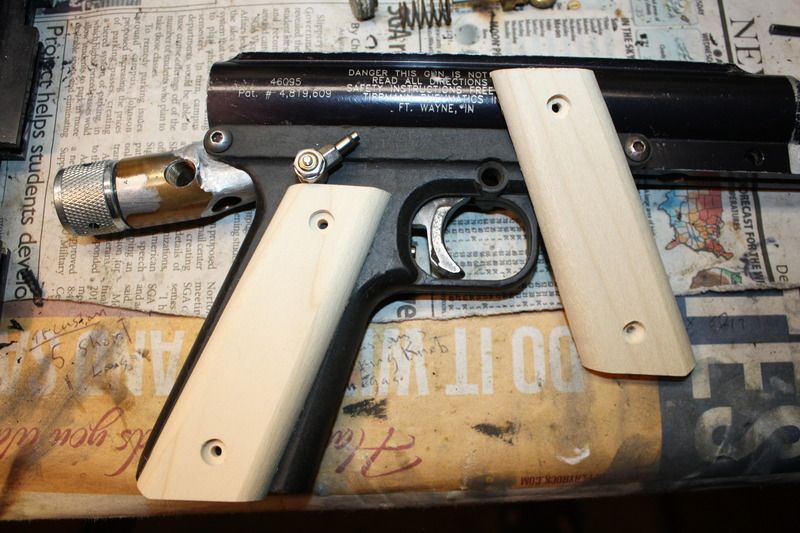
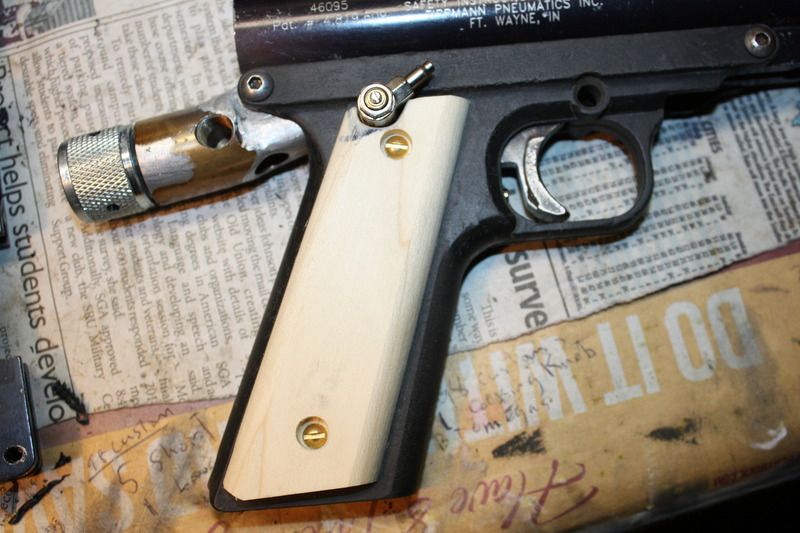
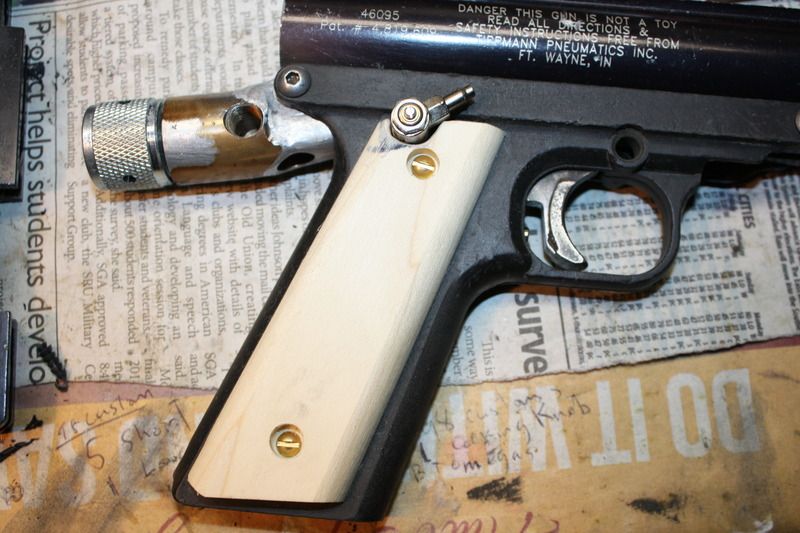
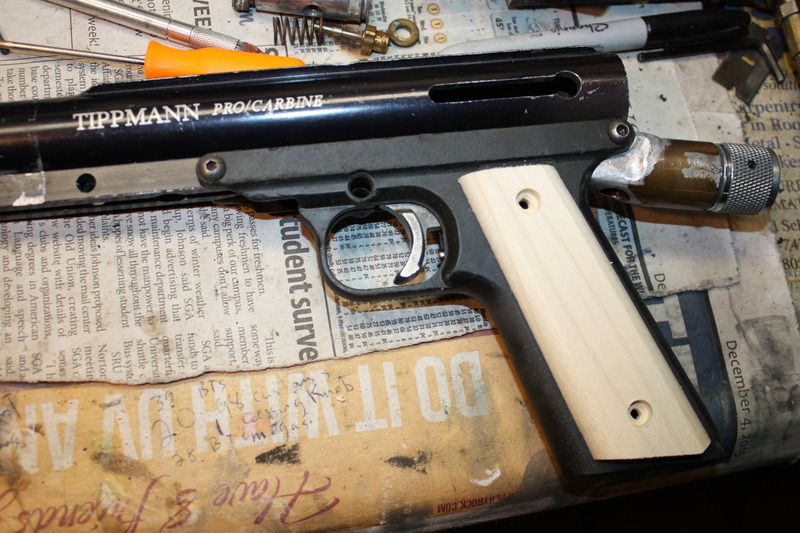
Homemade .45 panels
Stained with 3 coats of Varnish (BELOW)
Polishing the hammer:
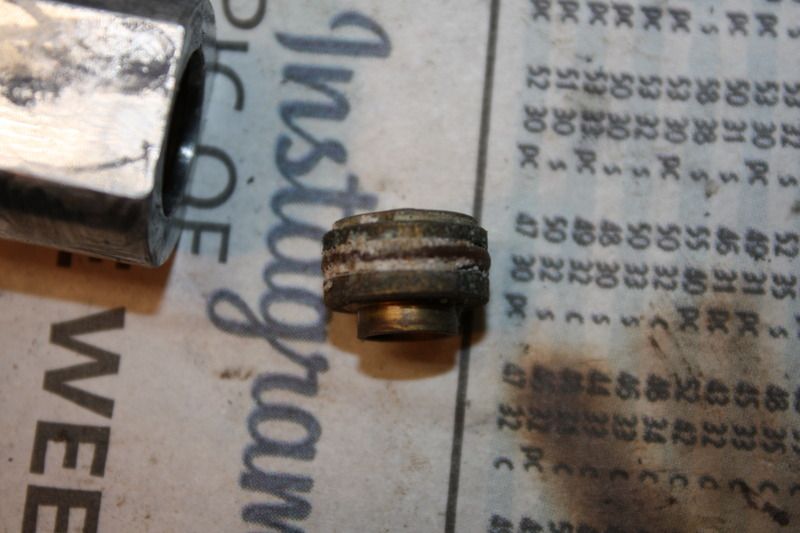
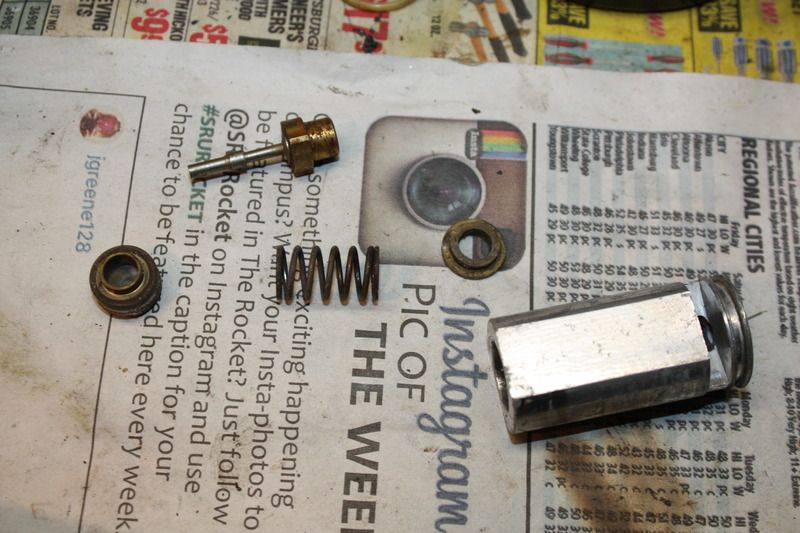
Polished and deburred the valve seat:
Stock Valve Vs. Modified valve

I was trying to reduce obstruction of the exhaust port. Not sure if it improves things:
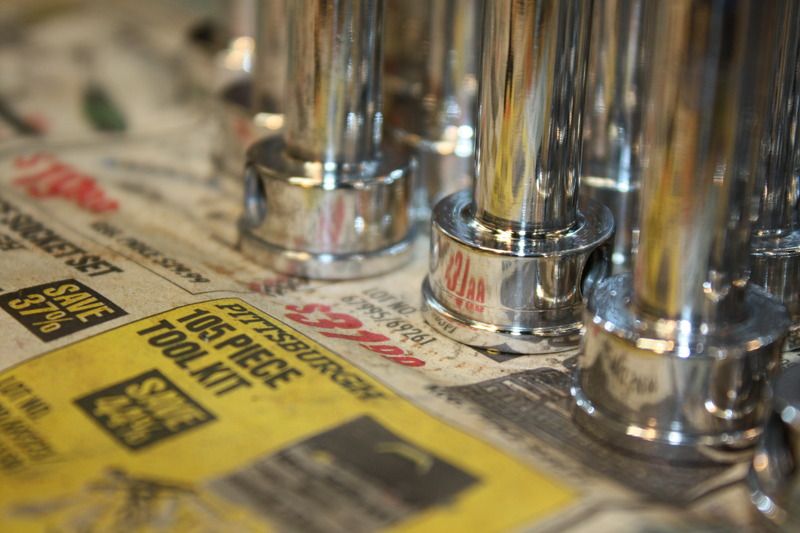
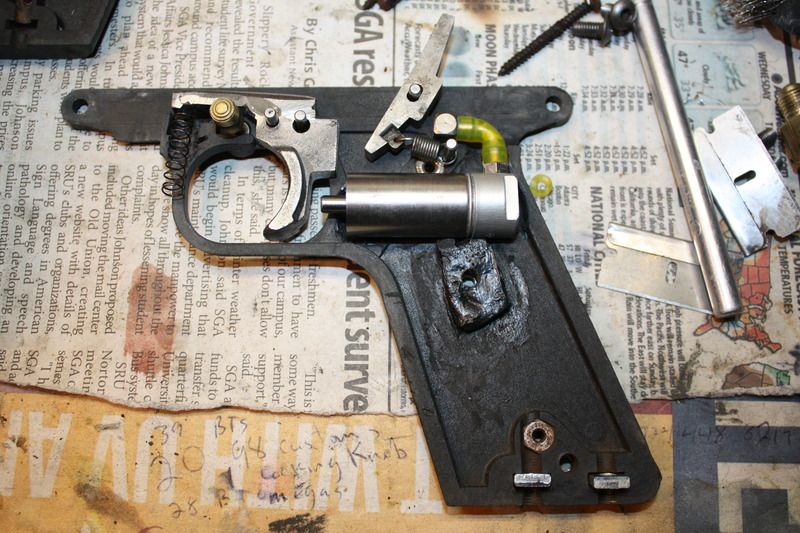
Everything is Polished and ready for assembly:

FYI Disclaimer - There are cowboy airsmiths that will say polishing ruins the marker. The polish we use is a really fine grit that merely buffs and doesn't reduce the aluminum mass. Polishing the internals with the compound that we use for raw aluminum and steel prevents oxidation and gumming that will throw off the inner tolerances and make the marker not recock correctly. It's lower maintenance over time.
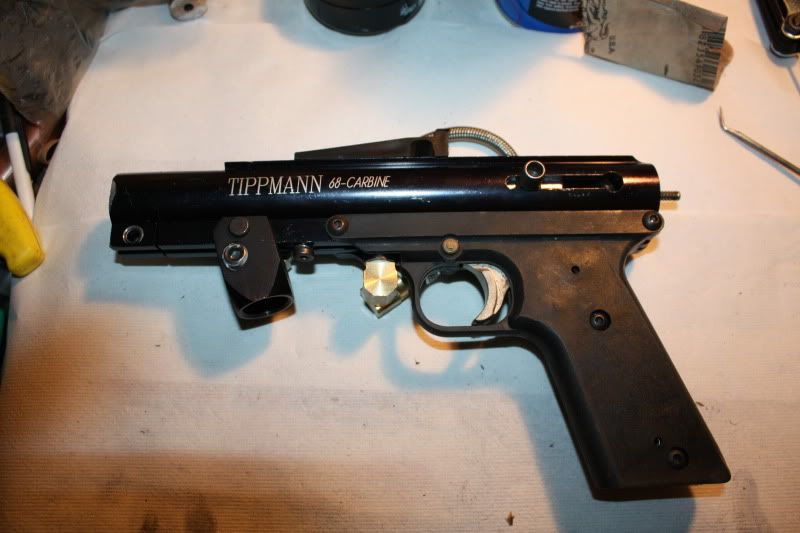
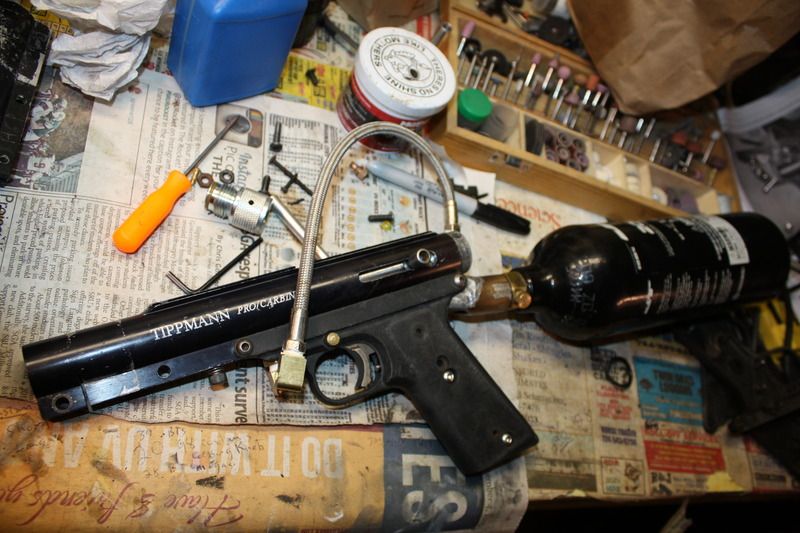
Vertical ASA mounted:
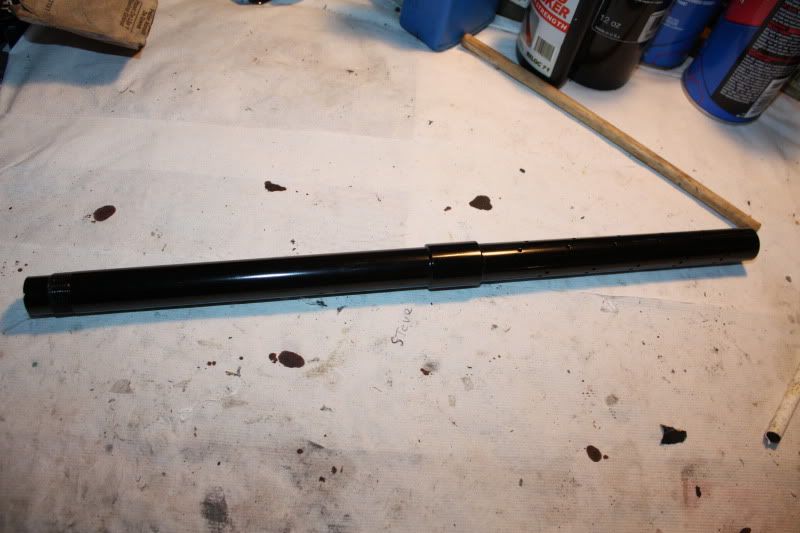
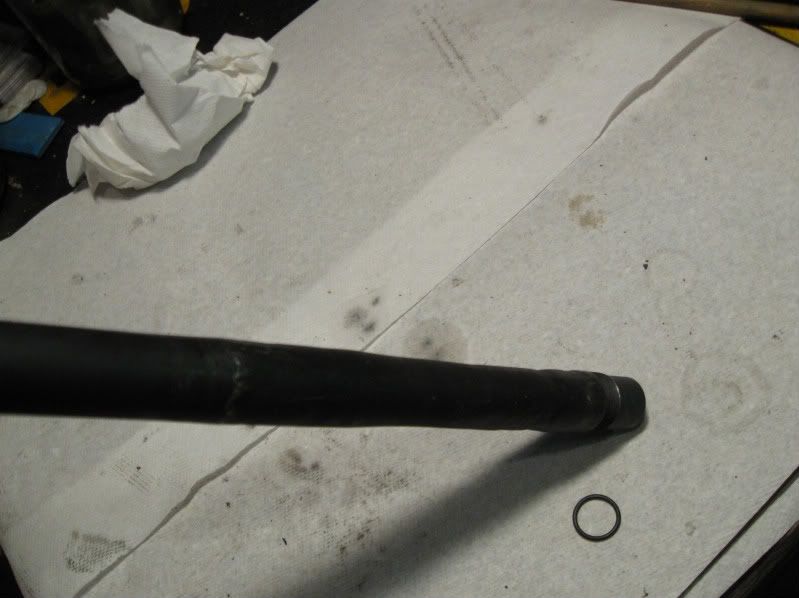
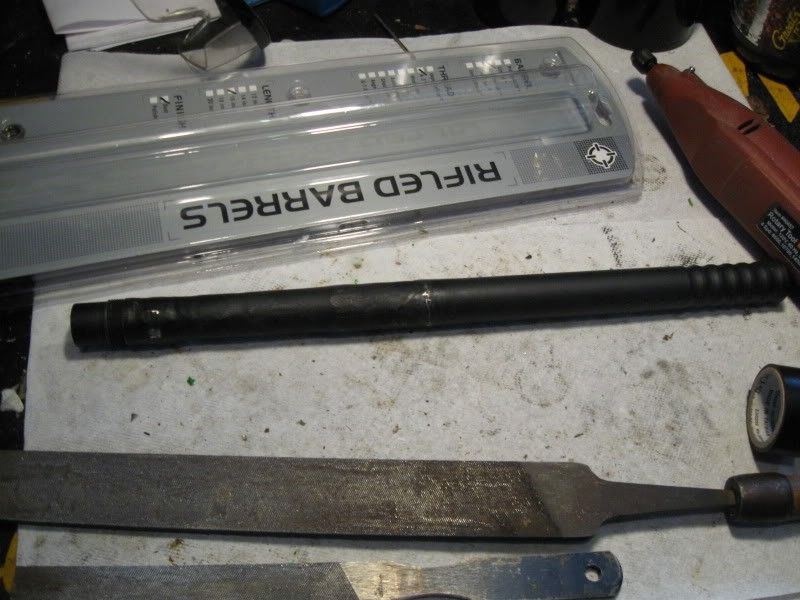
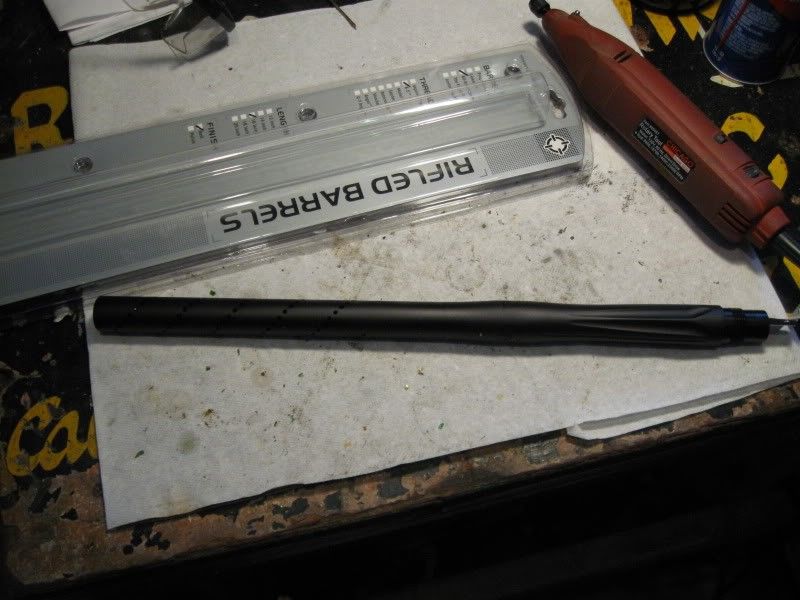
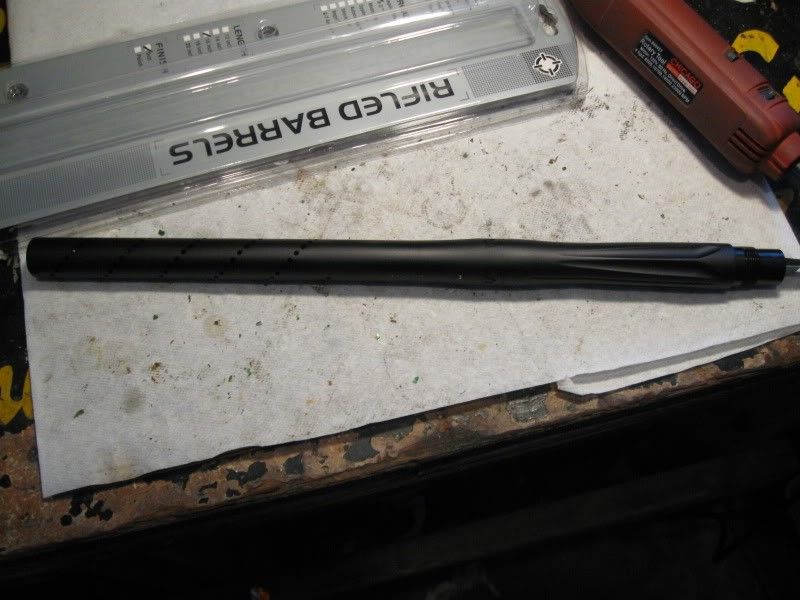
True Vintage All American Barrel for the Prolite. Found it on PBN for 20$.
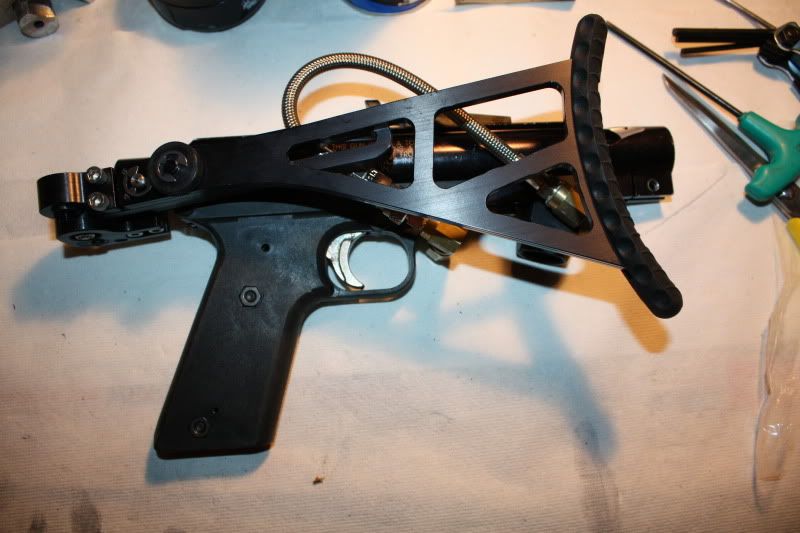
Brand new JCS Folding stock. I love these stocks. They are awesome! Almost as good as the Air Tipps Car stock from 15 years ago.
Final Assembly Pics of Entry #1 Coming (Scroll Down)
Well, this is the end of Entry #1's process build. And if you think that is cool, be sure to check out Entry #2 for some real insanity. *Scroll Down*
Hello,
This post is for the Low Brow Show Down Contest. See Flier:

The jist of the contest is that everyone gets the same markers - either a Tippmann Prolite or Tippmann Procarbine. The Pro Carbines are of the 3rd and 4th generation of Carbines that are circa 2000-2002 judging by the serial numbers of the ones I have seen. These markers are old and retired rentals from a massive paintball field (Cousins Paintball). Supposedly, there were over 700 of these markers that were retired.
Parts for these Tippmanns are a bit hard to come by these days. Tippmann no longer carries most of the parts, except for what crosses over to other marker model platforms. This is why each contestant would get a minimum of two "randomly picked" Tippmann markers. Cannabalize one marker to make another work. I personally chose two packages of 4 randomly picked Tippmann markers at $65 each and this gave me two entry spots. The original plan was to take two markers from the bundle to enter as two entries and give the other six Tippmann rentals to students and novice airsmiths so they would have a marker and also coerce them into participating in the contest. Plus, tinkering is way more fun with other friends working on the same projects. I had no intention of cannibalizing parts from my markers and I wanted to make both of my markers work. The bonus was that I got to give away six markers to folks that needed gear.
The contest is called "The Low Brow Showdown". Emphasis on "low brow", meaning that each contestant was to assume the mentality of a semi non technical person who could not machine or 3D print new parts from scratch. And all the work has to be done by the individual contestant. Other stipulations are the following:
- No lathes;
- No Mills (CNC)
- Hardware store parts are acceptable;
- JB Weld and other epoxy's are welcomed
- Replacement parts are good;
- Parts and upgrades from other models of markers is acceptable;
- Welding is acceptable;
- Heli-coil is acceptable;
- Taps and die are acceptable;
- No Annodizing permitted;
- Paint and or polishing is permitted;
- Rotary Tools like Dremel or Harbor Freight specials are allowed;
- Power Tools are acceptable;
- Melting Plastic is totally cool.
- Hand tools are allowed.
To put it simply, the contestants had to assume that they were some poor schmuck or student who acquired cheap rental crap, and has to fix it up as cheaply as possible to be able to compete on today's paintball field against today's technology. Awesome, right?
So before going any further, some context should be shared. I, personally, have never owned a new marker. Could never afford it or justify the purchase. I've always had used gear, beat up gear, or rental rejects which I modify to make the monster stuff that I kick butt with on the field. I've gotten so good at it that I supply and arm a massive paintball crew called the Merry Band of Brothers and the student organized Indiana University of PA Paintball Club. I've also been in the sport since 1987, and airsmithing since 1995. So, for me, I wanted to do something that is one of two ends of a spectrum for someone who finds themselves in a real life situation of fixing up junk to survive. One end of the spectrum being to make a aesthetically pleasing custom Carbine with conventional upgrades available today in 2016; and the opposite end of that spectrum being something sinfully custom and most likely ugly. Think of my two entries as examples of Yin and Yang.
This is what was sent me - 8 markers:


AND they were filthy!! Sand, grime, dirt, rust, and dried tar, AKA Valken Infinity paint. Just handling the markers did this to my hands:

Entry #1 is a "typical" Custom Pro Carbine build if one were to build one of these today with legit upgrades for the marker. Since the Pro Carbine hasn't been made in almost 15 years (at the time of this write up) much of the upgrades are rare like "hens teeth". Some are expensive. Some are laying about in a junk bin at the neighborhood paintball shop. And then there's Ebay.com or places like PBNation and MCB. Even though I own a Carbinethat I used to use years back, I followed the suggestions given forth on Warpig.com's FAQ page or the Tippmann Carbines - http://www.warpig.com/linkout.cgi?ht...n.com/jspharm/
Ironically, some of the upgrades can still be bought from the manufacturer. I still had the number for Blackpoint Engineering AKA JCS Paintball and bought a folding stock for the Carbine for $10. Other upgrades came from junk bins from local shops. The barrels were "new old stock" from another local field - Clearance special. The venturi bolt was an ebay special from a few years back. In short, Entry #1 was built by a person who knew how to use Google to find upgrades. And this entry was meant to be aesthetically pleasing.
I hit a snag early on with Entry #1 Pro Carbine. As I mentioned before, I kept two of the eight Pro Carbines that were sent to me. The remaining six were given away to students from the local paintball club, and also to novice airsmiths attempting their hand at this contest. Cleaning the grime off of the Pro Carbines was proving to be a challenge. It was suggested from someone we trusted very much that we should get the "purple" cleaner stuff in a "purple" jug from the automotive section of Walmart. We did and one student took his disassembled Pro Carbine and stuck it in a pot with one part "purple" cleaner to five parts water and dawn dish detergent; and he boiled the marker. Everything that was plastic polymer came out clean and new looking and needed very little wire brushing. On the other hand, everything anodized aluminum was "stripped" raw and pitting occurred on the inside and outside of he aluminum. WTF?
I felt really bad and decided to give up to the student the body of my Pro Carbine for Entry #1 so he could still get his carbine working. This left me with no Pro Carbine body. I had all the internals and the grip frame, but no body. For Entry #1, I was pretty much screwed until early November 2016 when I was visiting a friend that had a box of Carbine (generation 2) junk. In the box, he had a body, but the body was for the Carbine, not the Pro Carbine which took the shroud/feedneck foregrip. The Carbine body had picanny rails where a feed neck would slide into place over the feed port. One problem, I did not have the elbow for the Gen 2 Carbine body.
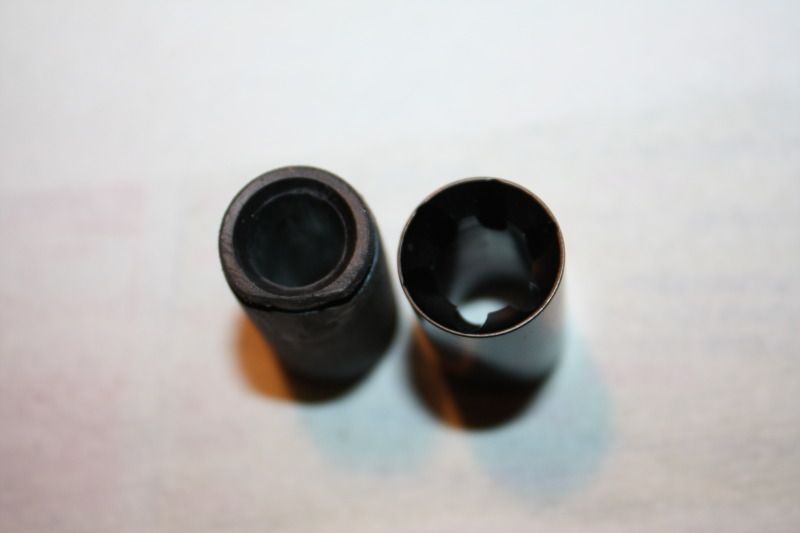
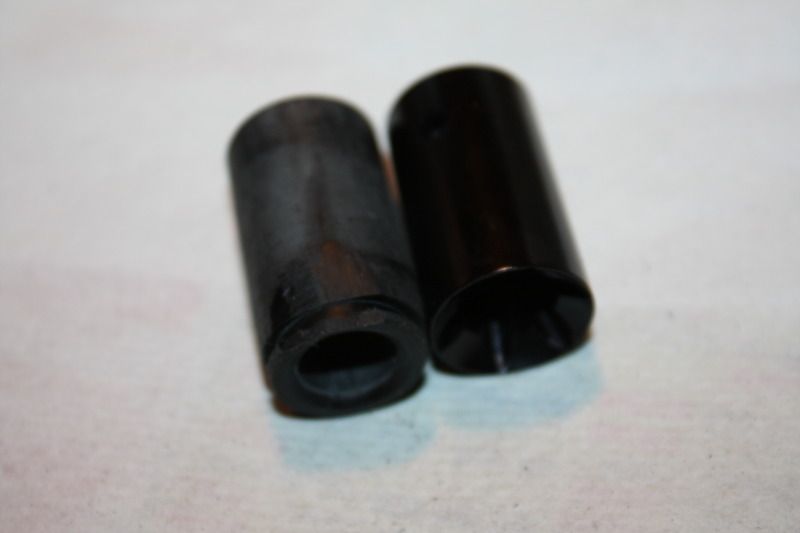
So to clarify with pictures, instead of having a body for the Procarbine -

I had a body for the Carbine -

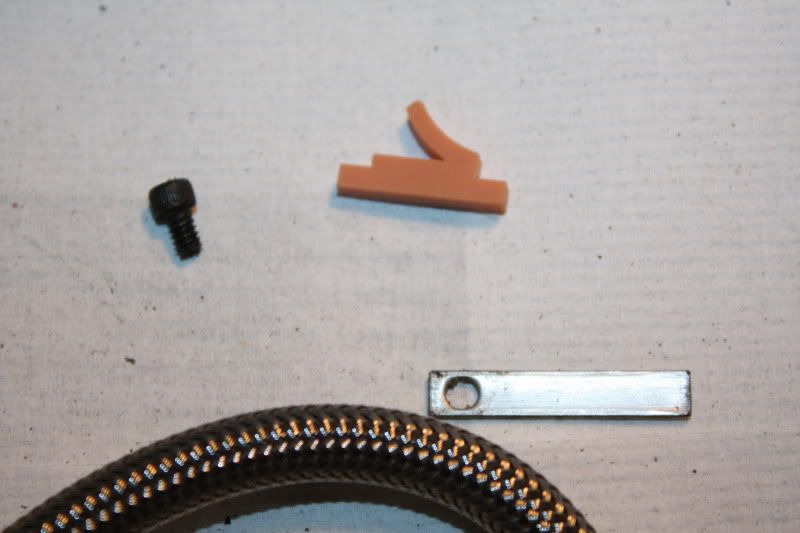
And the Carbine needed this feedneck -

I tried to locate the feedneck through the usual means. No luck. Some folks even scoffed at me for asking. Wow. So this meant that I had to improvise. And out came the file hand tools. In the picture BELOW are two Carbine bodies. One is the actual rental Carbine that belongs to the school club and the other one with the picanny rails for the feed neck have been ground off / filed down and the body had been contoured to work with the Pro Carbine front shroud:

The Carbine body had a lot of black spray enamel paint on it. After a good bit of paint thinner, I had this really nice body:


And the shroud now fits and the balls load from the Pro Carbine elbow into the breach of the Carbine body (BELOW).

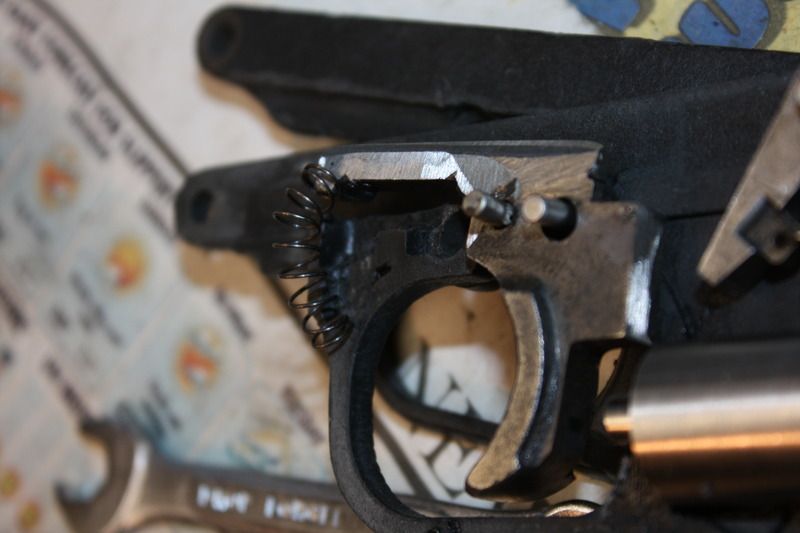
But I still had one problem that I missed when I selected the Carbine body. I ran into a major problem during reassembly. The steel braided line adapter is a pressure fitting that has a face that presses against the oring seal of the valve and makes a seal. The original generation of carbines had a different style of valve that was later redone/swapped out to the CVX style of indirect exhausting. When this was done, the carbine receiver body needed to be converted to take a 1/8 27 thread. Instead of swapping out the body completely, Tippmann just drilled and retapped the body of the carbine to take the 1/8 27 NPT thread. My Carbine was one of these that was retapped. The main issue with the retapping of these bodies was that the threads were un anodized/not hardened. But from years of use - threading in and unthreading, the threads have worn out/stripped from tightening the adapter down enough to get that seal between line and valve to occur.
And so, this is what I have to fix - :

ABOVE: The ASA hose threads are thoroughly stripped out. Hmmph.
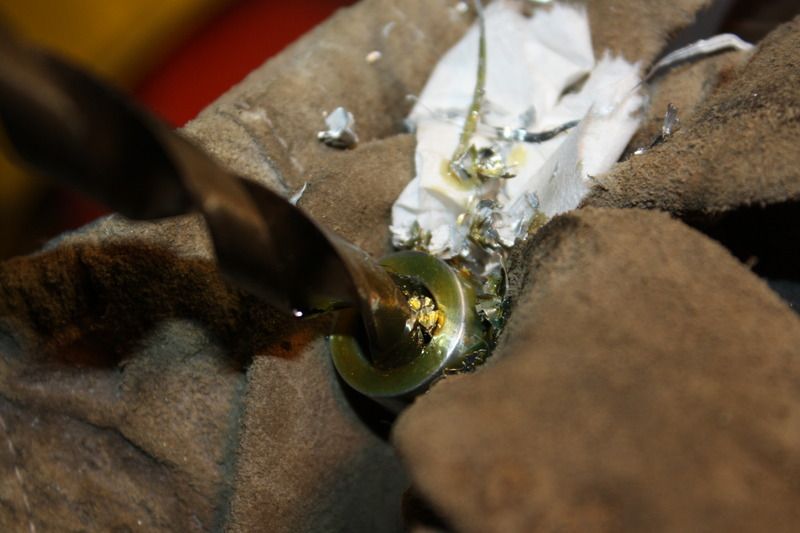
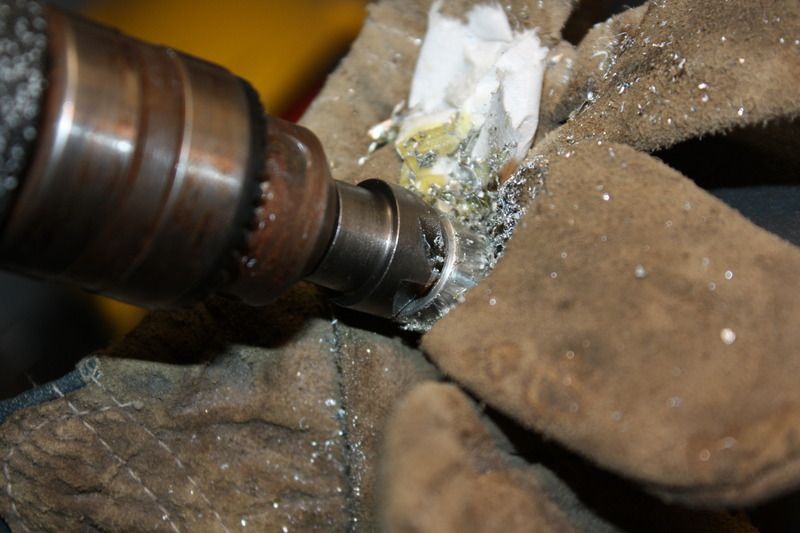
BELOW: More pics of the problem:


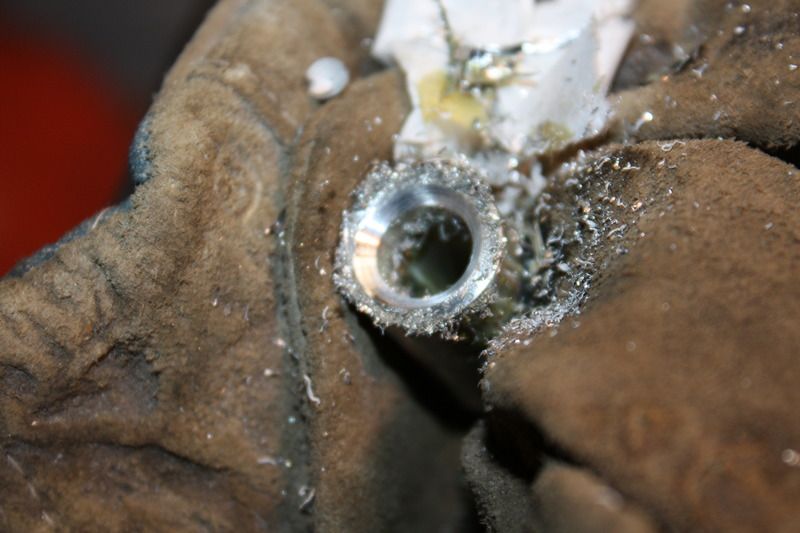
Since the threads themselves are not holding air pressure, I could theoretically heli coil the body / use a thread repair kit. I did check various places for a 1/8 27 NPT thread repair kit. Most places could not order it. The few places that could were industrial places. Fastenal to the rescue:


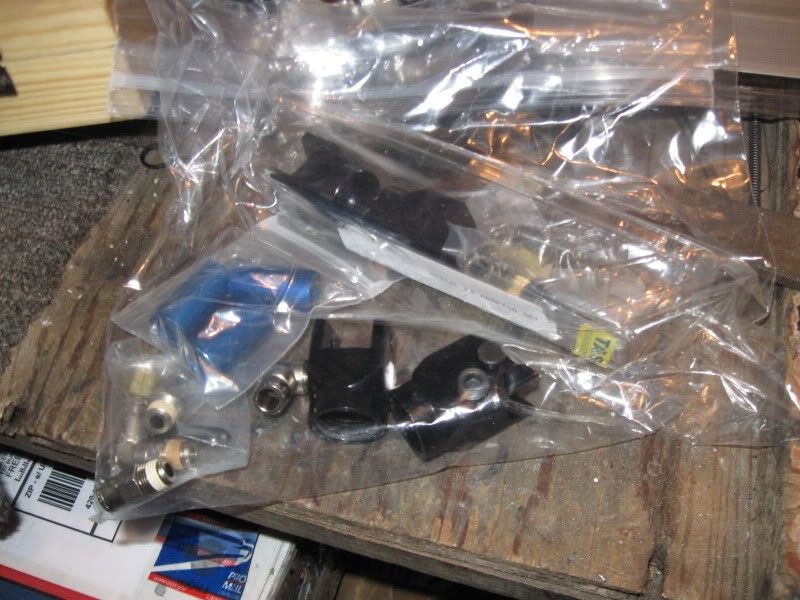
New parts:

And More NEW upgrades from MCB, PBNation, and Ebay. Paid $5 each for the items.

Replaced the front bolt with a venturi bolt:


Polished AND cored out the power tube:
Polished (BELOW)

Stock back of the powertube:

Cored Out for maximum flow:


Homemade .45 panels
Stained with 3 coats of Varnish (BELOW)

Polishing the hammer:


Polished and deburred the valve seat:

Stock Valve Vs. Modified valve

I was trying to reduce obstruction of the exhaust port. Not sure if it improves things:

Everything is Polished and ready for assembly:

FYI Disclaimer - There are cowboy airsmiths that will say polishing ruins the marker. The polish we use is a really fine grit that merely buffs and doesn't reduce the aluminum mass. Polishing the internals with the compound that we use for raw aluminum and steel prevents oxidation and gumming that will throw off the inner tolerances and make the marker not recock correctly. It's lower maintenance over time.
Vertical ASA mounted:

True Vintage All American Barrel for the Prolite. Found it on PBN for 20$.

Brand new JCS Folding stock. I love these stocks. They are awesome! Almost as good as the Air Tipps Car stock from 15 years ago.


Final Assembly Pics of Entry #1 Coming (Scroll Down)
Well, this is the end of Entry #1's process build. And if you think that is cool, be sure to check out Entry #2 for some real insanity. *Scroll Down*


Comment