Inside Doc's Shop 2026

Collapse
X
 
  • Time
  • Show
Clear All
new posts
  • DocsMachine
    MCB Member
    • Jul 2020
    • 2699
    • Alaska

    #16
    Playin' Catch-up!

    One of the oldest projects on the table right now is, actually, kind of a free one. A couple of years ago, we had a kind of raffle, and I offered to bump up the giveaway with a certain amount of airsmith time.

    The winner and I pondered the options, and he settled on having me mill a 'Cocker body he had. The trick here is that we wanted to replicate the old "Fastback" milling, which was of course 3D profiled on a CNC mill. My CNC mill is still waiting for me to grow a suitable brain, so I did this the old fashioned way.

    As many of you know, the Fastback was not my design- I just marketed and assembled them- so I didn't have the actual models and specs. I did, however, happen to have one of the original bodies, which I had bought back at great expense, and could therefore reverse engineer.

    I decided to first try it out on a test dummy- a nearly literal scrap body, left from a batch I'd acquired years ago, where the shop had mistakenly tapped the front-block holes for 9/16"-18, rather than the 'Cocker's nonstandard 9/16"-24. Rather than scrap them, I cut most of them down to "MiniCocker" size and simply retapped the fitting for the correct screw.

    I think I had two of them left, so I dug this one out:
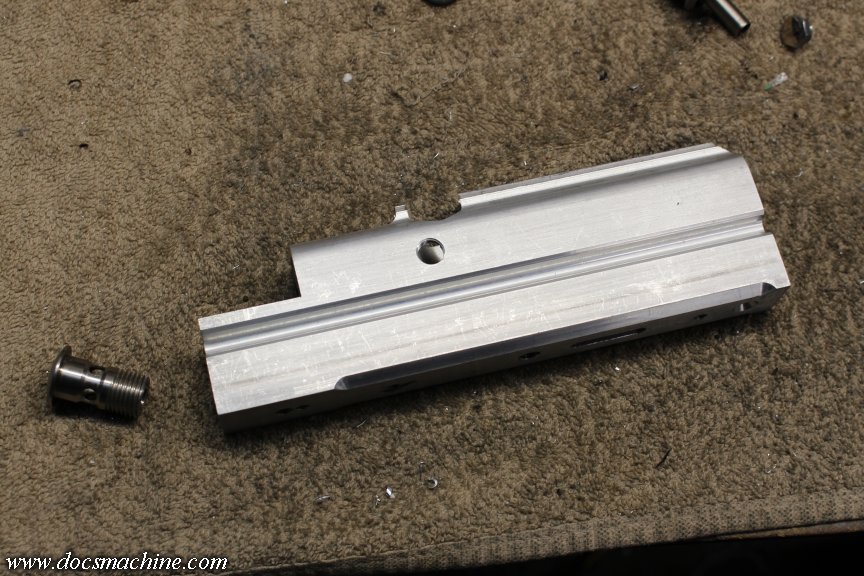


    I gave it a rough sketch based off the original body, to show where I could saw off the bulk:
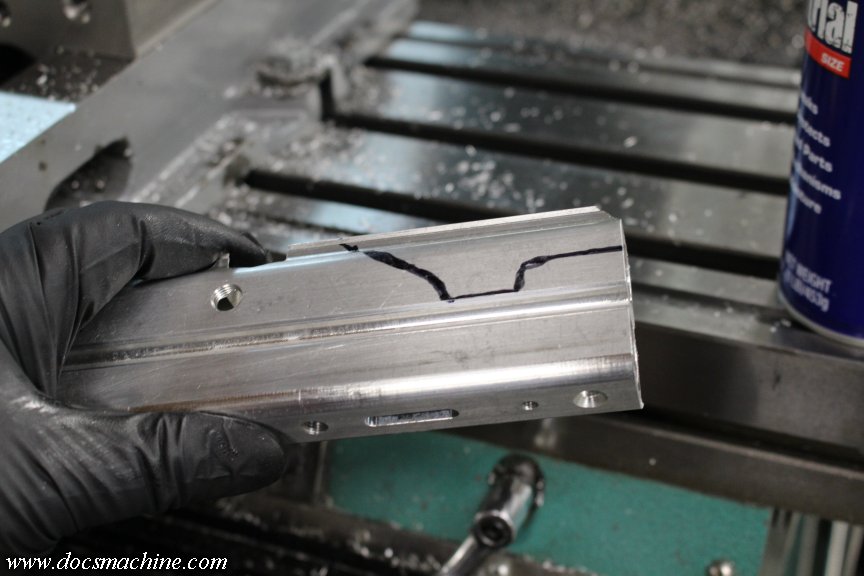


    Like so:
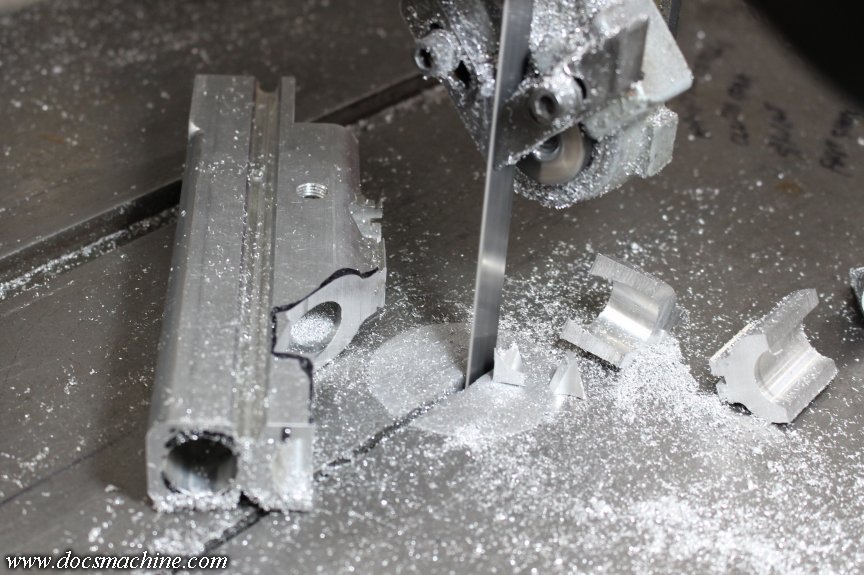


    Which saved a bunch of mill time.

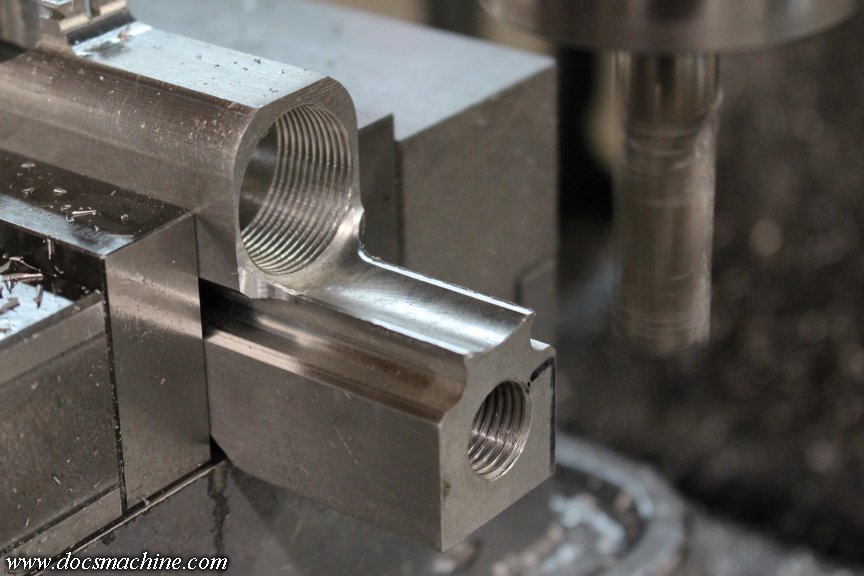
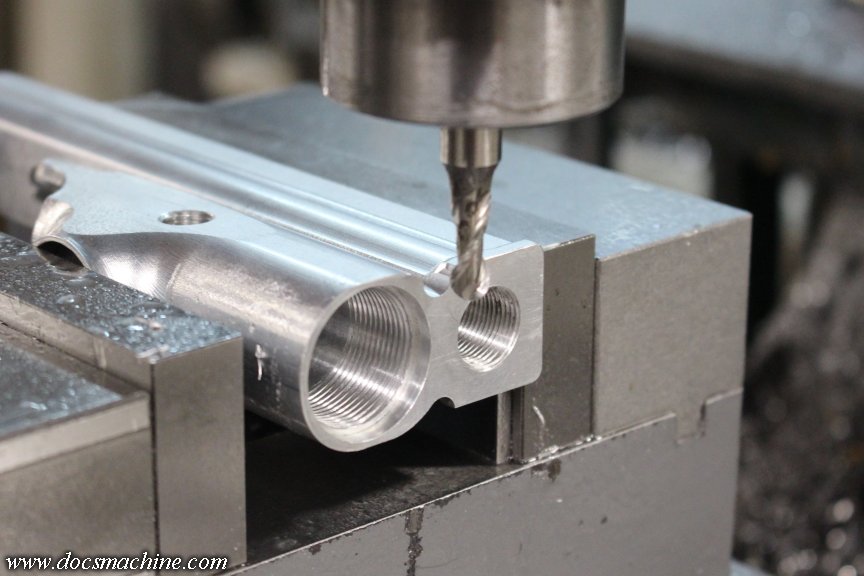
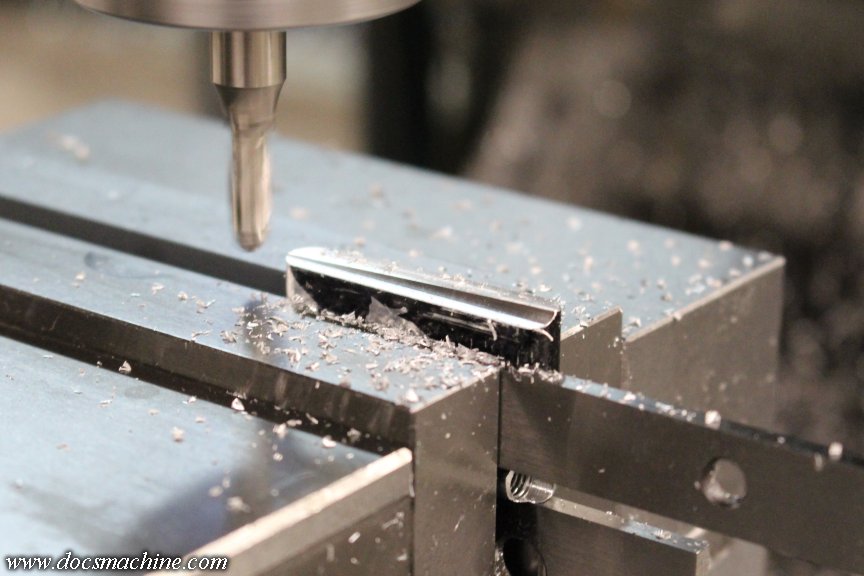
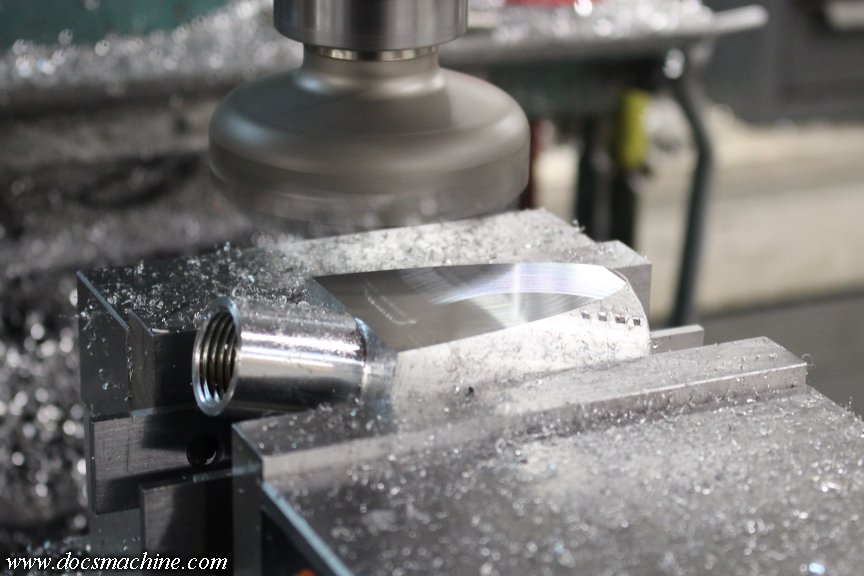
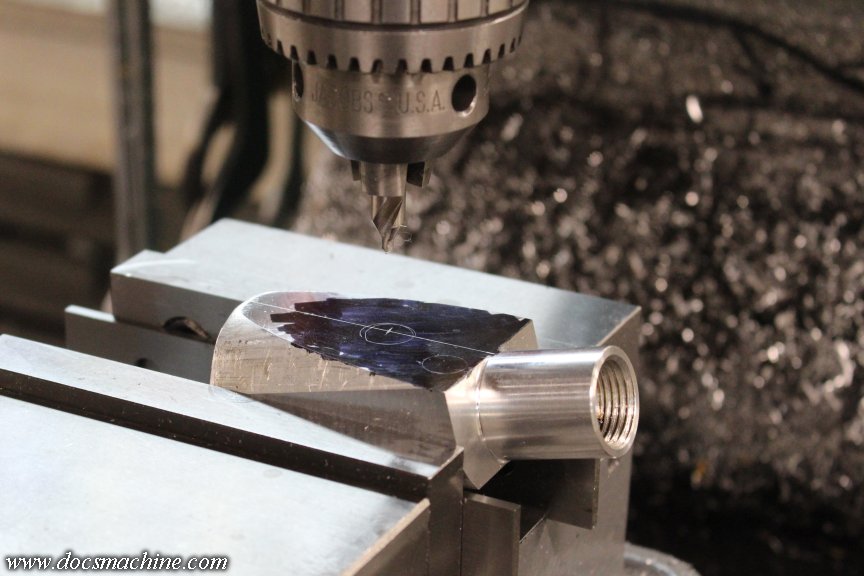
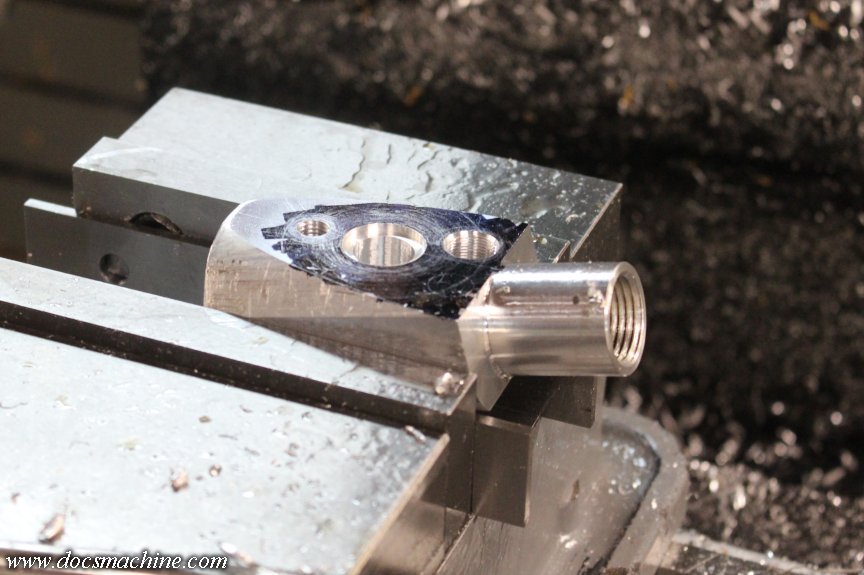
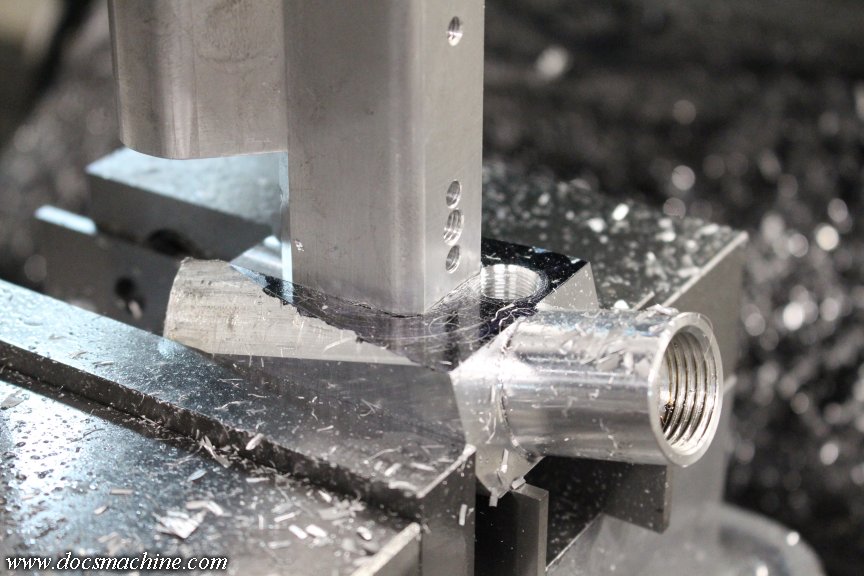
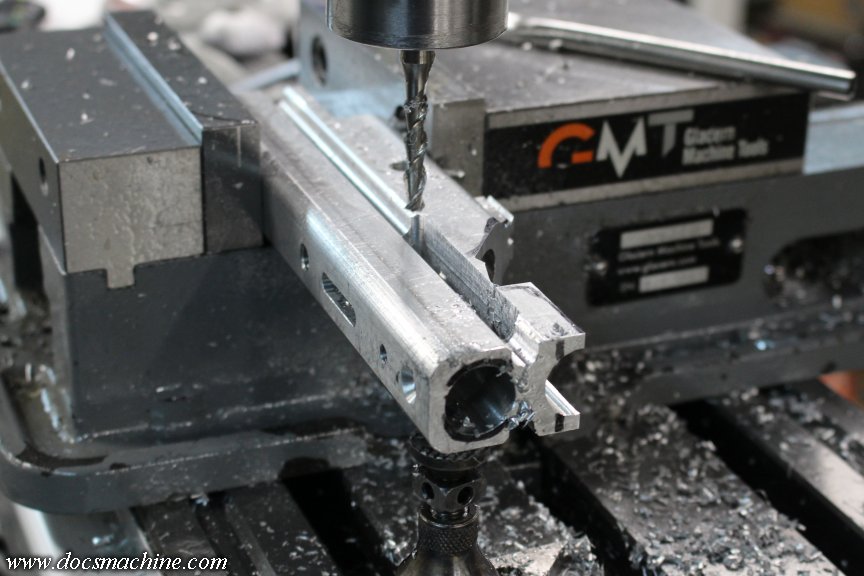
    The first tricky bit is the slot for the cocking sled, so I laid out in this kind of tricky setup, and predrilled some of it out...
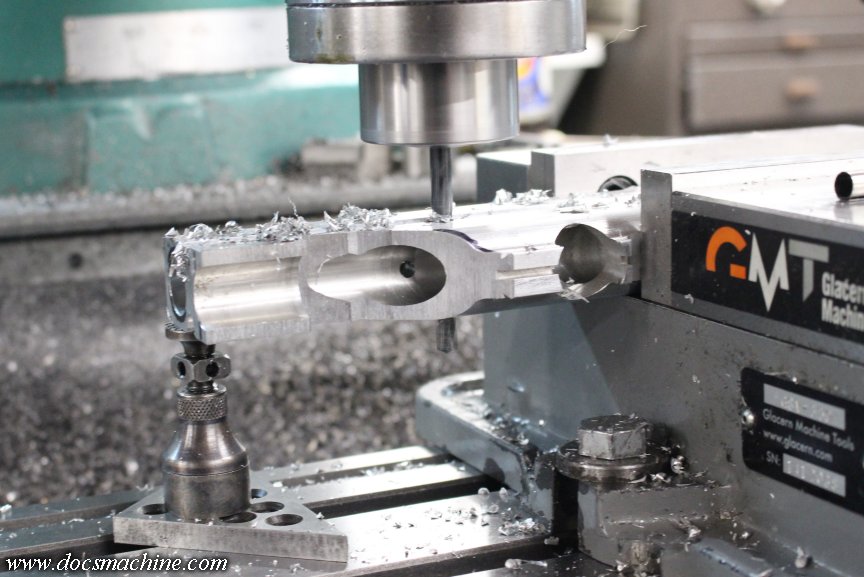


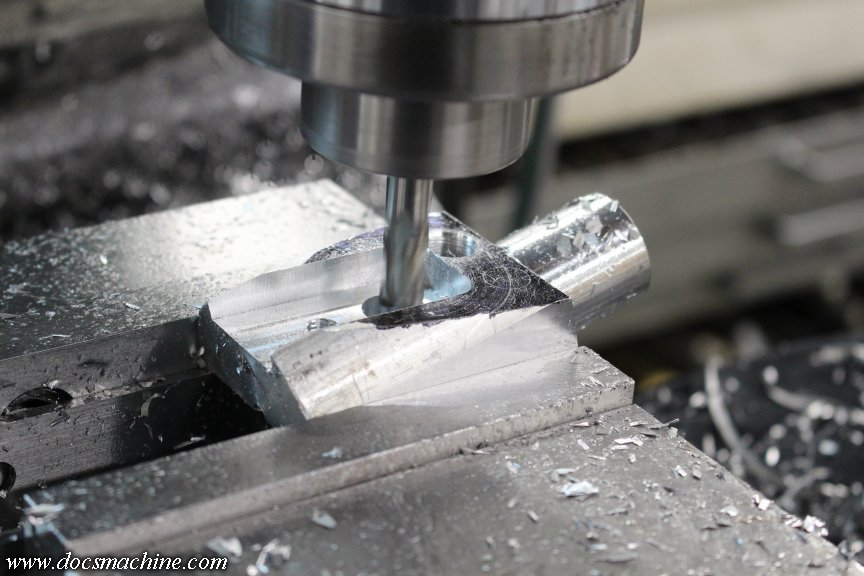
    And then milled the slot to size:


    To get the signature curve to the back of the body, I employed a large Rotabroach, which was much easier than setting up the rotary table.
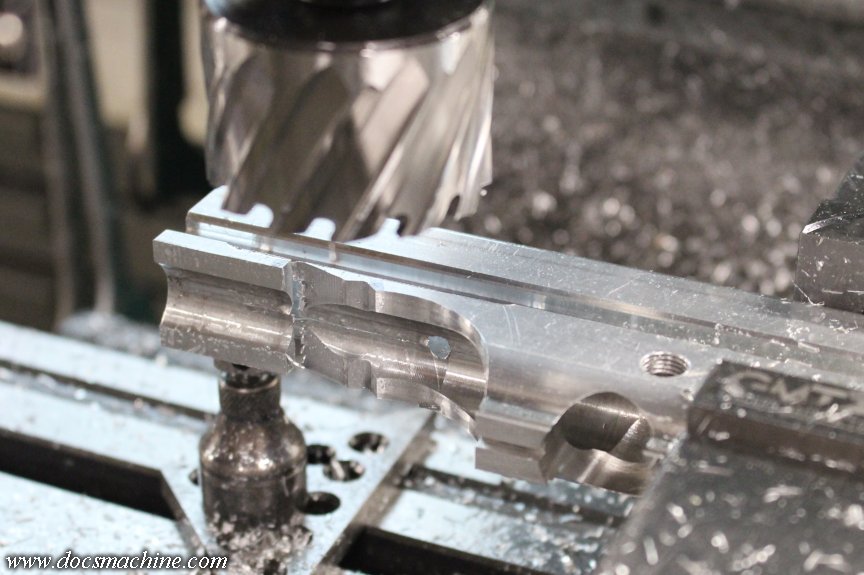


    I later figured I could just RB that section out and make one bandsaw cut to wind up with pretty much the same effect. But for now, a little more milling got us to here:
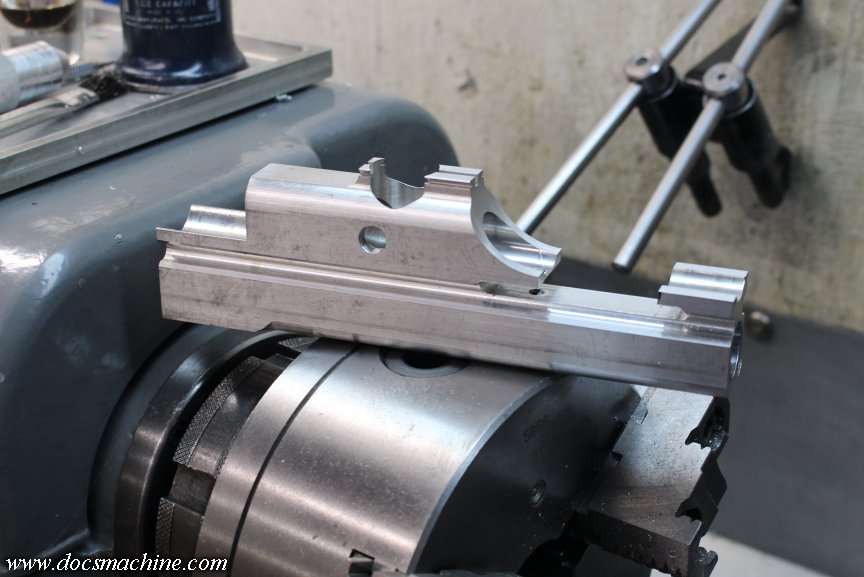


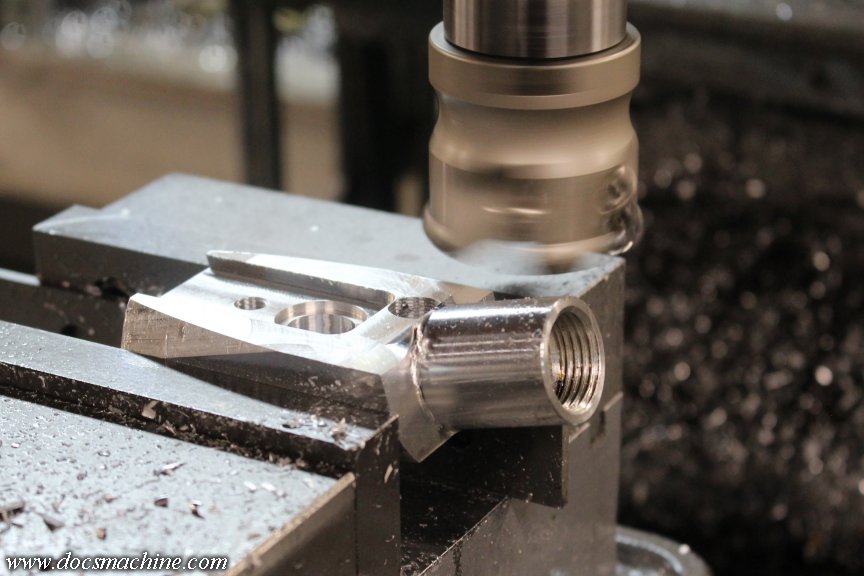
    Milled a bit of the 'wings' off in front of the breech...
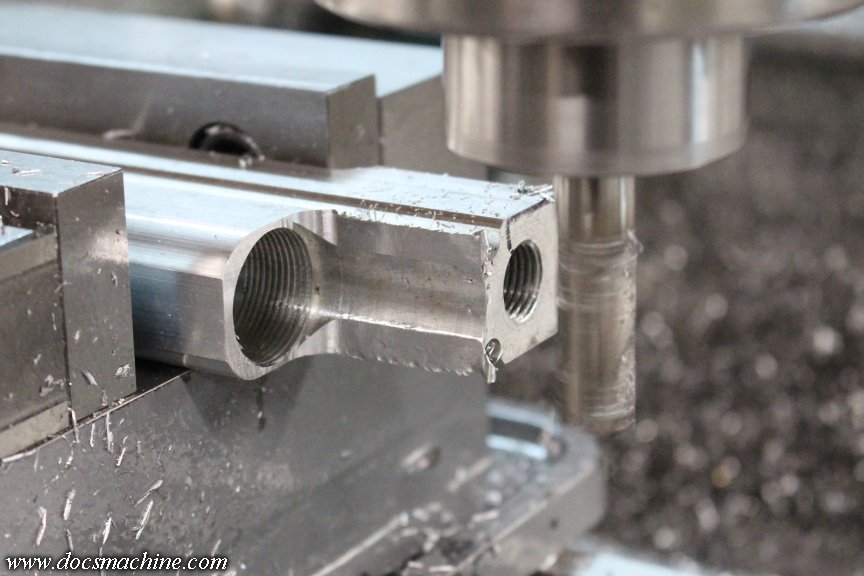


    Rounded the edges of the pump slots....
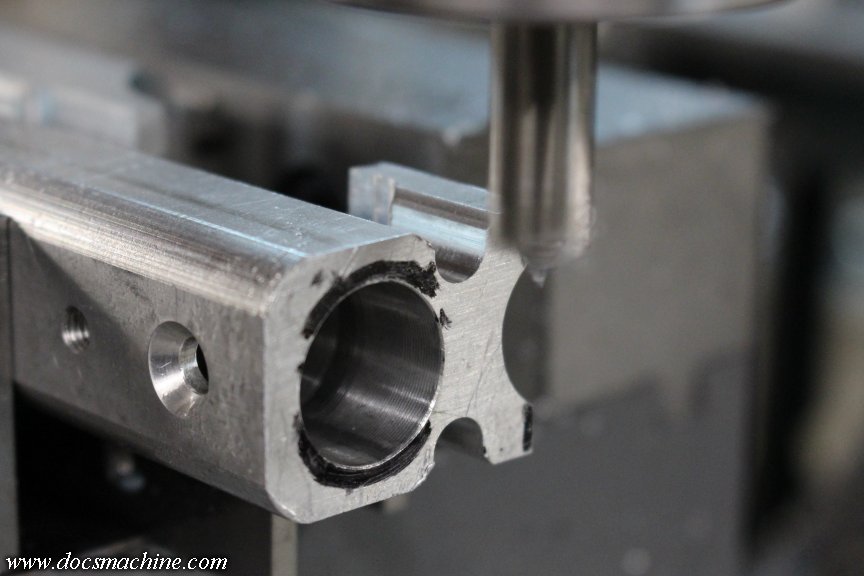


    Milled the bolt-pin/cocking lug slot...
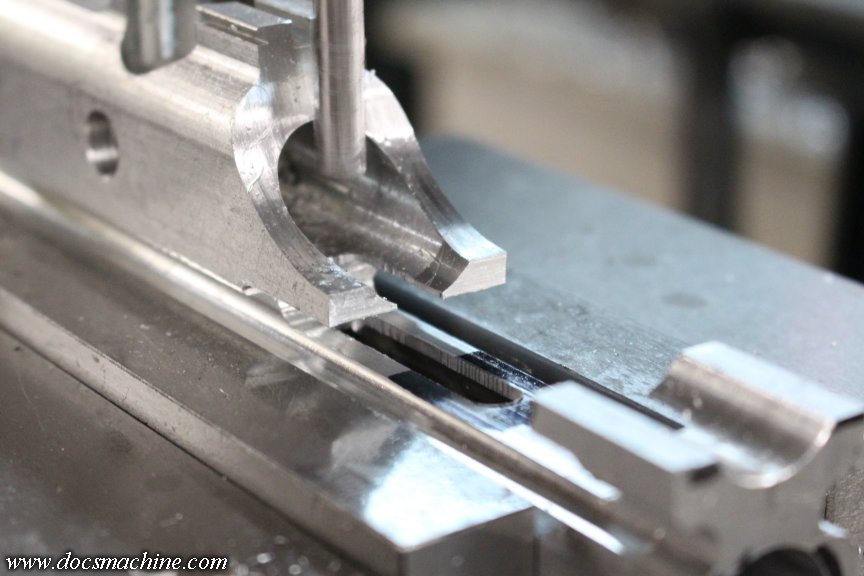


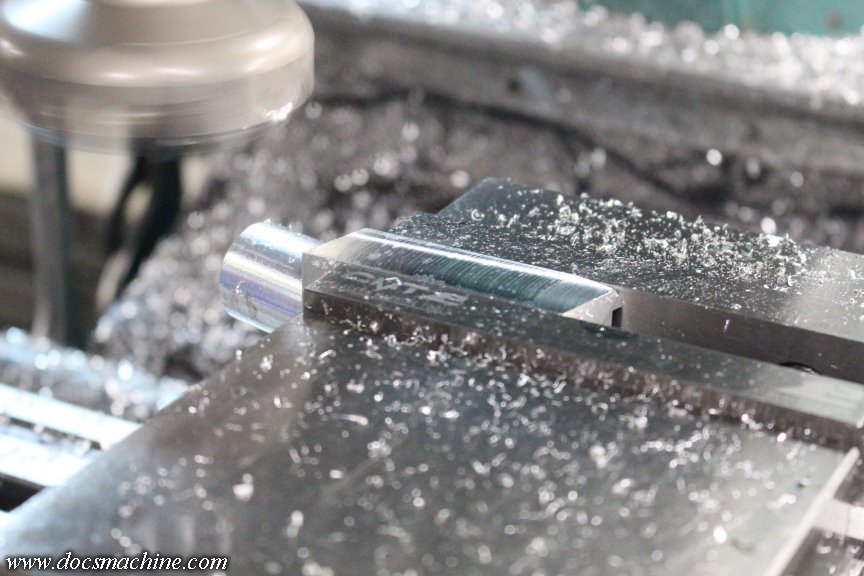
    Trimmed up the signature 'fangs' at the back...
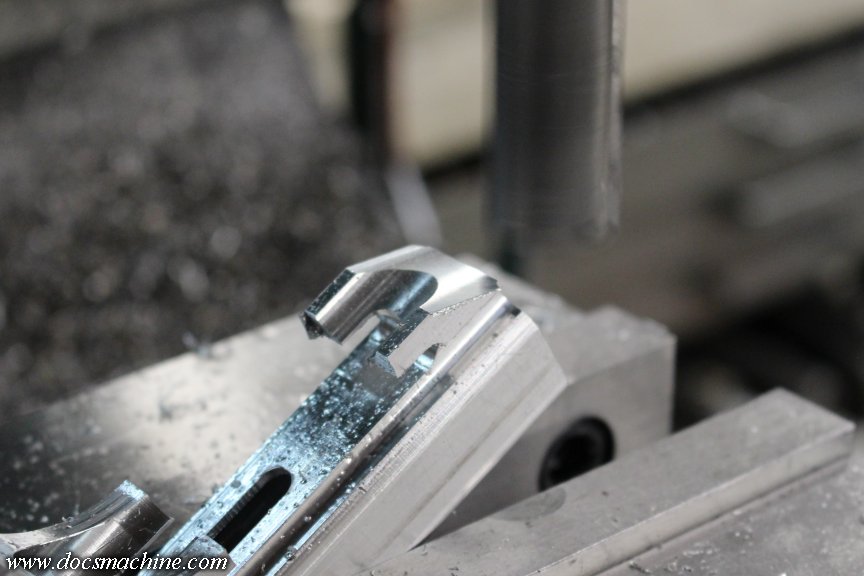


    Clearanced the stub of the remaining sight rail....
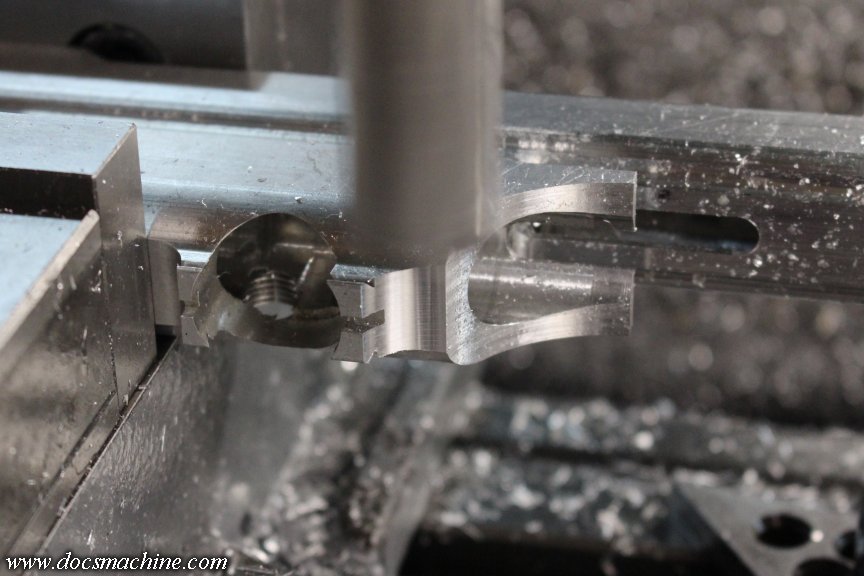


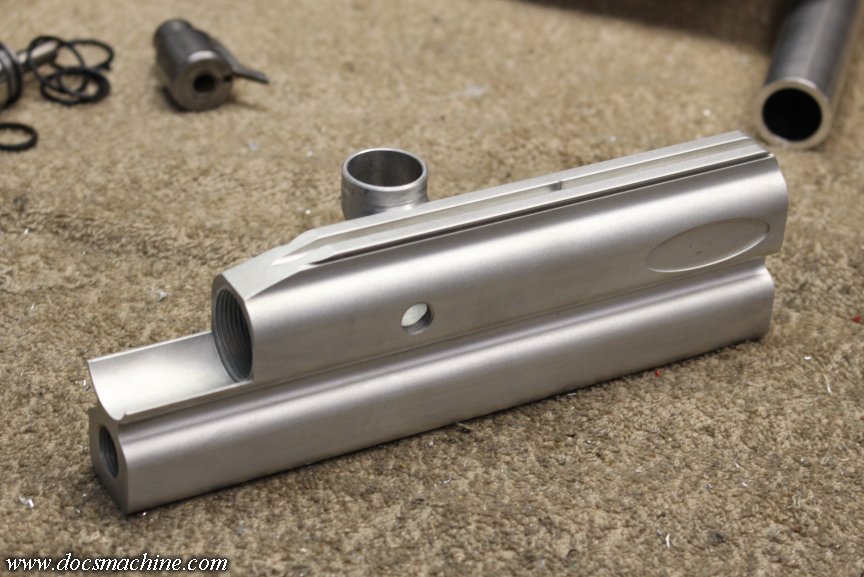
    And that gives us a close approximation of the Fastback, just without some of the 3D milling/profiling yet.
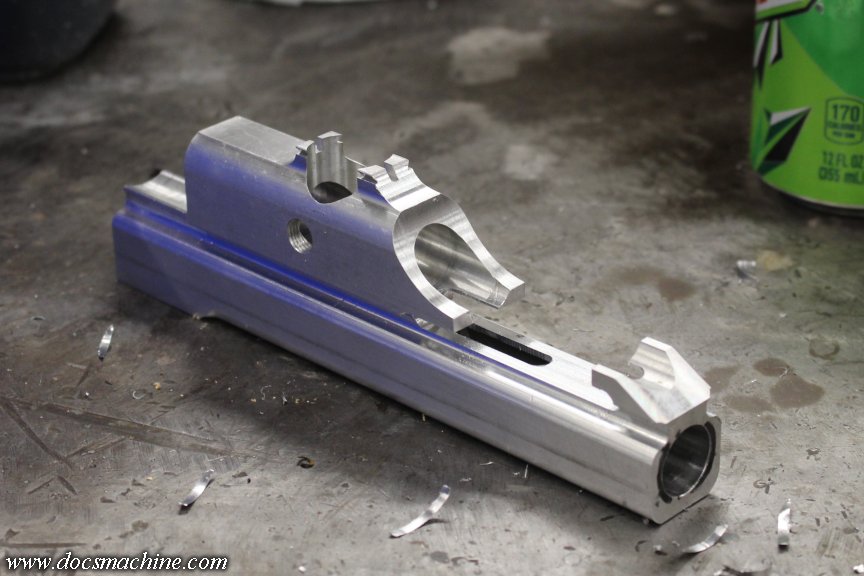


    With those specs close enough I had reasonable confidence in them, I took the customer's body...
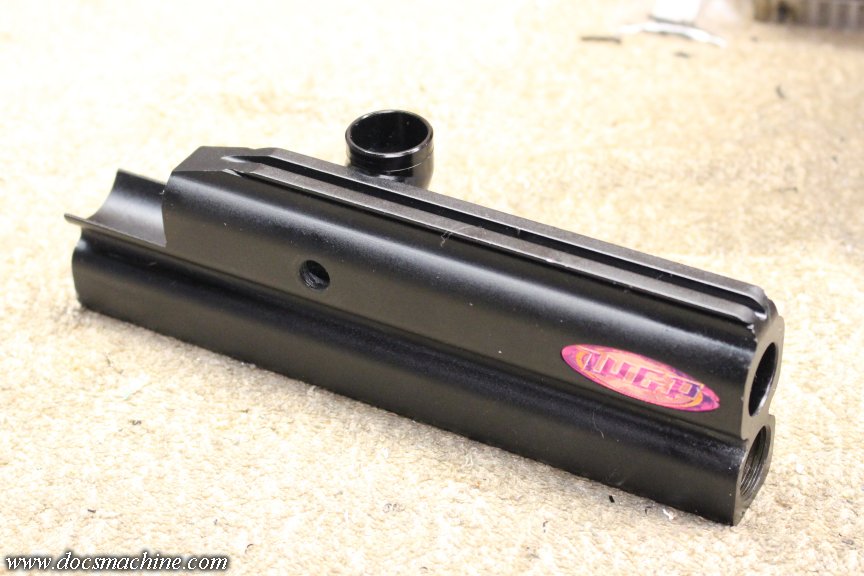


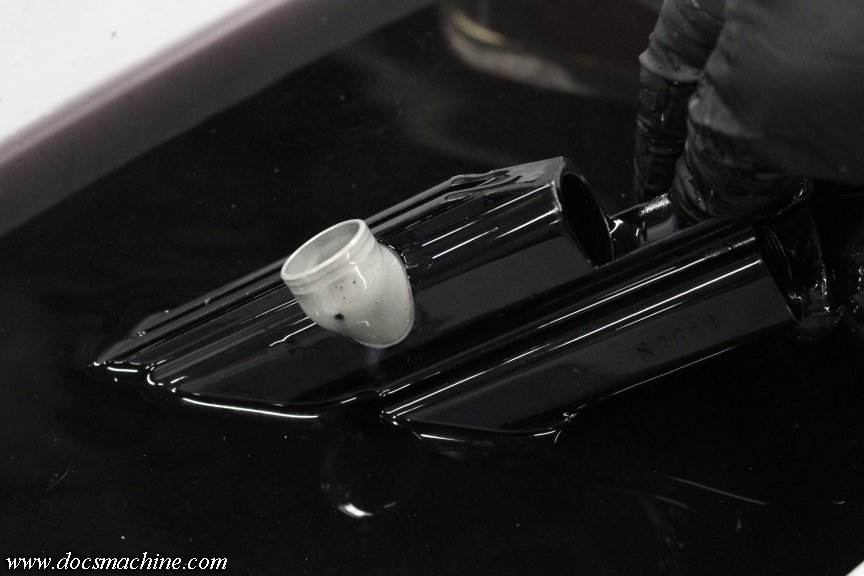
    And dunked it in the lye bath to strip the anno off.


    Finally, using my new knowledge, milled the same slot and took that big Rotabroach slice.
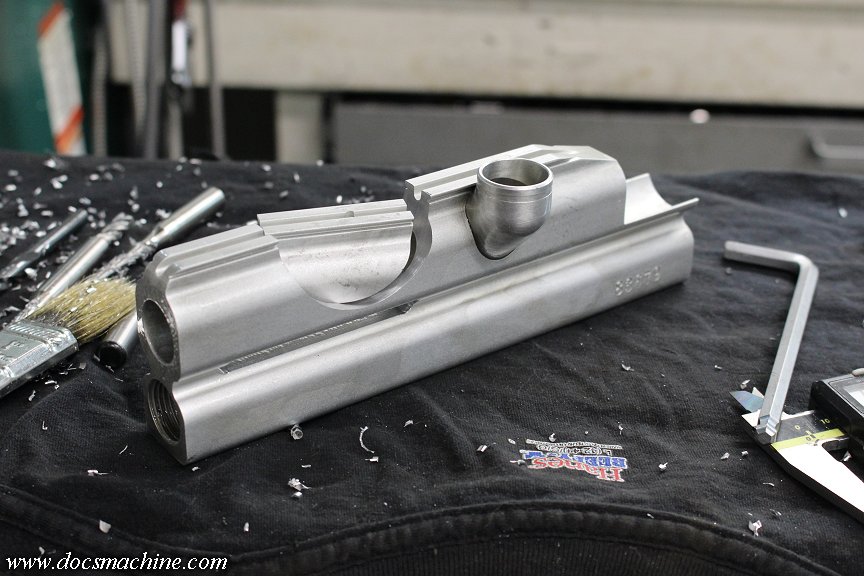


    To Be Continued!

    Doc.​
    Doc's Machine & Airsmith Services: Creating the Strange and Wonderful since 1998!
    The Whiteboard: Daily, occasionally paintball-related webcomic mayhem!
    Paintball in the Movies!

    Comment


    • OpusX
      OpusX commented
      Editing a comment
      Shes purdy 😎
  • SETHZILLA!
    Apocalypse Dude
    • Jul 2020
    • 889
    • Atascadero,CA

    #17
    Oh dammit, now I want another rf fastback to go with the double fastback you built me...

    Sent from my SM-S921U using Tapatalk

    "What could go wrong?" - Sethzilla!

    Member of WORR BOYZ pump paintball team
    Playing since 1986: Stock, Pump, Mech, Electro, tourney, but now mostly rec.

    Feedback:
    https://www.mcarterbrown.com/forum/b...lla-s-feedback

    WTB:
    https://www.mcarterbrown.com/forum/b...-wtb-wgp-parts

    Comment

    • DocsMachine
      MCB Member
      • Jul 2020
      • 2699
      • Alaska

      #18
      All of the above was.... a bit longer ago than I'd care to admit- although in my defense, it was also essentially 'free' work, and partly my own project.

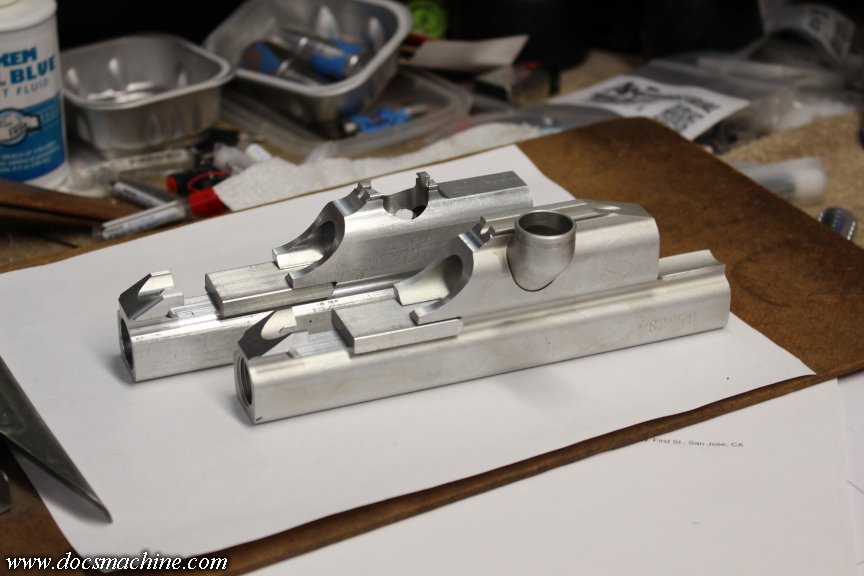
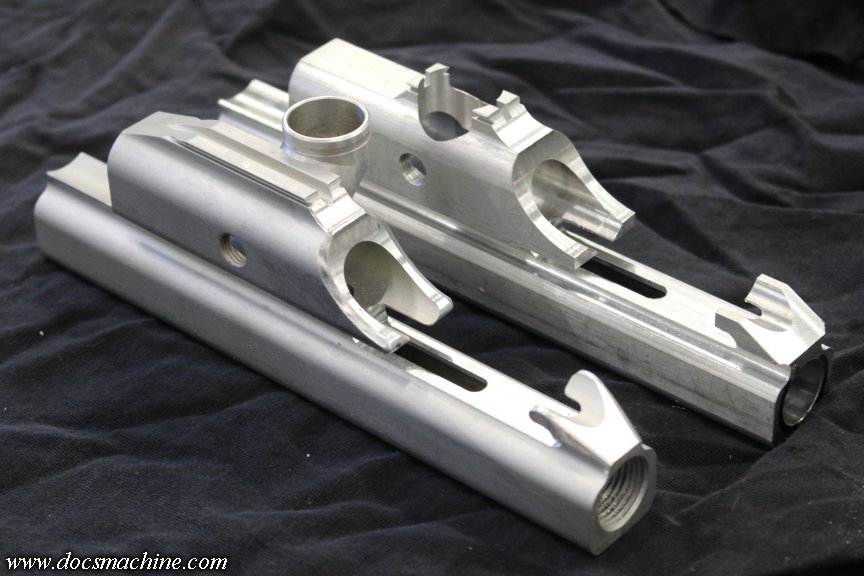
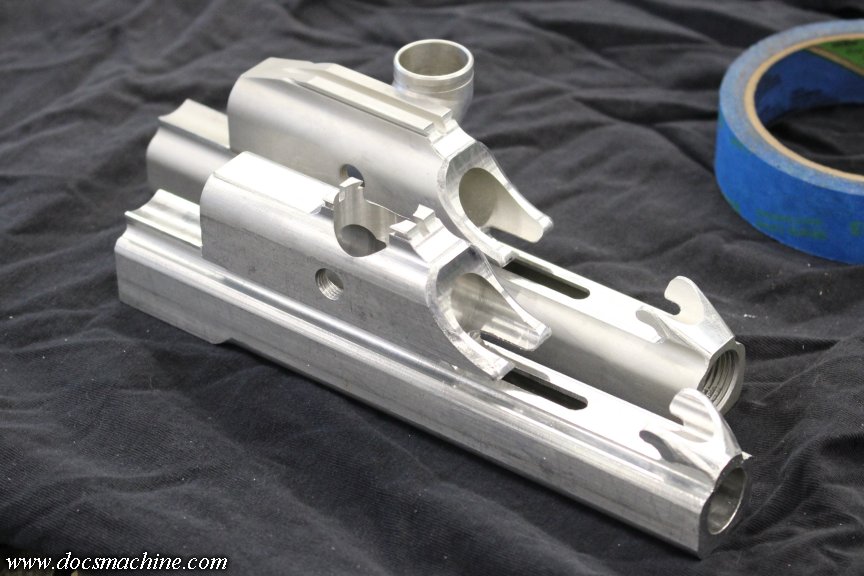
      This weekend, I dusted them off, and here's what we had- not shown from before, I'd also started blanking the cocking sleds:


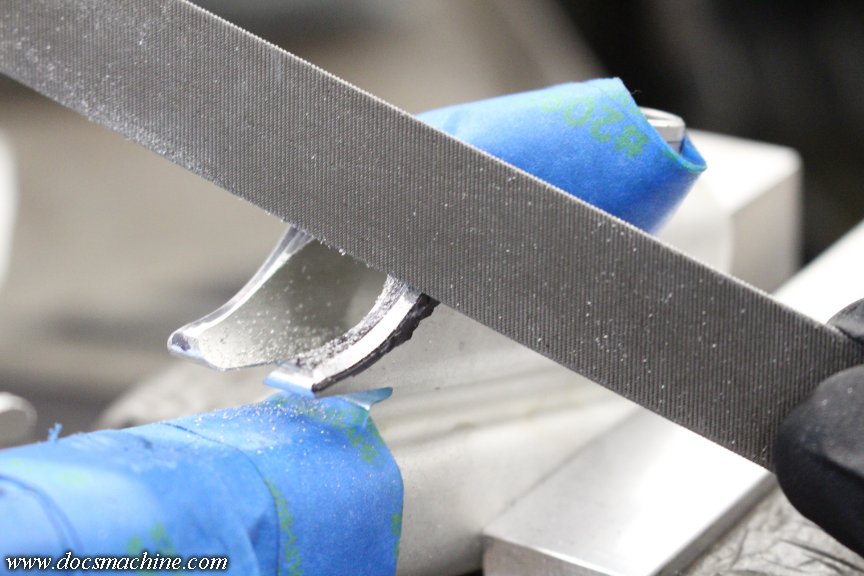
      The majority of the body milling was done, so it was time to do some of that aforementioned 3D profiling. Like the Vee-Twin I made a couple years ago, that means hand filing.

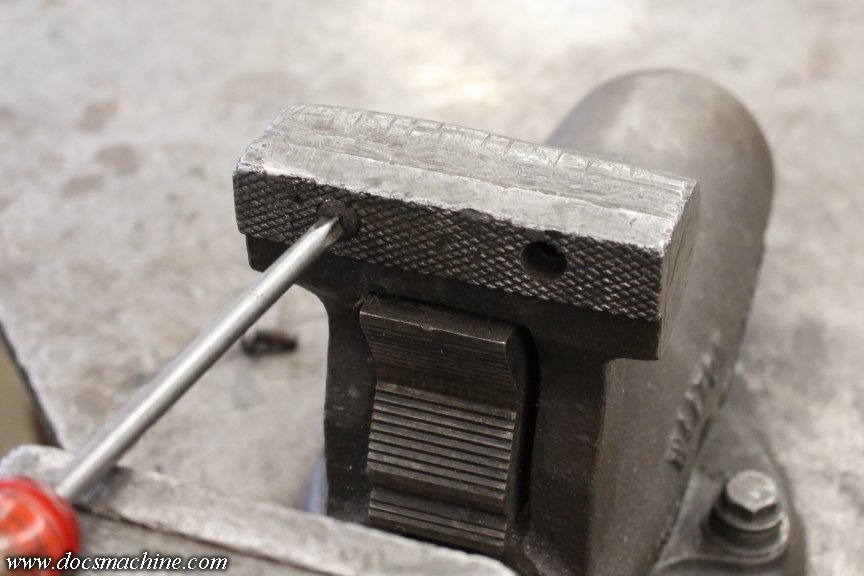
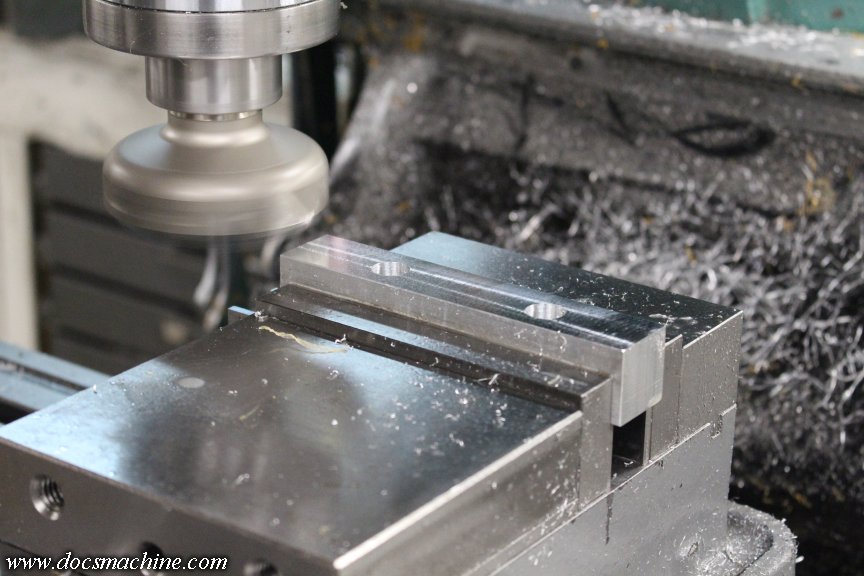
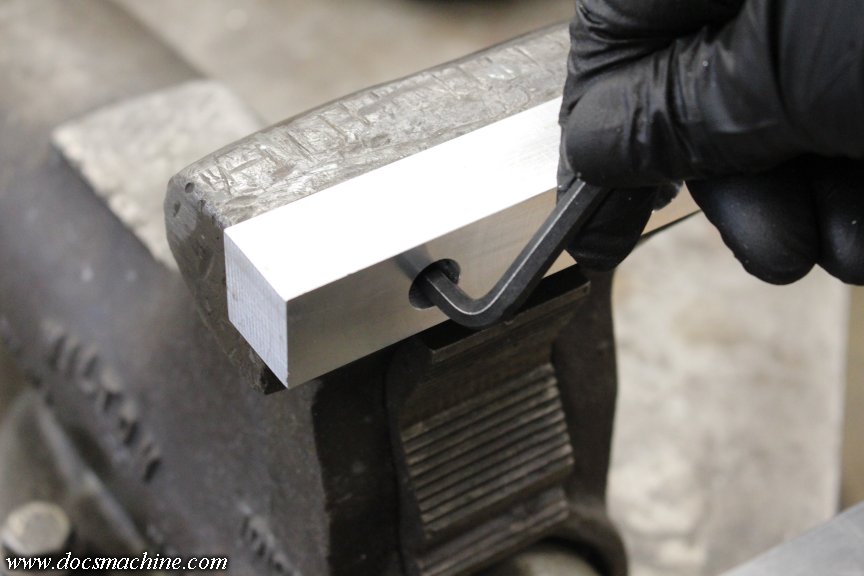
      I hold the body in a vise for this- I used to use pads that go in the jaws of the vise and are held magnetically, but I've had trouble with the weak-sauce magnets letting 'em flop off all the time. So these days I use proper soft jaws. Pop the old steel jaws out...


      Quick-like-a-bunny shave a few thou off the soft jaws to get rid of any dings or dents from the last job...


      And bolt 'em in.


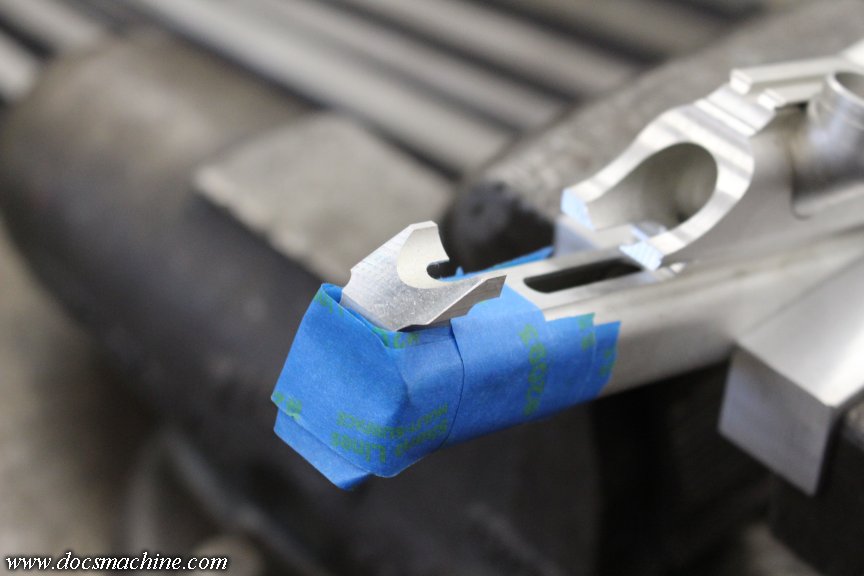
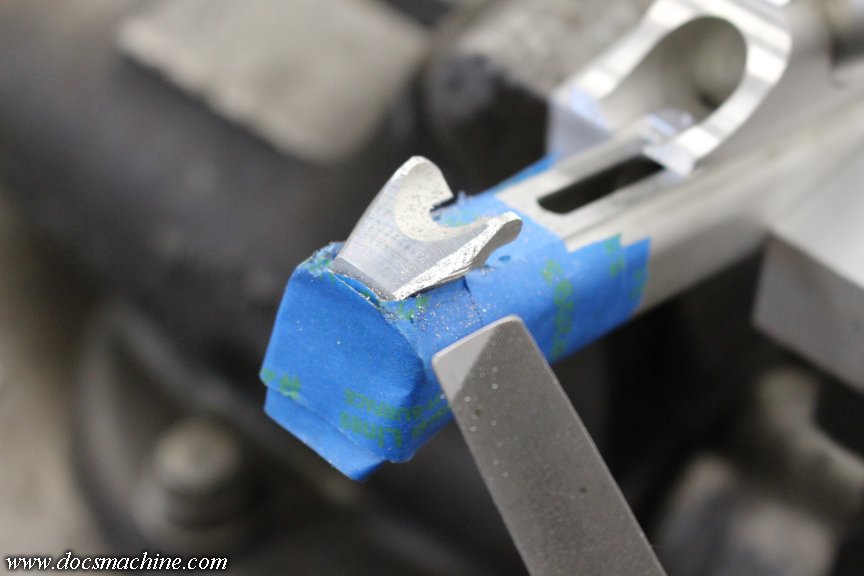
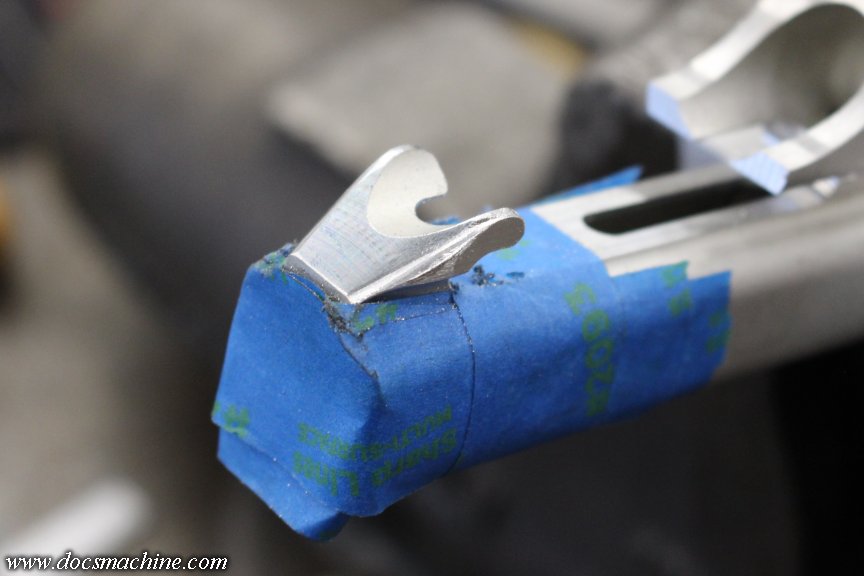
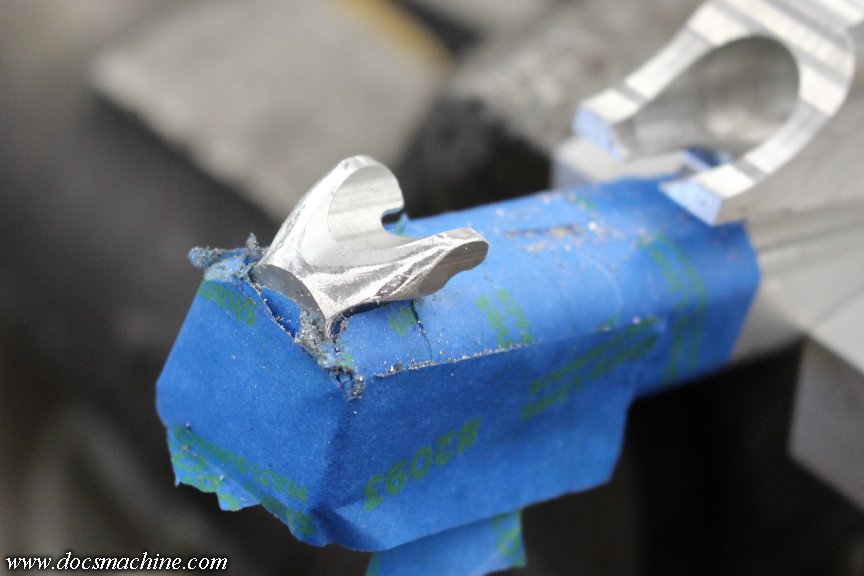
      That holds the body solidly- and to my thousand-pound welding table - and the jaws won't mar the body. Starting with the rear 'fangs', I slapped on a little painter's tape to help protect against errant file strokes.


      I marked and lightly scribed a couple of guide lines for the bevel around the bolt shroud, and carefully worked my way along those, too.


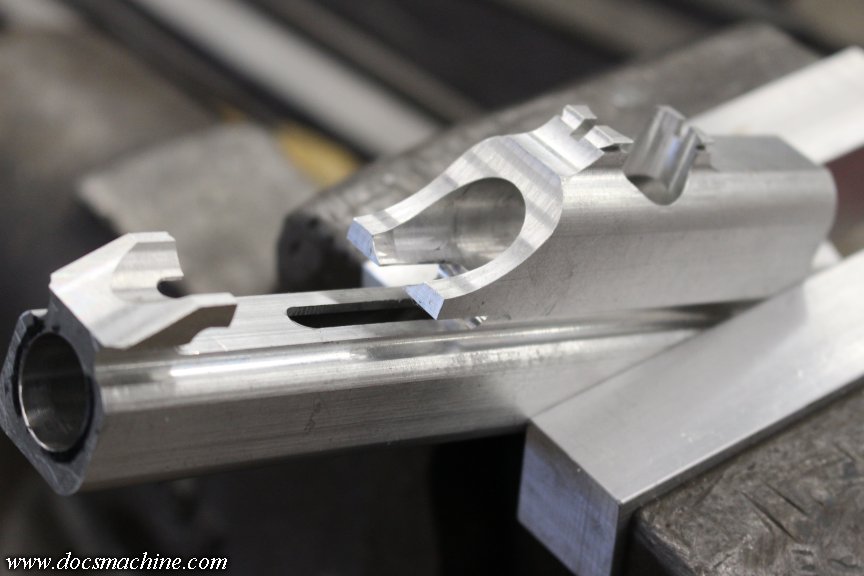
      Et voila! Not quite as fancy as the original, but not too darn bad.


      Then, my 'scrap' body...


      Still not done- to be continued!

      Doc.​
      Doc's Machine & Airsmith Services: Creating the Strange and Wonderful since 1998!
      The Whiteboard: Daily, occasionally paintball-related webcomic mayhem!
      Paintball in the Movies!

      Comment


      • OpusX
        OpusX commented
        Editing a comment
        You are a wizard!!
    • DocsMachine
      MCB Member
      • Jul 2020
      • 2699
      • Alaska

      #19
      These posts don't necessarily show everything in order- this particular project has been a bit all over the place, as I'm trying to juggle half a dozen flaming chainsaws at the moment.

      I've been trying to post this stuff in what at least appears to be a logical order, but don't be fooled- it's a bit of a madhouse in here right now.

      Anyway, since I'd already made this one already-long-overdue project even longer by adding my own parts to the pile, I figured one more couldn't hurt. So I dug this out and dusted it off.


      That is, or was, supposed to be a sort of "Fastback 2.0". Years ago- around 2007? I ran across a local guy that had a HAAS MiniMill in his garage, and was making some products of his own. I loaned him one of the last original Fasty bodies I had at the time, and he tried to reverse-engineer it.

      Long story short, I couldn't really afford to have him CAD it up properly- and of course 3D scanning wasn't really a thing either of us could afford- and, after the one test part, we realized that even with a discount, the per-body cost was going to be astronomical. I can't even recall what this cost me all told, but I bet I could have bought a Westwood with it, at the time.

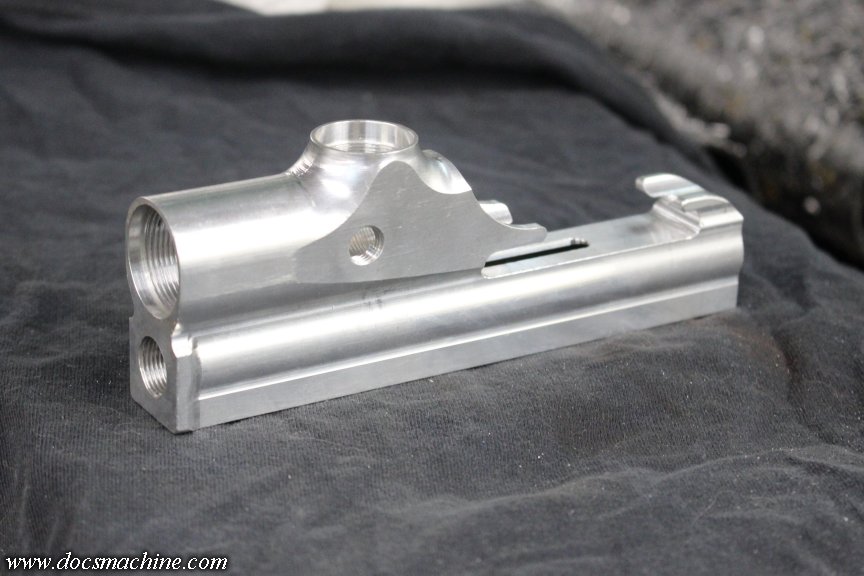
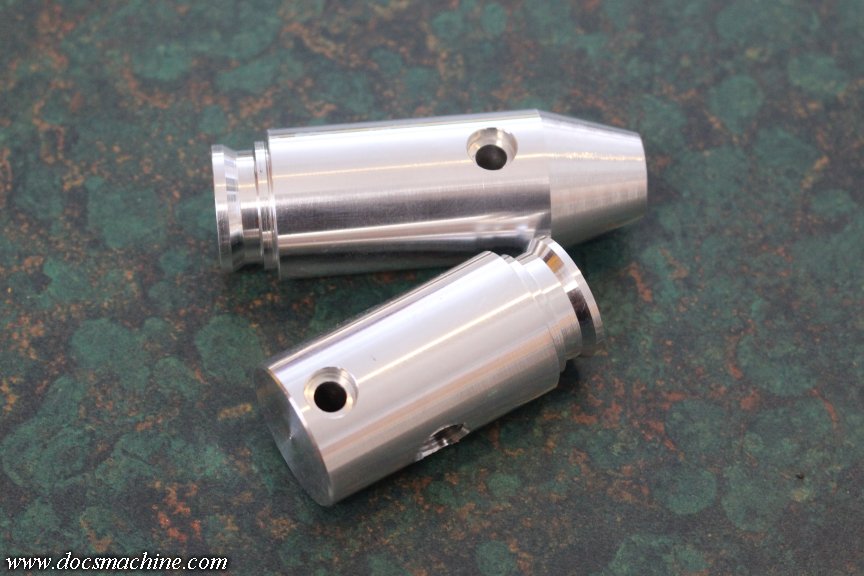
      Anyway, I've had the body sitting around ever since. I did some of the secondary machining- the breech threading, the feed neck threading- LED Angel, natch, 'cause that was the hot ticket at the time - and so on. I even made a cool one-piece MiniCocker front block with integrated ASA for it:


      What I never got around to was making the cocking sled, pump rod, hammer, etc. I have to do that for these other two bodies anyway, so I figured this was a good time. I already had the other two sleds mostly made, but they still needed to be finished, and I'd still need bolts, rods and so on.

      One tidbit that tripped us up early on, was the guy had drawn his CAD part from a blank, heavily modified body. He didn't have any factory-body specs, which for most of it wasn't a problem, but he didn't know about things like the necessary clearance for the pump rod. So the first thing I did was open up the side groove he had, to proper body specs.


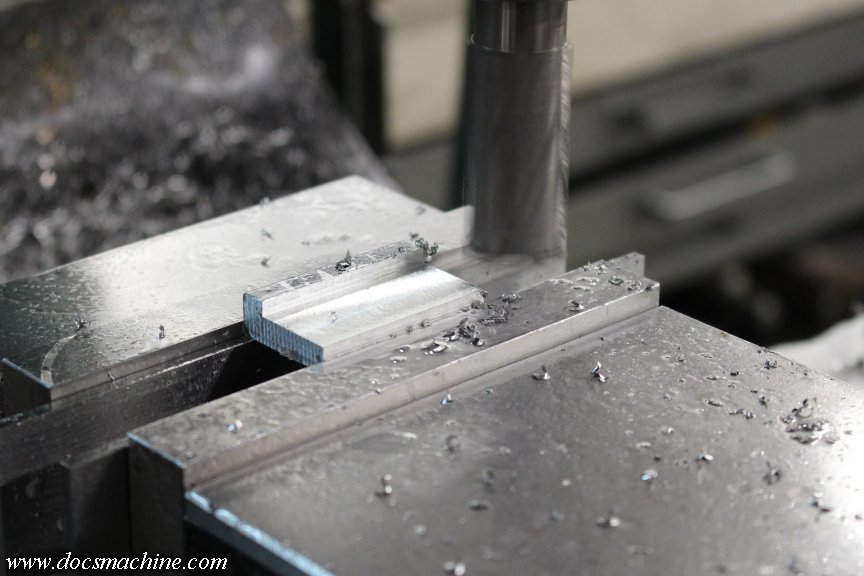
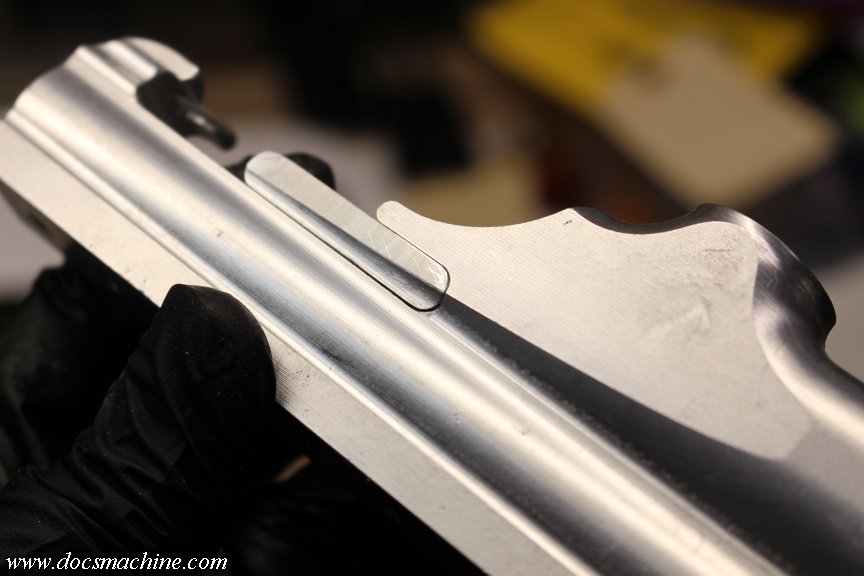
      With that done, I started on the cocking sled itself. Thinned and stepped...


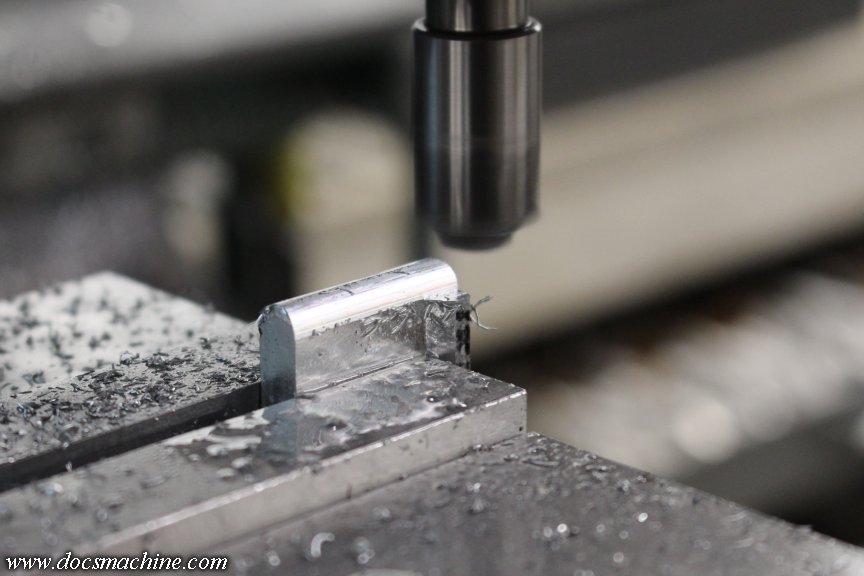
      Rounded on both ends...


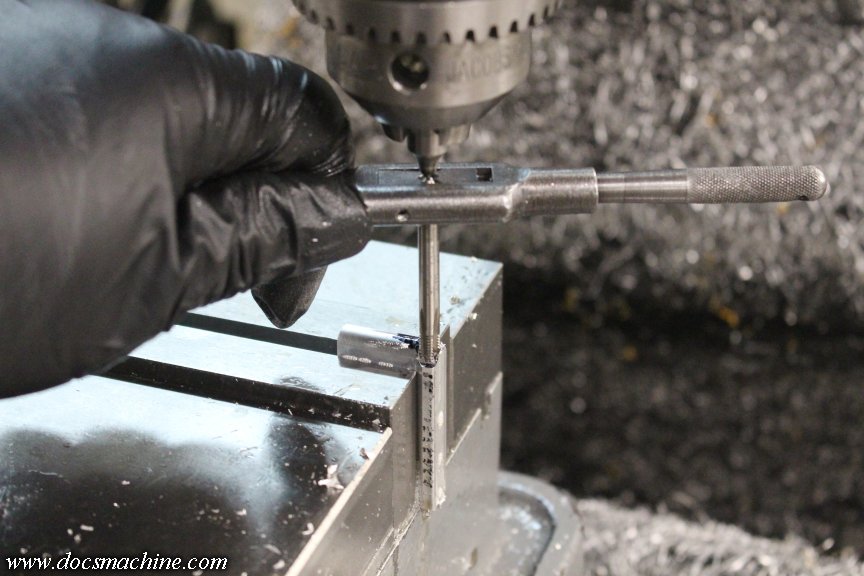
      The pump rod hole properly located- thanks to the fresh body groove- and drilled and tapped.


      Finally, there were a couple of trimming steps to make it match the body profile:


      Assisted by a little file fine-tuning, et voilá!


      This body, too, will need a little finishing with a file, and that's coming up. In fact, lots more coming up- stand by!

      Doc.​
      Doc's Machine & Airsmith Services: Creating the Strange and Wonderful since 1998!
      The Whiteboard: Daily, occasionally paintball-related webcomic mayhem!
      Paintball in the Movies!

      Comment

      • DocsMachine
        MCB Member
        • Jul 2020
        • 2699
        • Alaska

        #20
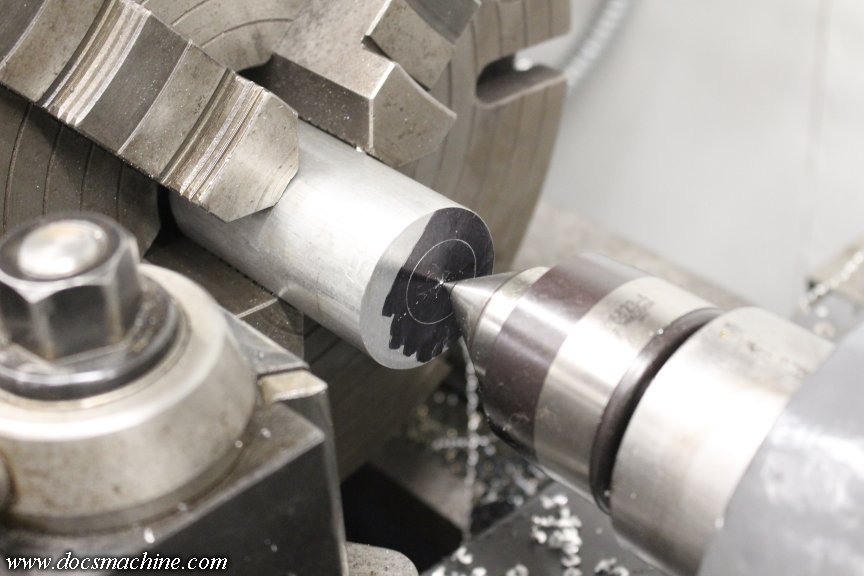
        Another patiently-awaited customer request ready to head out the door!


        Doc.
        Doc's Machine & Airsmith Services: Creating the Strange and Wonderful since 1998!
        The Whiteboard: Daily, occasionally paintball-related webcomic mayhem!
        Paintball in the Movies!

        Comment

        • DocsMachine
          MCB Member
          • Jul 2020
          • 2699
          • Alaska

          #21
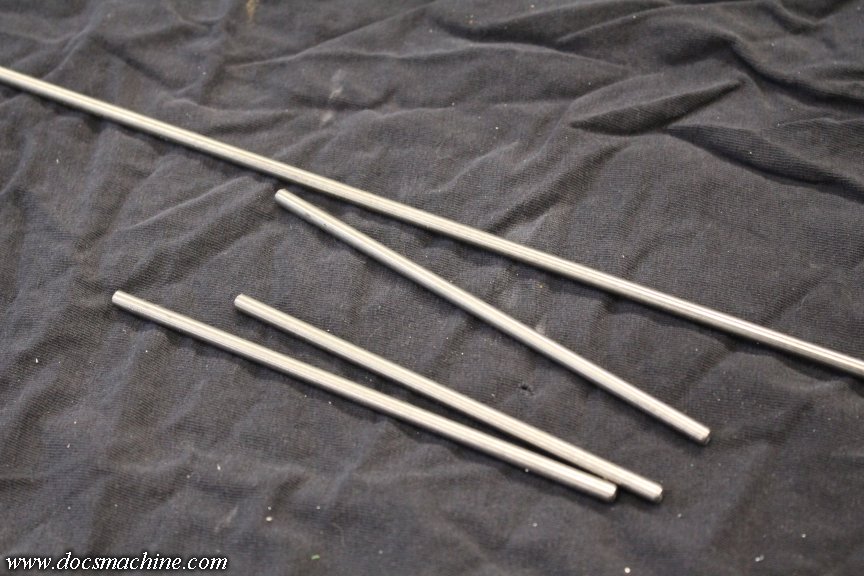
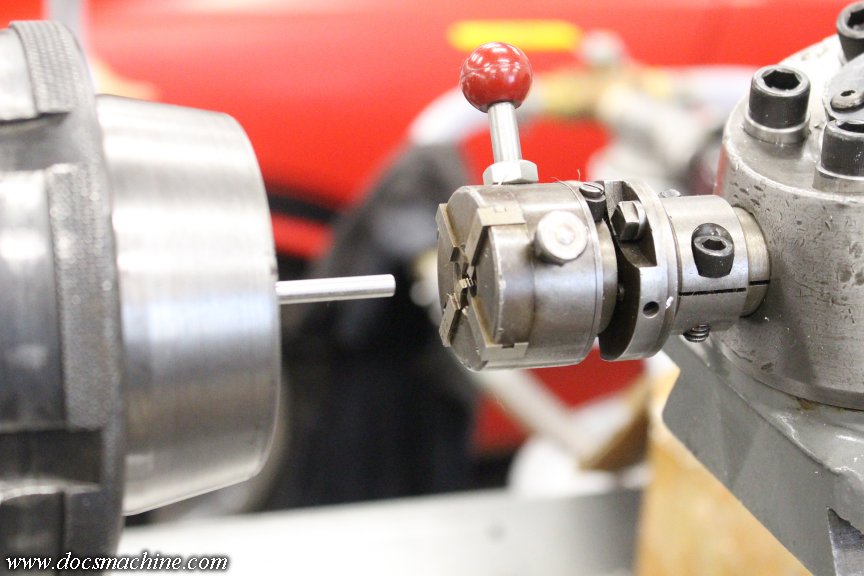
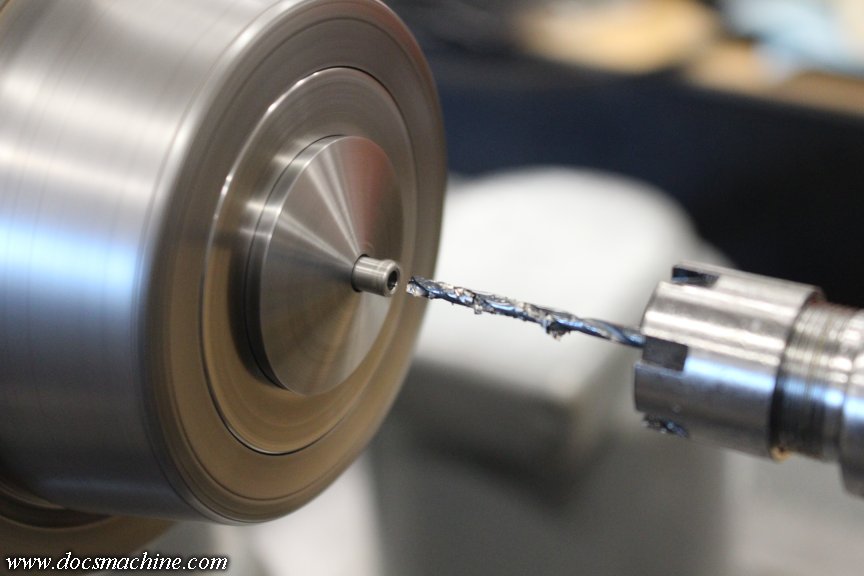
          Didn't have much time for this one, today- I'm juggling a number of chainsaws at the moment. But, as the next bite on this elephant, I fabbed up the pump rods. Each body set is fairly unique, so I had to fit each one, TO each one. After a few rough measurements, I cut three pieces of 3/16" stainless rod, and faced and beveled each end.


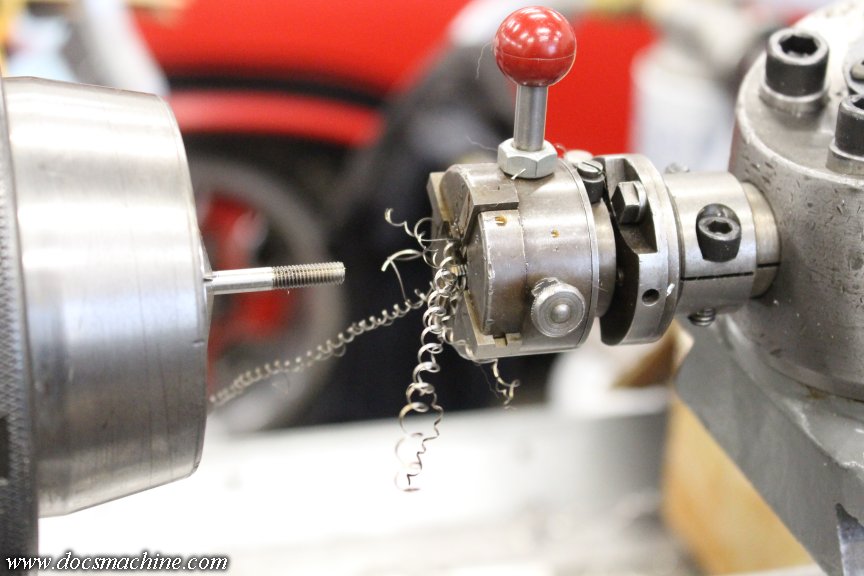
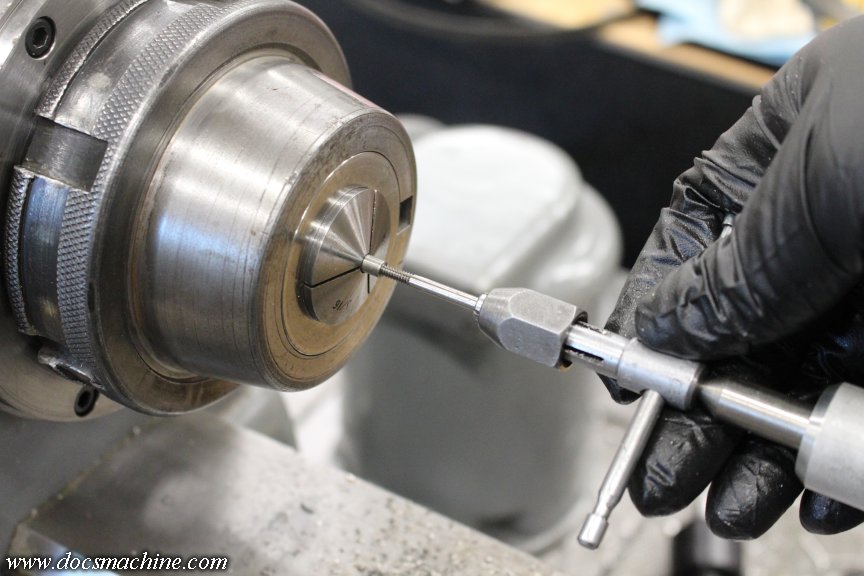
          Then I set up the Geometric Die Head (the same one from fifteen years ago! ) on the Rivett turret lathe...


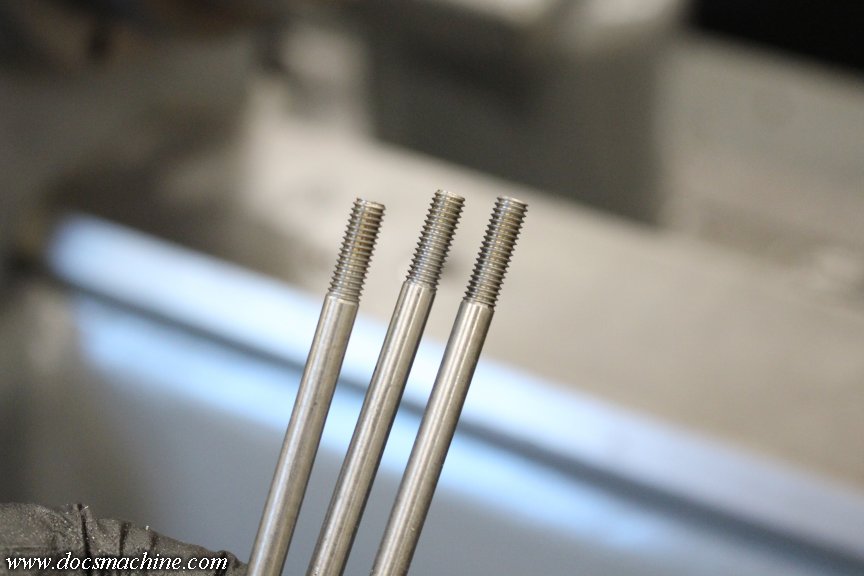
          And in just a few moments, had each rod threaded.


          The right one's a bit long, I adjusted the depth for the other two. Not shown, but I turned the long one down a tadge- that's a technical term- to match the others.


          I measured each one in place on their respective bodies, marked 'em, and cut 'em to length- this time on the Sheldon lathe.


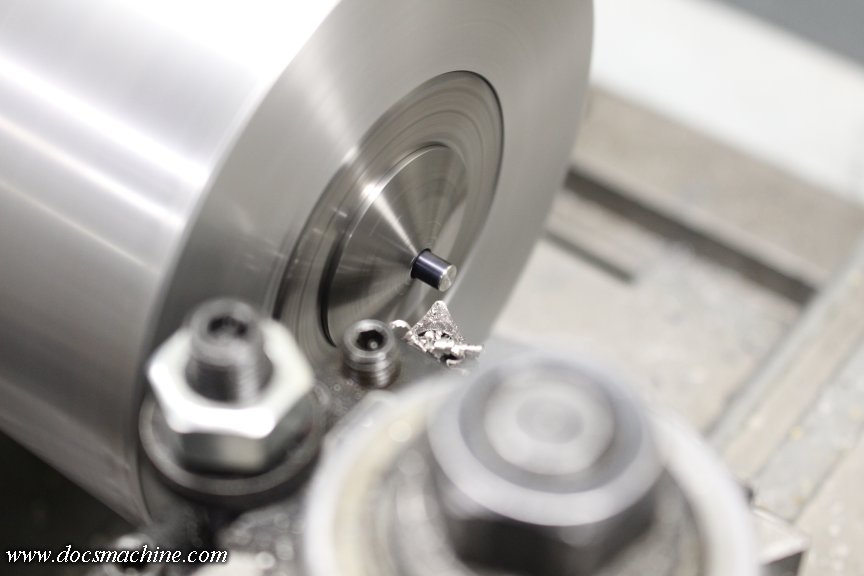
          Back to the turret, I set it up to centerdrill, and then tap drill each one...


          (You can't beat a turret for drilling on a lathe. )

          And then with a good sharp gun tap and some Tap Magic- which I don't usually use, but this is a tiny tap in stainless steel- cut each one to 6-32.


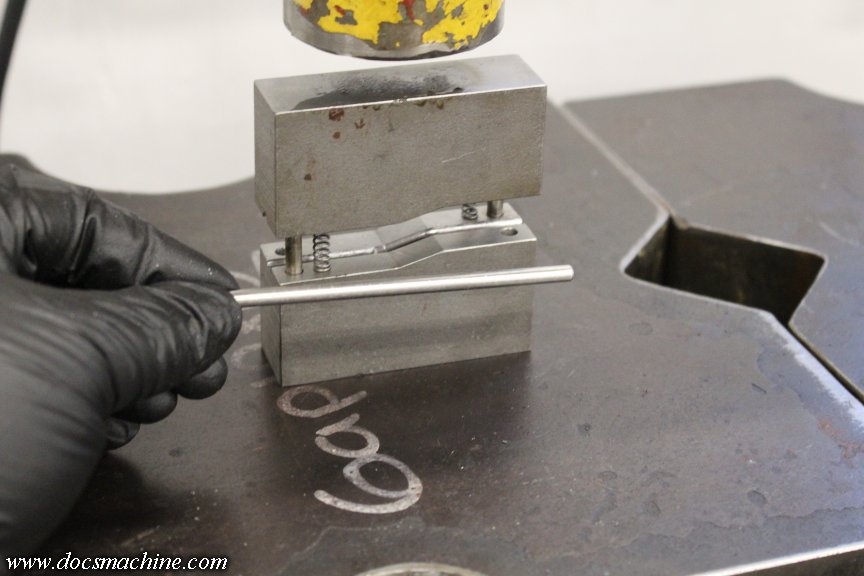
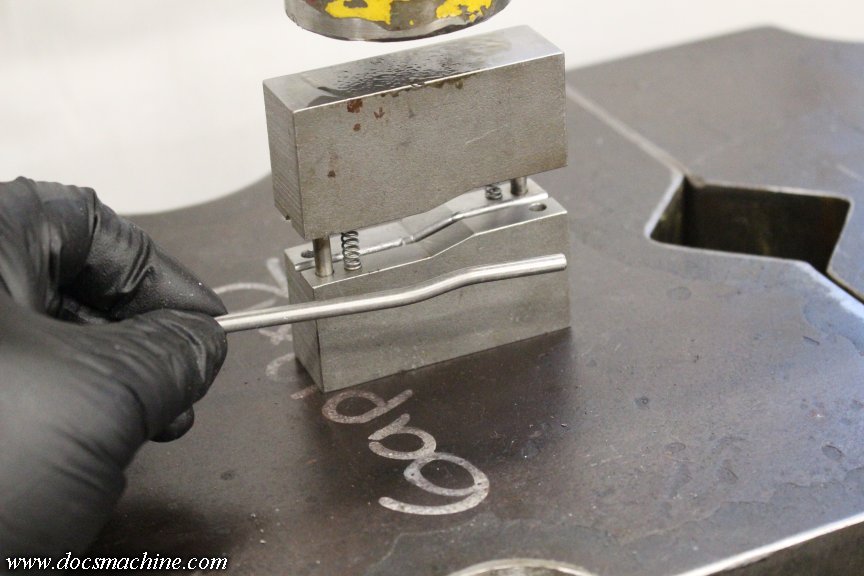
          And the last trick, I got out my custom-made rod bender.


          Years ago, everyone- including yours truly- was halfblocking and midblocking AutoCockers, which required either shortening original rods or making a new one from scratch. I made a ton over the years, and early on, I whipped up this press to get just the right 'dogleg' bend in one easy motion.

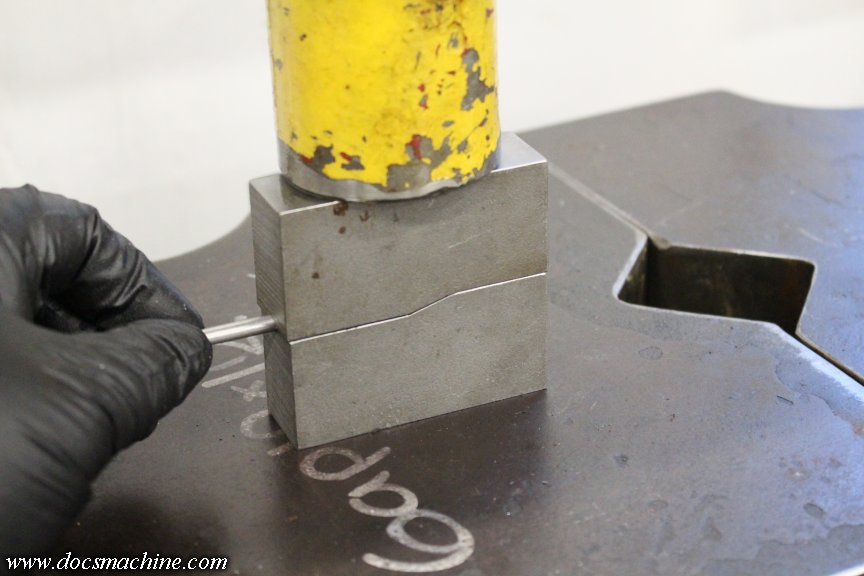
          Just lay the rod in the groove, mach it in the vise or a press...


          And presto, one perfect bend in just seconds.


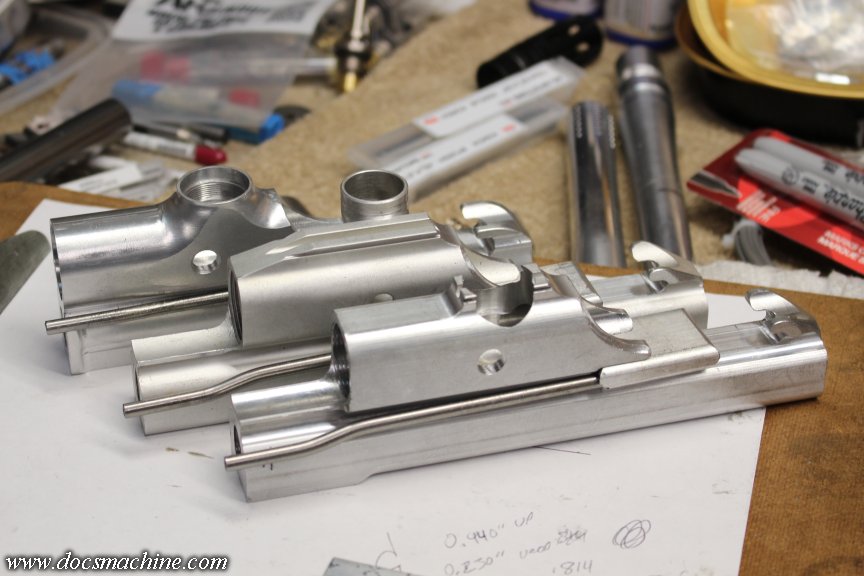
          And that's all three fitted.


          They may need fine-tuning when it comes time to assemble the guns for real, owing to differences in both front blocks and rams, but you occasionally have to do that even with factory parts. These basic markers have been in production one way or another for almost forty years, and by at least two dozen different companies.

          We're nearing the end on this one! We just need bolts, pins and hammers!

          Stand by!

          Doc.​
          Doc's Machine & Airsmith Services: Creating the Strange and Wonderful since 1998!
          The Whiteboard: Daily, occasionally paintball-related webcomic mayhem!
          Paintball in the Movies!

          Comment

          • DocsMachine
            MCB Member
            • Jul 2020
            • 2699
            • Alaska

            #22
            This part came out exactly as I intended....


            ... and it's scrap.

            On the plus side, the monster hogged right through that in no time, that's only about ten minutes' work. Would have been over an hour on the little lathe...

            But, just means I gotta do it again tomorrow...

            Doc.​
            Doc's Machine & Airsmith Services: Creating the Strange and Wonderful since 1998!
            The Whiteboard: Daily, occasionally paintball-related webcomic mayhem!
            Paintball in the Movies!

            Comment

            • DocsMachine
              MCB Member
              • Jul 2020
              • 2699
              • Alaska

              #23
              Yeah, yeah, ain't dead yet. Had to do a bunch of side projects and catch-up bits. All of the following took place over parts of about three different days.

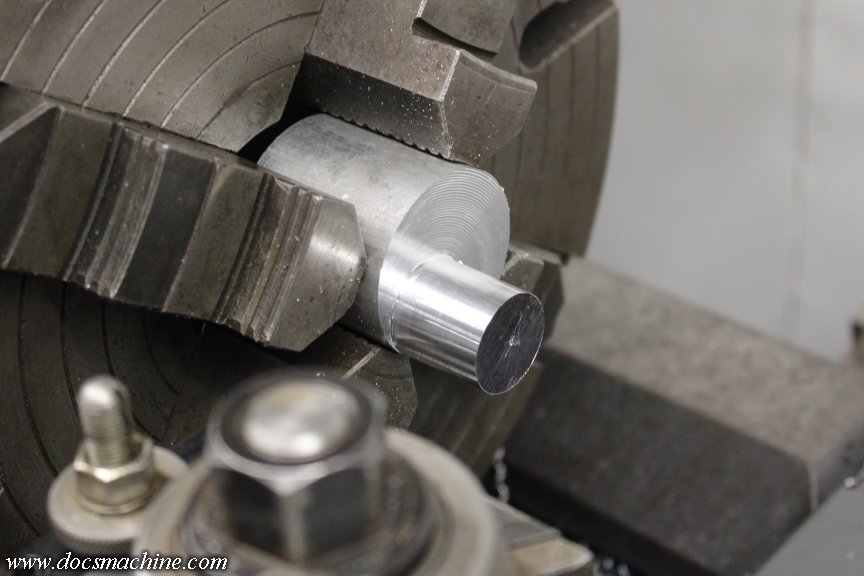
              First, I recut that eccentric bit, but this time with the spud a bit closer to the center.


              Like so.


              Now, while the big monster is an accurate lathe, it's not what you'd call delicate. So I took the part over to the Sheldon and recentered it.


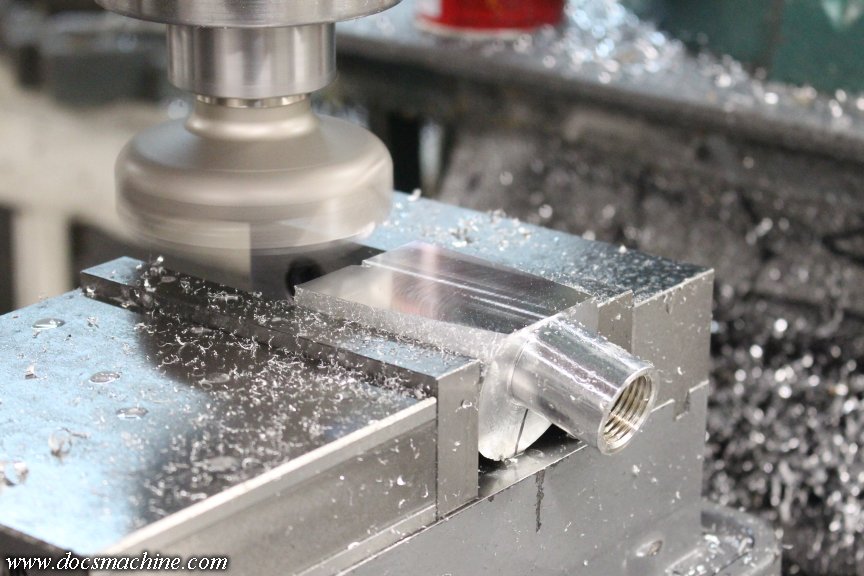
              That spud then got drilled, bored and threaded.


              Making it into an ASA.


              After that, and with a bit of careful eyeball alignment, it was time to hog off a ton of the excess meat.


              Now that I had some square faces and still had a little extra metal, I located and started drilling the features.


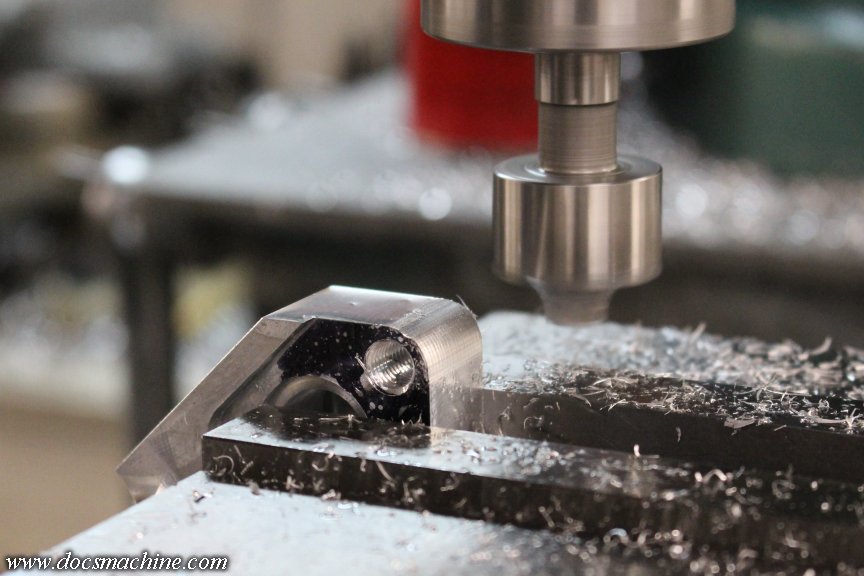
              This is actually the backside of the block. I counterbored the O-ring groove basically out of habit. But, that meant I had to clearance for the body...


              And with that done, mill off even more of the excess.


              A quick test fit...


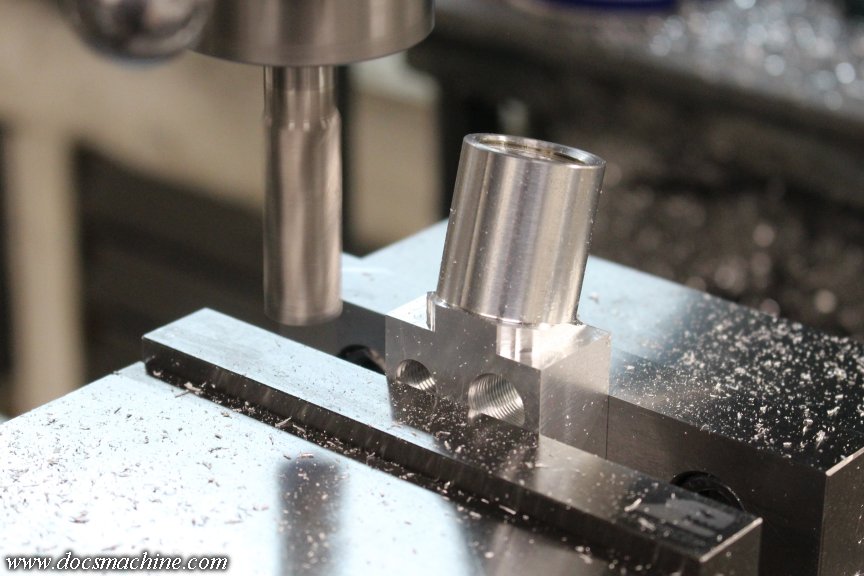
              And finally milling down that upper section.


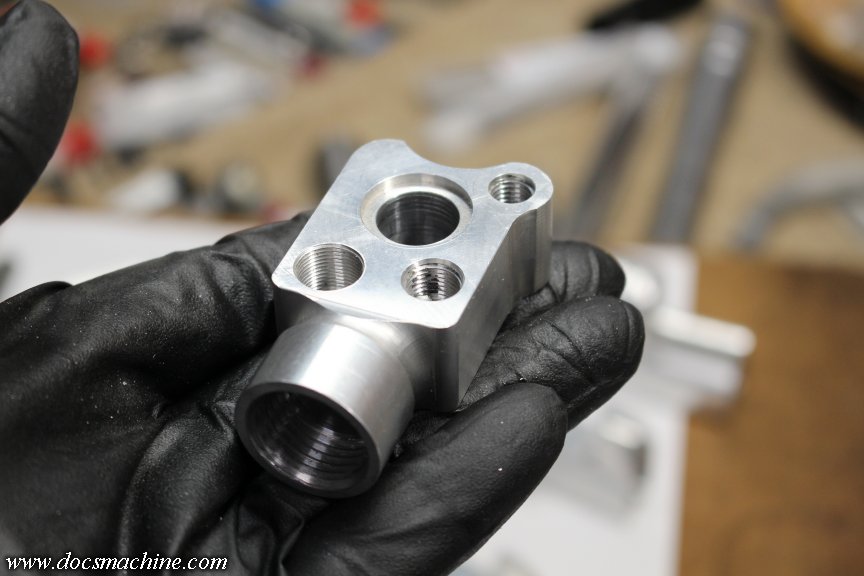
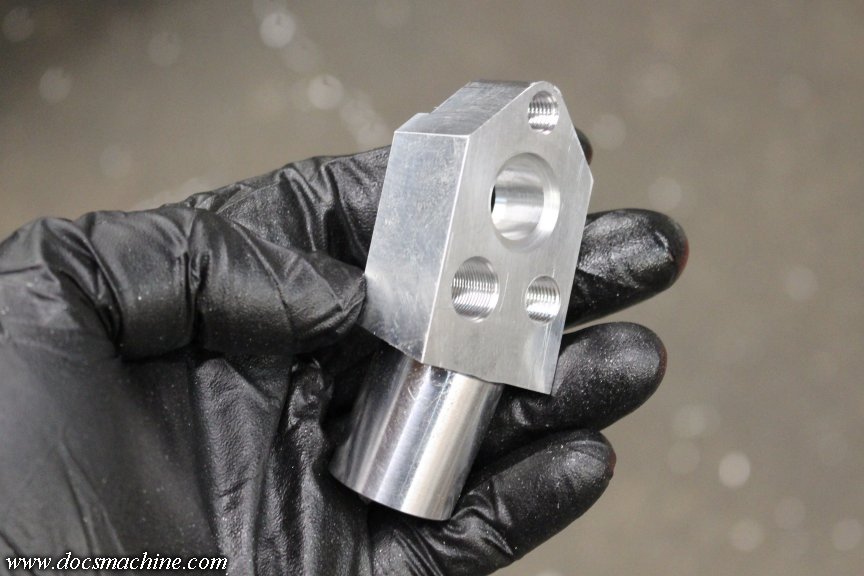
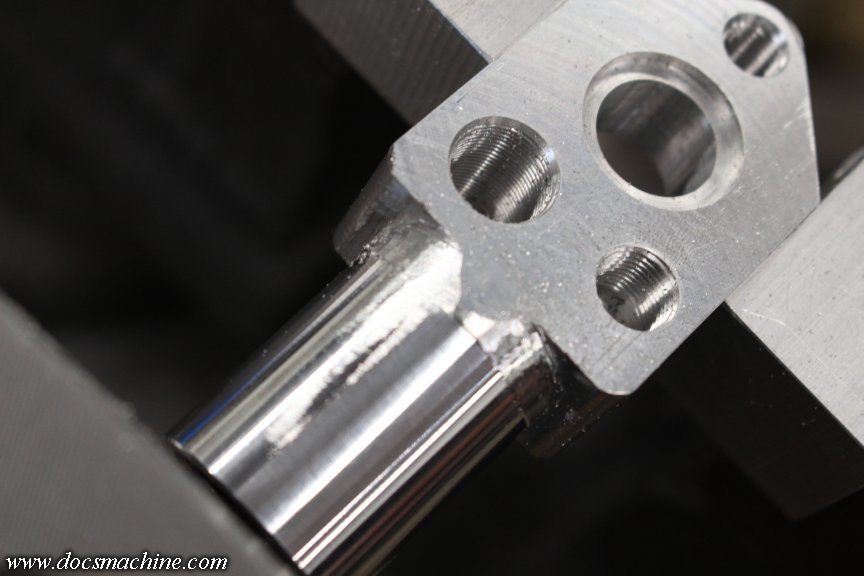
              Leaving us with this.


              It's not quite done yet, it still needs a few finishing touches, but should be ready to ship out by Monday.

              Doc.​
              Doc's Machine & Airsmith Services: Creating the Strange and Wonderful since 1998!
              The Whiteboard: Daily, occasionally paintball-related webcomic mayhem!
              Paintball in the Movies!

              Comment


              • RPP
                RPP commented
                Editing a comment
                Wow. I love these post. Thank you for sharing.
            • DocsMachine
              MCB Member
              • Jul 2020
              • 2699
              • Alaska

              #24
              They say the difference between a good machinist and a great one is the great one knows how to hide his mistakes better.

              Keep that in mind.

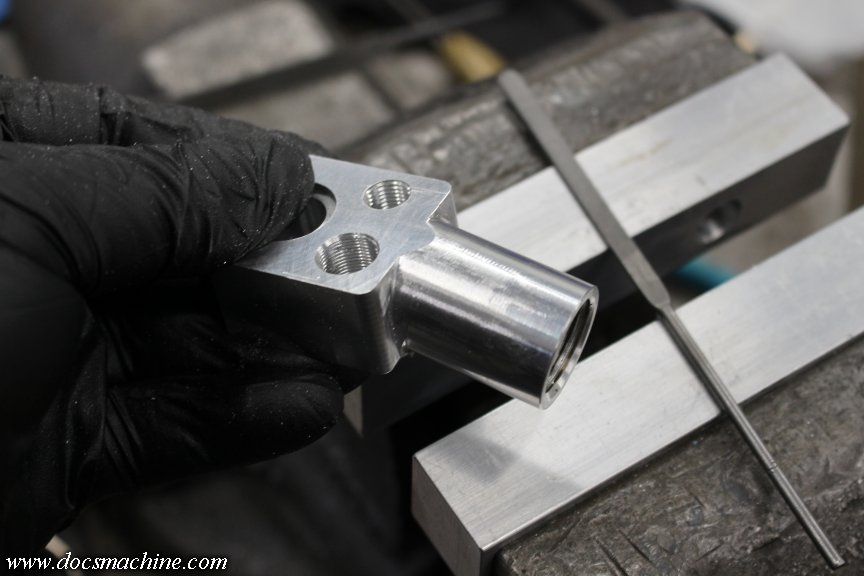
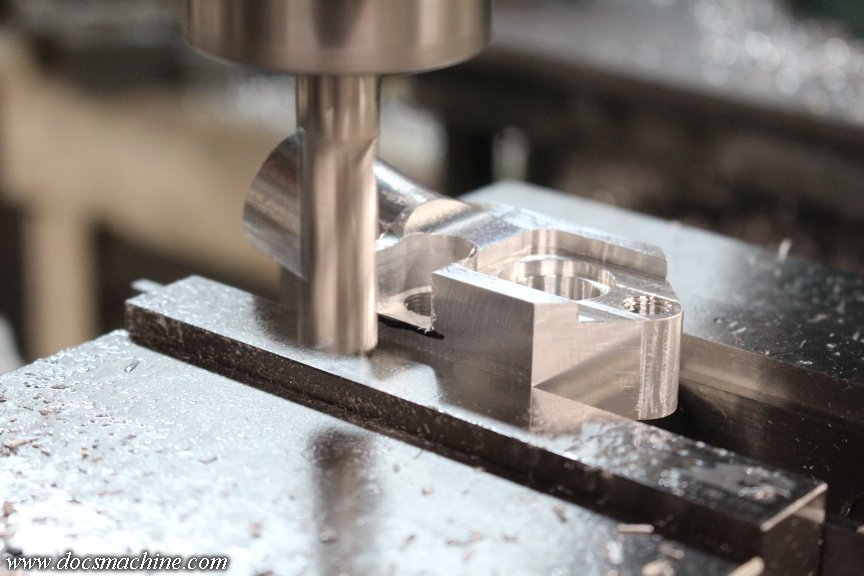
              Today's task for this front block (for one of my Vee-Twin Autocockers) is to just clean up the milling, drill the internal air port, sand a few bits smooth, and mail 'er off. The main part being the blend between the ASA and the body of the block, so I milled away the bulk of it, trying to make sure I didn't go too deep.


              Then I very gingerly filed the rest down to match the profiles.


              I'm no Clickspring, but I know my way around a file.


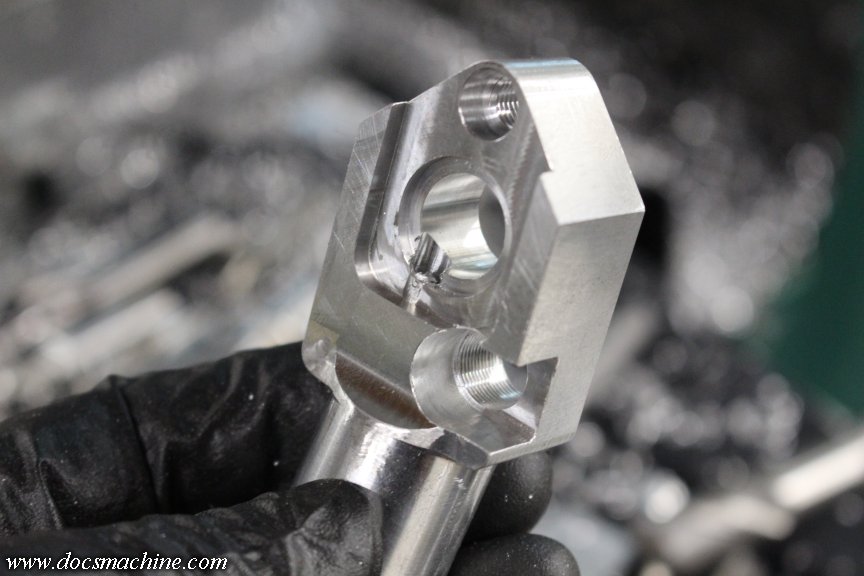
              Then we needed to open up some clearance for the 3-way linkage...


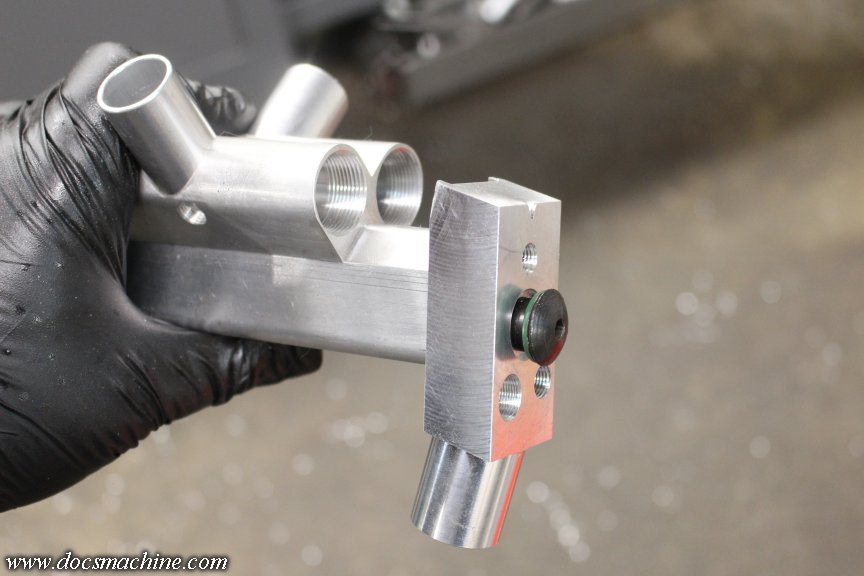
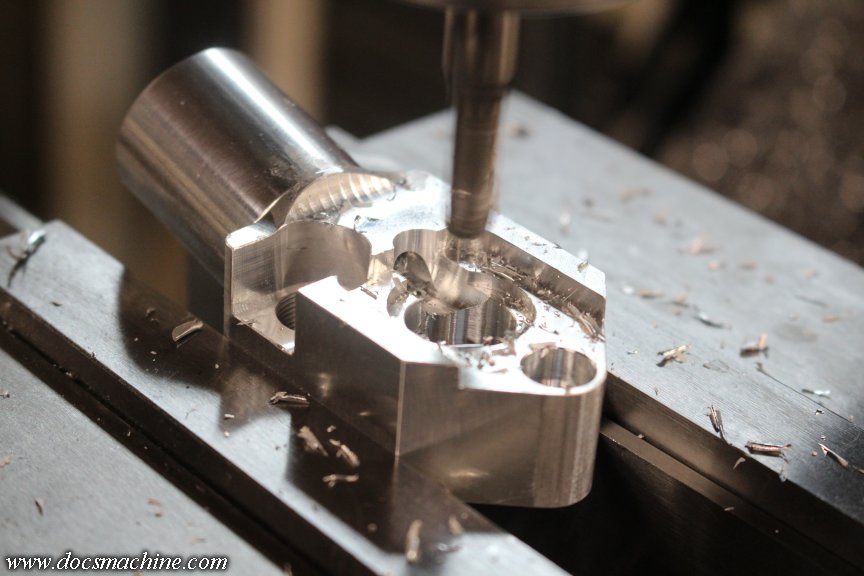
              And then the very last machining step was to drill an air passage through from the ASA to the center bolt. It's a fiddly job, and unfortunately I didn't realize the drill was wandering a bit.

              And I f**king ruined it.


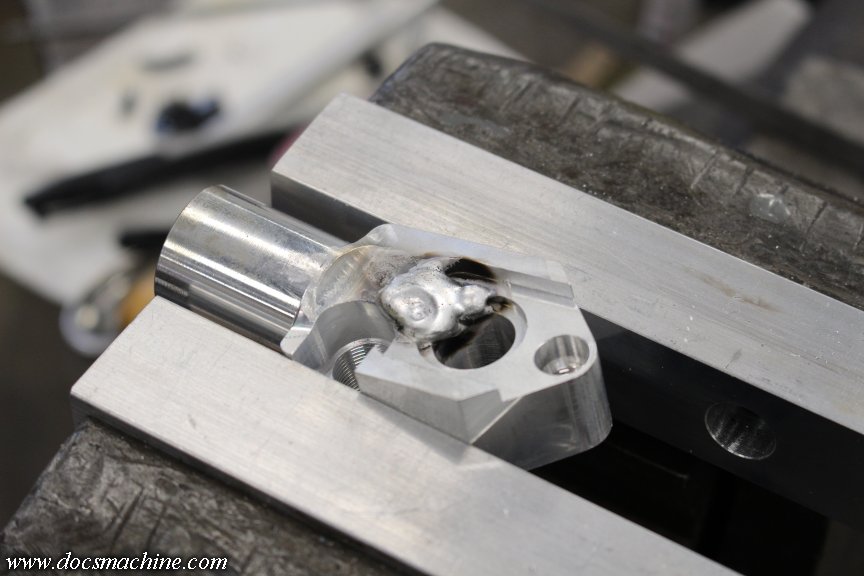
              It might be hard to tell from the photo, but the air passage breaks through the seat where the O-ring is supposed to seal, and you can see below that where the metal is now paper thin and pushed out. It's basically unrepairable.

              I calmly and coolly came up with a few choice invectives and I may have hurled a few things. BUT... while moving to Tibet and becoming a monk is looking better by the day, this was still a job I needed to finish. I contacted the customer, offered a couple of options. One was to make it fresh from scratch- same cost, I don't charge for my screwups. I wish I could, I'd be a friggin' millionaire by now.

              I also have another block with an integral ASA, from the original VT run, but the customer wanted a 15-degree rearward tilt, and the one I had was straight. Last, and what we settled on, was welding up the damage and remachining it.

              The welded areas will show up in the anodizing, but in this case, the welded area will be between the block and the body, and can't be seen in use. So I milled the damaged area out...


              TIG'ed the groove shut...


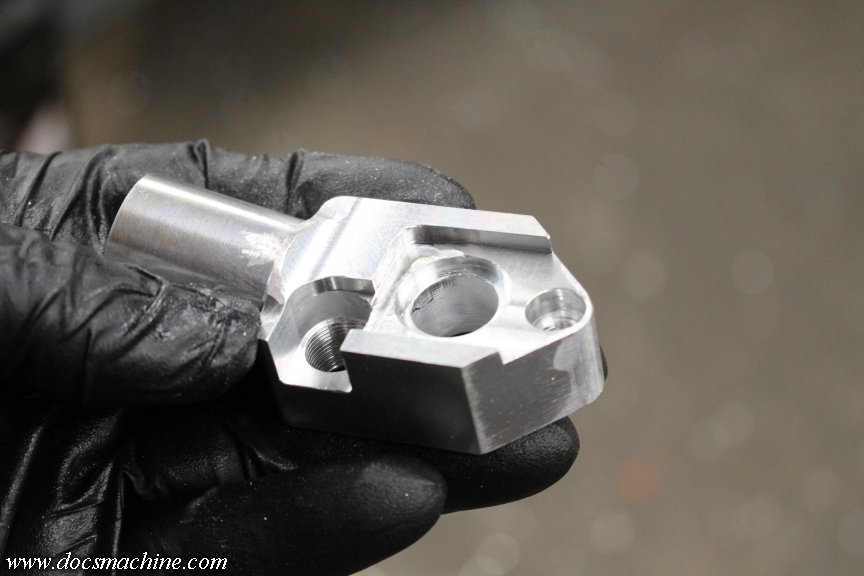
              Remachined the whole mess...


              And finally, very carefully and gingerly redrilled the air passage. Before I send it off, I'll mount and pressurize it to make sure there's no pinholes- there shouldn't be, but you never know.

              After that, I scrubbed and wet-sanded it, and assuming it passes a pressure test, it's ready to go!

              On to the next thing!

              Doc.​
              Doc's Machine & Airsmith Services: Creating the Strange and Wonderful since 1998!
              The Whiteboard: Daily, occasionally paintball-related webcomic mayhem!
              Paintball in the Movies!

              Comment

              • DocsMachine
                MCB Member
                • Jul 2020
                • 2699
                • Alaska

                #25
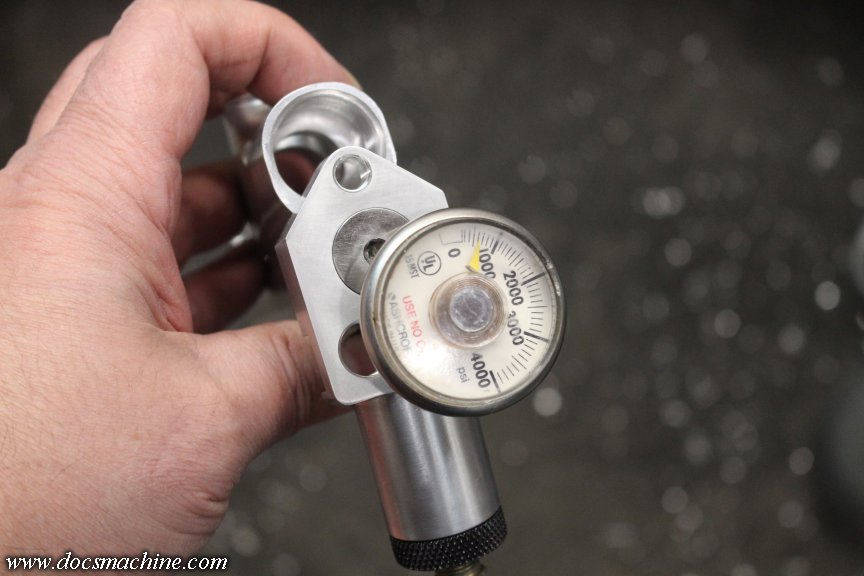
                Pressure test 100% successful.


                Installed it on a body, threw a gauge in the LPR port, and hit it with full CO2 pressure. (Which, since it's only in the mid-60s in my shop, meant about 600 PSI.) Nary a bubble when I hosed it with some Windex. I think we can call this good!

                Doc.​
                Doc's Machine & Airsmith Services: Creating the Strange and Wonderful since 1998!
                The Whiteboard: Daily, occasionally paintball-related webcomic mayhem!
                Paintball in the Movies!

                Comment

                • DocsMachine
                  MCB Member
                  • Jul 2020
                  • 2699
                  • Alaska

                  #26
                  In the continuing annals of "Doc Screws Up Again!"

                  Many of you may recall a few years ago when I made a run of replacement Montneel cup seals. To go with those, I put together some "rebuild kits", which included those seals, a set of valve body O-rings, a hammer O-ring and a power tube O-ring. I also made some replacement hammer-bumpers that go up in the sight rail.

                  Well, late last week, I sold the last complete kit I had- I have plenty of all the parts, save the bumpers. I set out to cast another batch, and in one of my many stunning flashes of brilliance, decided to try and color the normally-whiteish polyurethane to black, to better match the originals. (Though I've seen both black and dirty-honey clear.)

                  So, to that end I picked up a tiny bottle of dye from eBay, meant for coloring castable resins.

                  Resins, not urethanes.

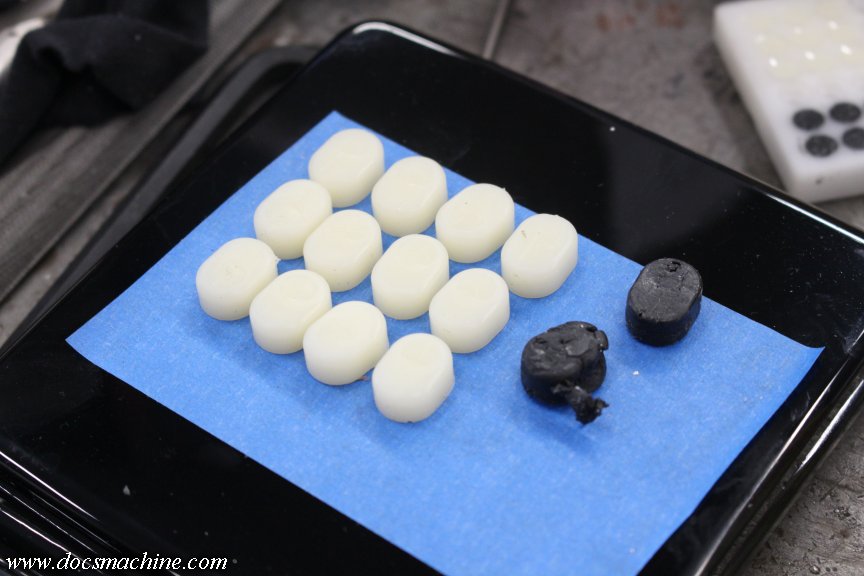
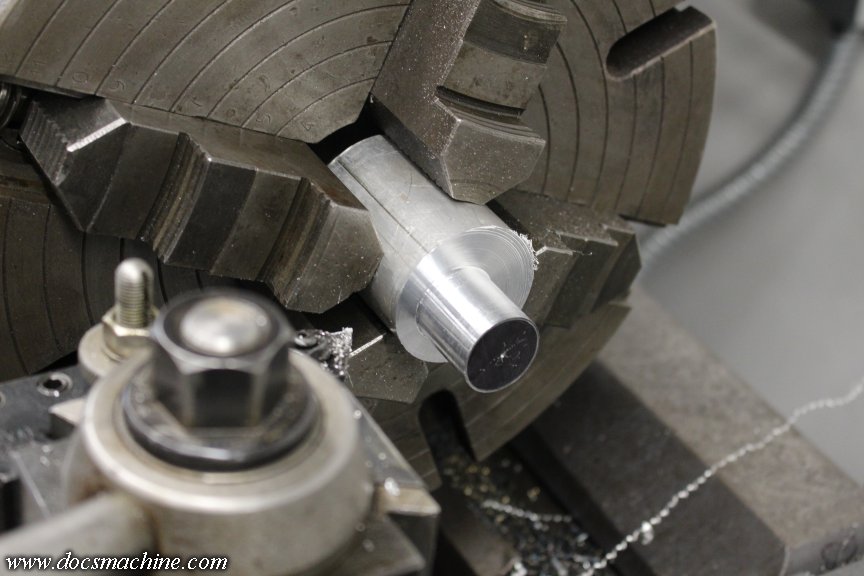
                  I mixed up a batch and filled my molds... and three days later, they still hadn't really cured. They basically crumbled when I tried to take them out of the molds. It had to be one of two things: The material was getting old (same bottles as from '23 or '24) or that dye was keeping the polyurethane from polymerizing. So as a quick test I cleaned out the molds- which was a bit of a job- and cast a fresh batch with no colorant.

                  Sure 'nuff, this morning the new batch had cured nicely:


                  Yep, something in that liquid dye reacted poorly with the material, and it couldn't cure properly. I'd be curious to know what's in the dye- the SDS for it says nothing at all about the contents, other than it's not flammable, not significantly toxic, and if it's spilled, we should wipe it up with a cloth.

                  But, despite that little setback, I have my Montneel rebuild kits back in stock. I'll cast a few more batches just to make sure I have plenty on hand for the next few years.

                  And it reminds me I have a couple of parts-box Z1's I need to dust off- again- and put back together...

                  ... In my spare time.

                  Doc.
                  Doc's Machine & Airsmith Services: Creating the Strange and Wonderful since 1998!
                  The Whiteboard: Daily, occasionally paintball-related webcomic mayhem!
                  Paintball in the Movies!

                  Comment

                  • DocsMachine
                    MCB Member
                    • Jul 2020
                    • 2699
                    • Alaska

                    #27

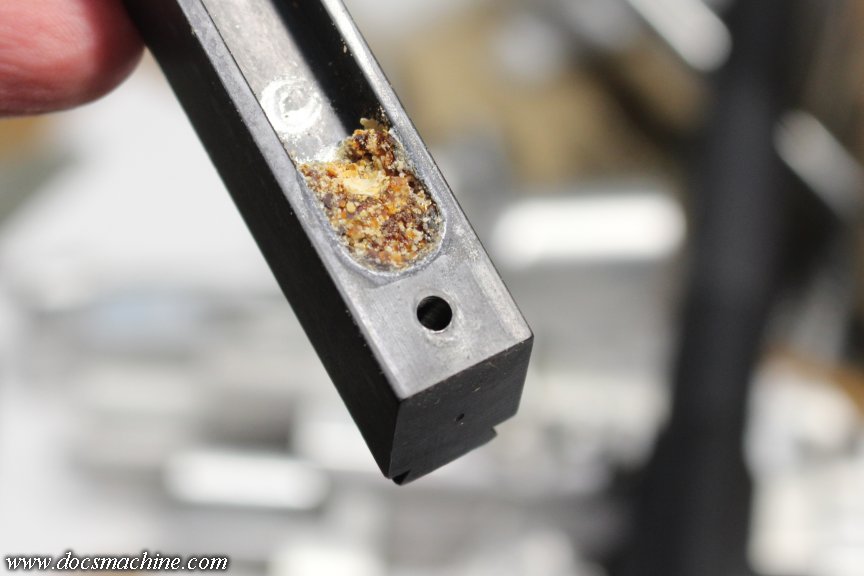
                    For those curious as to what this is for- and why- I got out one of my parts/project Montneels, in this case a partial Mega-Z I got from Magageddon a couple years ago, and opened it up to make sure these new bumpers actually fit.

                    This particular one I had not done anything with yet. The bumper lives up in the sight rail, and in this case...


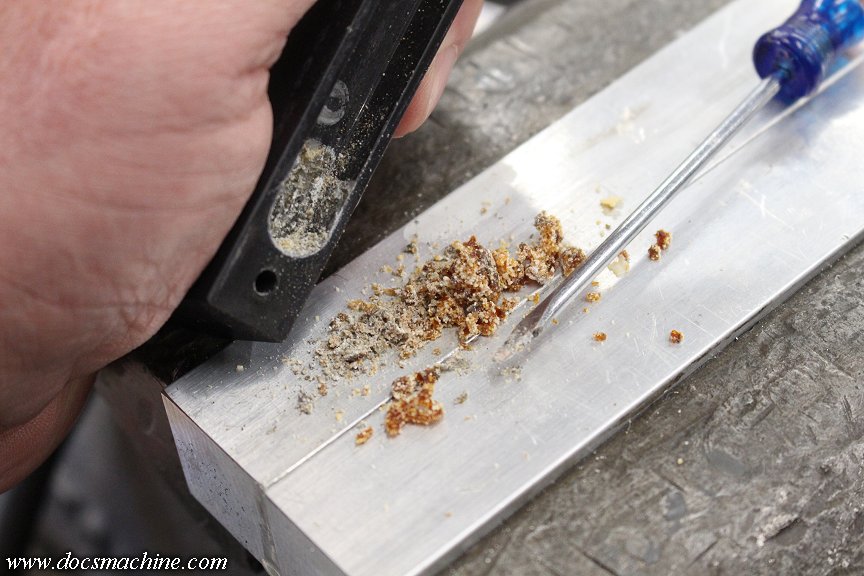
                    Yeah, that used to be polyurethane. Cheaper urethanes can react with moisture in the air and hydrolyze, or break down. Basically the polymer depolymerizes.

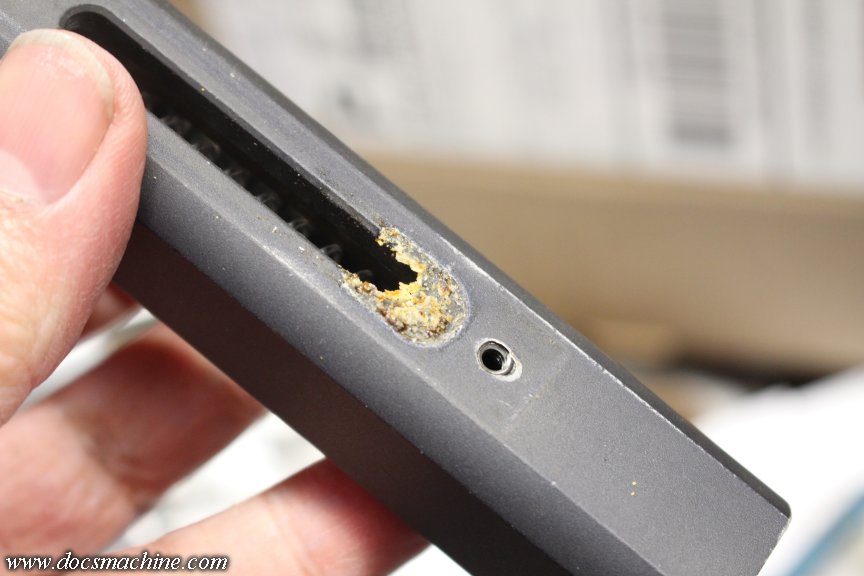
                    This example is likely 35+ years old, and had utterly degraded. I had to scrape it out with a screwdriver:


                    It even left a smear on the body, and in both cases tarnished the anodizing.


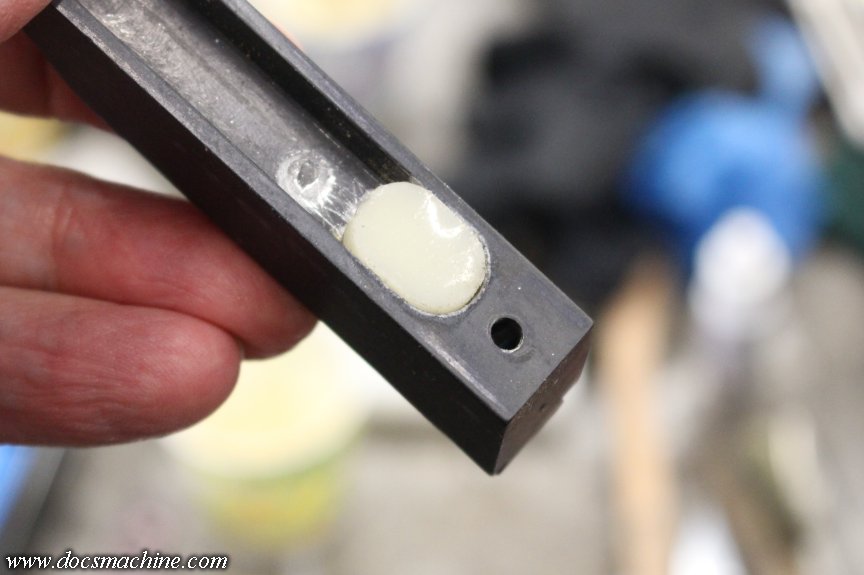
                    Once cleaned out, the new bumpers simply press back into place:


                    Where a pin sticking up from the hammer hits it on the rearward stroke, buffering the impact somewhat. The gun works without it, but can damage itself without that cushioning.

                    I may take a few minutes this evening and clean up the rest of the gun... 'Mag said the trigger spring's broke, but apart from that, it looks like it just needs cleaning, lube, a new hammer pin, and of course all the O-rings. I wonder if I have a grip for it...

                    Doc.​
                    Doc's Machine & Airsmith Services: Creating the Strange and Wonderful since 1998!
                    The Whiteboard: Daily, occasionally paintball-related webcomic mayhem!
                    Paintball in the Movies!

                    Comment

                    • DocsMachine
                      MCB Member
                      • Jul 2020
                      • 2699
                      • Alaska

                      #28
                      Still makin' progress, just a lot of it at the moment is repetitive bulk-work.

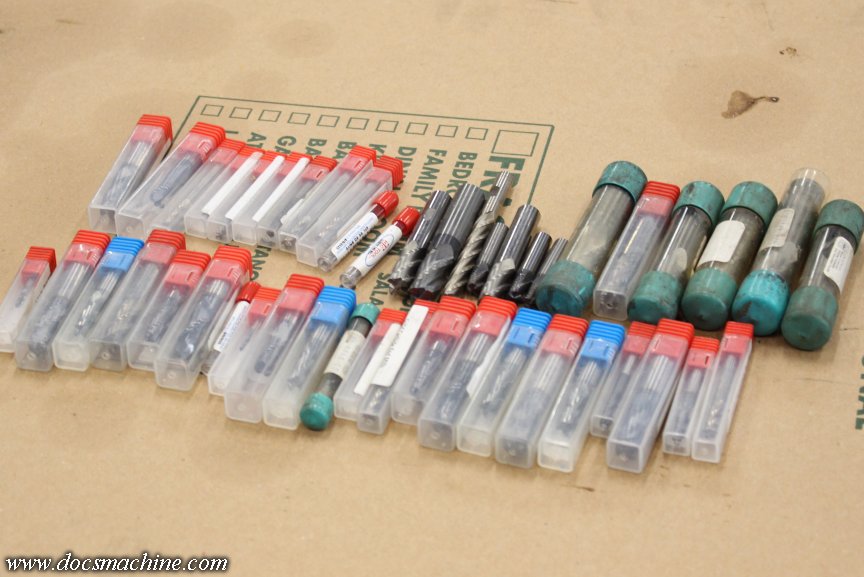
                      Had a friend offer me most of his endmill collection. Seems his machine, an older Milltronic, has gone kerflooey- something with the drivers, which I took to mean the servo amplifiers. It'll cost too much to fix- more than the machine's worth- and he has machines at work he can use, so he doesn't need all the tooling.


                      Almost all carbide and less than $8 each- which was actually a bit more than he was asking, 'cause I'm a nice guy. Everything in a square tube is brand-new, and the rest are damn near.

                      And, interestingly enough, right when I was thinking I need to get some fresh tooling. I still want to buy up some basic HSS, but all this is a pretty nice start.

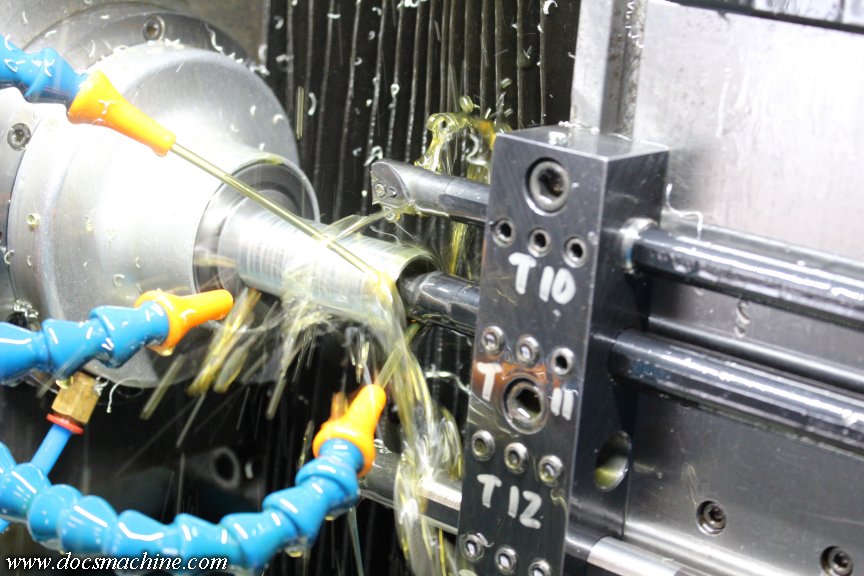
                      Much of the rest of the weekend was running the bejeebers out of the Omni:


                      I haven't been putting in nearly enough time on this yet this year- trying to get other way-overdue stuff taken care of. But I've got a boxful of product I've been needing to get off to anno since the beginning of the year, and I need another few dozen to fill out the order.

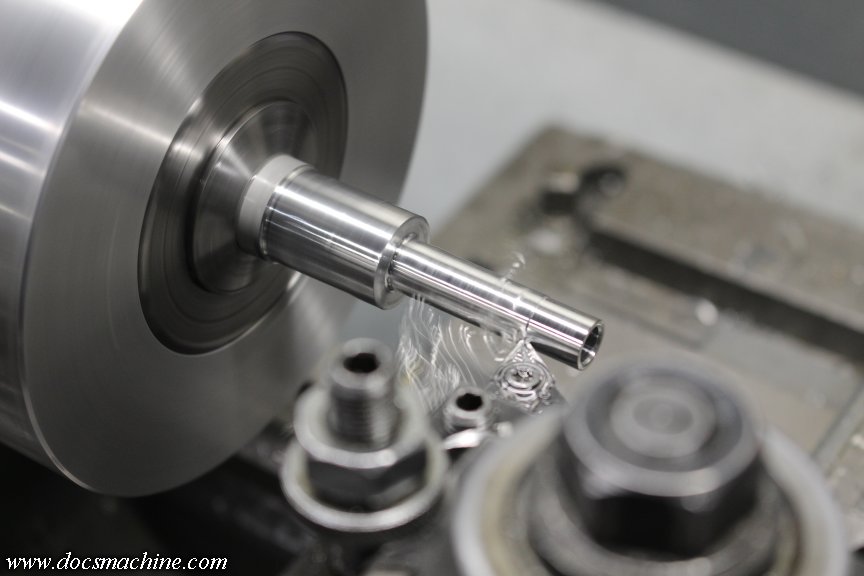
                      I also made one of these:


                      Actually, I started on three of them. They're not done yet, but I had reason I needed to at least start on them. More on what they are later- at least one of them may well be a very long term project.

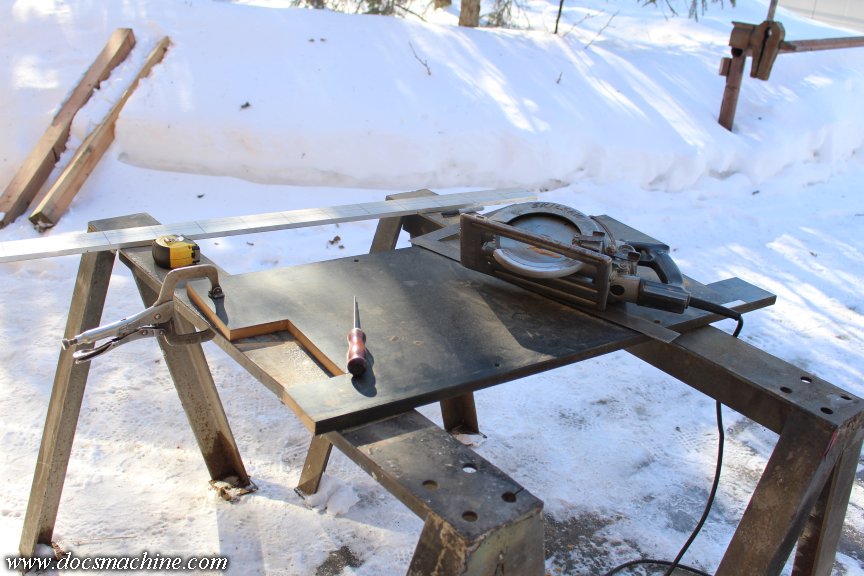
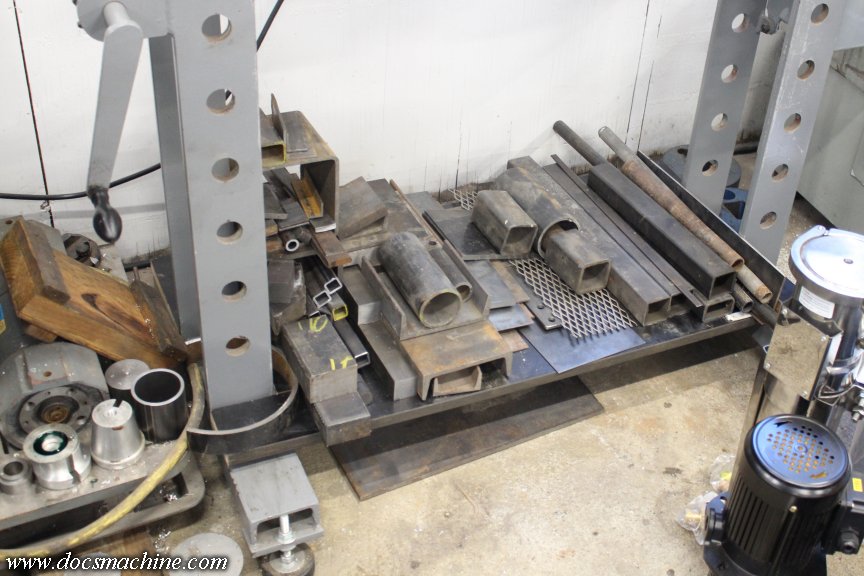
                      And, while the Omni's been running- a 2:15 cycle time- I've been trying to clean up a little and put away tools, as the shop is a freakin' wreck. I had a heap of scrap metal, clean steel I occasionally use for this or that, but I haven't really had a place to put it. While I was trying to sweep the area, I got an idea. I had this chunk of treadmill base- particle board- that I'd used as a backing for the holesaw when I made the Rivett collet drawer.


                      It had no other use, so I cut it to length, nipped a couple notches in it, and fitted it to the base of the hydraulic press:


                      There's a crossbar under there to keep it from sagging too much. I'd already been kind of piling scrap there, often just as press tools- anyone with a press knows what I'm talking about.

                      This let me un-jumble it, make it a little easier to find stuff, and made more room for all the other pile. That opened up a fair chunk of floor, and like that game with the sliding tiles, made room to shift and organize a few other things, too.

                      The downside is the actual press tools no longer have a home. Really, I need to get rid of that grinder seen to the left, and make myself a little rack or something for it all.

                      Just one more thing for the to-do list...

                      Doc.​
                      Doc's Machine & Airsmith Services: Creating the Strange and Wonderful since 1998!
                      The Whiteboard: Daily, occasionally paintball-related webcomic mayhem!
                      Paintball in the Movies!

                      Comment

                      • DocsMachine
                        MCB Member
                        • Jul 2020
                        • 2699
                        • Alaska

                        #29
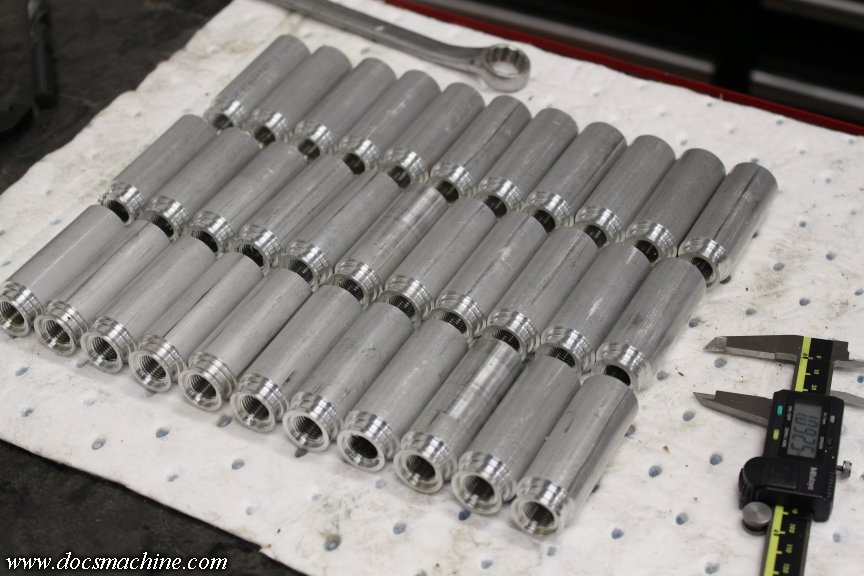
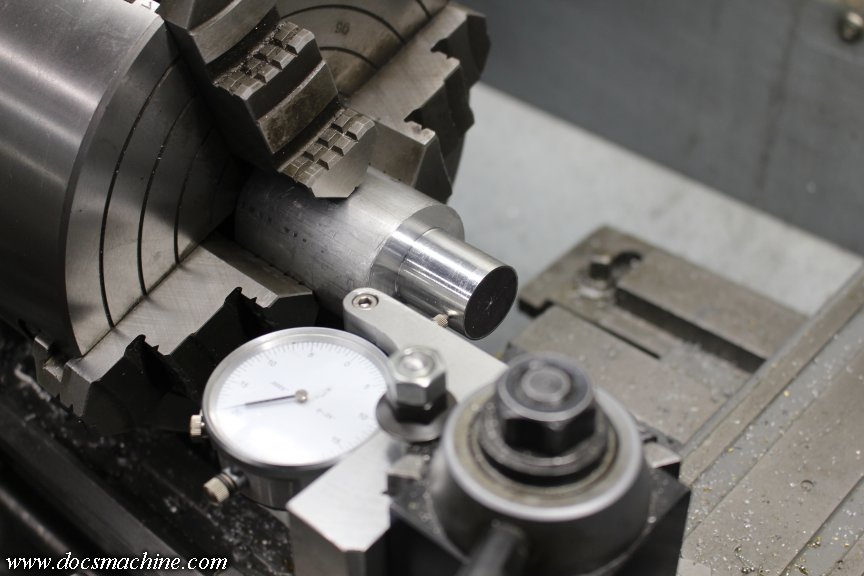
                        A bit of yesterday's production for a client.


                        With a little luck, I should be able to have these out by Monday.

                        Doc.
                        Doc's Machine & Airsmith Services: Creating the Strange and Wonderful since 1998!
                        The Whiteboard: Daily, occasionally paintball-related webcomic mayhem!
                        Paintball in the Movies!

                        Comment


                        • Funsi00
                          Funsi00 commented
                          Editing a comment
                          Looks like a Nelson valve body?

                        • DocsMachine
                          DocsMachine commented
                          Editing a comment
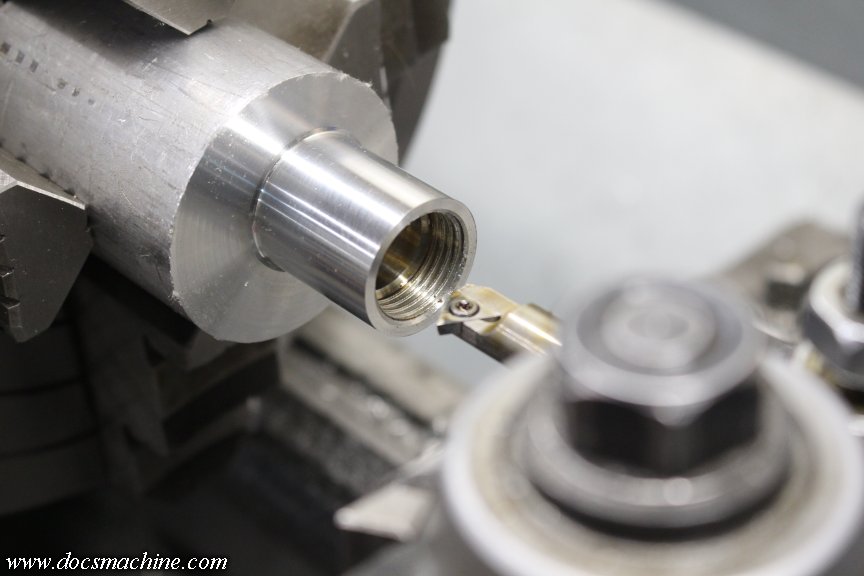
                          Completely wrong! It's a bunch of Nelson valve bodies.

                          Doc.
                      • DocsMachine
                        MCB Member
                        • Jul 2020
                        • 2699
                        • Alaska

                        #30
                        Yes! I found my old photos!

                        When I started this biz, way back before the turn of the Millennium, I used a 35mm film camera, a Pentax K-1000, to photograph the cooler stuff. I couldn't take pics of all that I wanted to- with the film and developing costs, one photo probably cost me a buck and a half to two bucks.

                        But, that worked 'til I went digital with a cheap point-and-shoot 'round about December of '99, but I'm a packrat, and still have boxes of those old paper photos.

                        Now, of course I scanned and posted those back in the day, but usually at fairly small sizes considering the teeny monitors we used to have, and also my website is not the most organized of places, and many of you probably haven't seen some of this stuff.

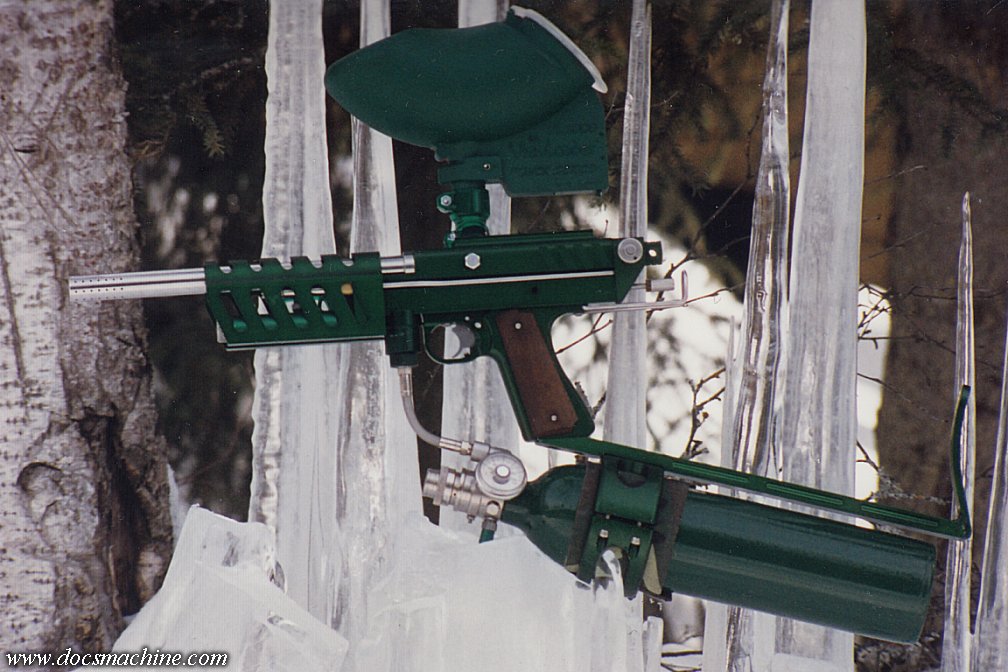
                        So, I figured I'd scan and post a few blasts from the past. First up, my once-pride-and-joy:


                        My original "green cannon" Autococker, lightly milled and heavily modified, this was my 'main gun' for a number of years. I was so proud of it I even made a red-oak display stand for it. It's now long an obsolete antique these days, but at the same time, I'd have no issues gassing it up and playing a game with it today. (Well, other than the HPA tank is wildly out of date. )

                        I made the stand in '96, predating the biz by a couple of years, and had pretty much finished it by that point. I was actually thinking a few months back how I should shoot some fresh pics- I still have it- and do a 30th anniversary retrospective on it.

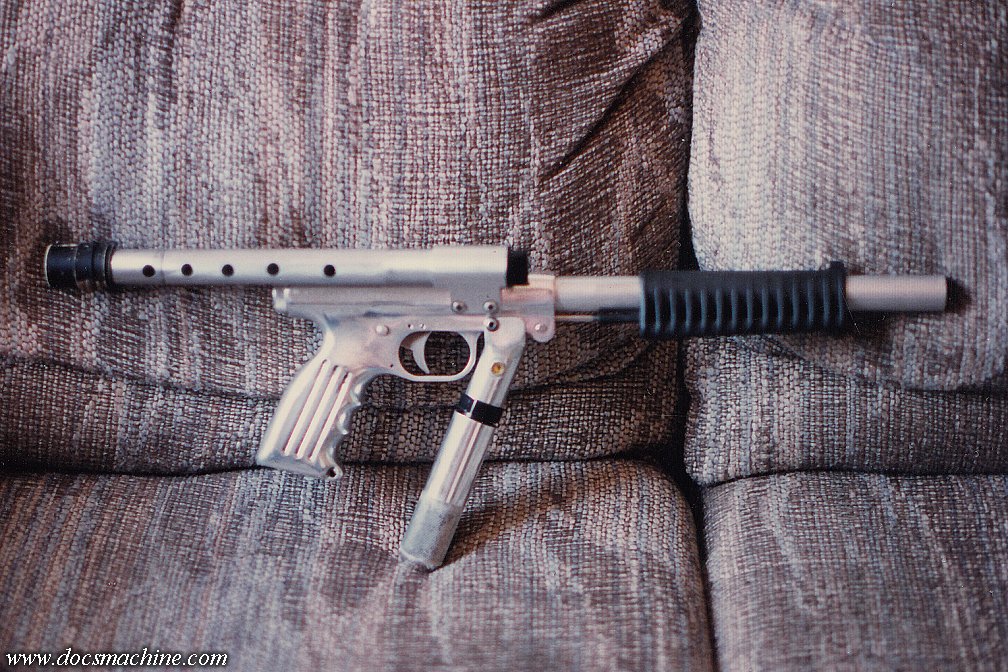
                        The other is my heavily customized SL-68-II:


                        I've had a pic of the other side of this one up on my website since before it really was a website (and not just the space my dial-up ISP gave me with the account) and it brought me a lot of business over the years. It basically demonstrated that I could modify the unmodifiable.

                        I still have this one, too, and have been meaning for years to dig it out and clean it back up. I also recently developed a new barrel mod for these markers, so I'll probably add that to it as well.

                        I have two good sized boxes to still go through, so plenty more still to come!

                        Doc.
                        Doc's Machine & Airsmith Services: Creating the Strange and Wonderful since 1998!
                        The Whiteboard: Daily, occasionally paintball-related webcomic mayhem!
                        Paintball in the Movies!

                        Comment

                        Working...