Prior to yours I don't recall any that were not multiple guns bolted together.
I made a pair of double snipers around 2011/2012 but it was a total cheat because I did them in brass then brazed them together and cleaned them up to look solid.
-
Interesting question: Who made the first double-barrel AutoCocker?
Near as I can tell, I was the first, and apart from Ken's Ma-Deuces, and I think a Chipley one-off, no one else has made one. Have they?
Since this thread started, I've had a couple people tell me "yeah, that's cool, but this other guy made one first".
Now, I made the first one in '04, and I'm told Simon's been showing off his (which IS my first one) at events for years, and of course Ken made a few Ma-Deuces over the years, so I'm thinking those people are thinking my old ones, are the ones "made before". In other words, they're basically telling me I made them before I made them.
BUT... is that true? Does anyone know of a double-'Cocker from prior to '04? When I made that first one, not a single person suggested someone had done one before, and apart from Ken's, I've never seen one or heard of one, since.
Anyone know? I'd be very curious to hear.... And whatever happened to that multi-barrel market thread?
(And, does anyone have a pic of Simon's?)
Doc. -
Boy, did I need practice. A feed neck tube is absurdly simple, and for whatever reason, this thing took me way to long to program.
After all too many iterations, at way too late in the evening, I finally got my first successful part....
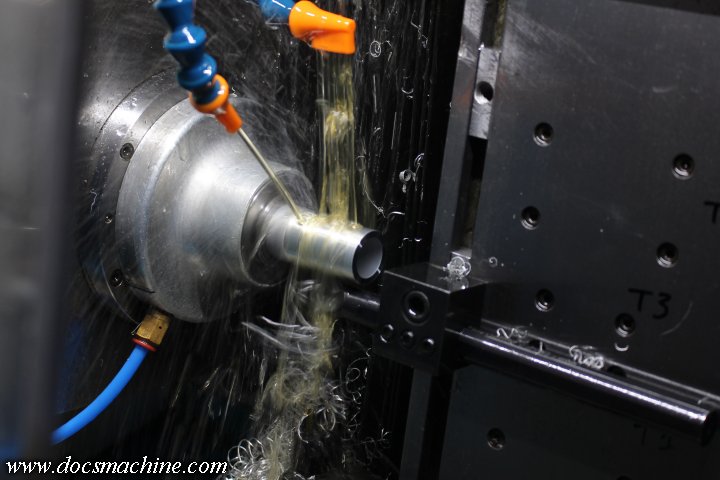
Which was spot-on dimensionally, even though the code is ugly and about six times longer than it should be, and all my feeds and speeds are seat-of-the-pants.
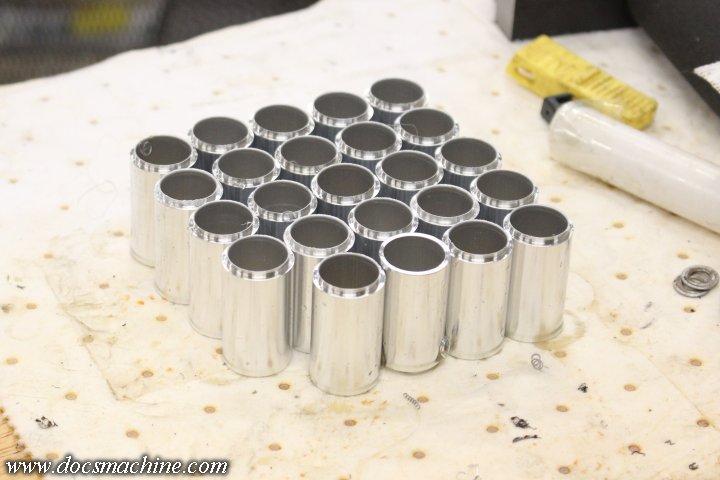
Made my batch plus a few extra, in case I either screw one up or maybe make more VT's in the future.
Now it was time to slap one together. Well... 'slap' isn't really the right word, as I'd forgotten one of the big steps. Ideally, one should sand and smooth the body before installing the feed necks. That way it's easier and straighter to sand without the neck in the way.
This part is always tedious, and typically takes up a couple sheets of sandpaper- or most of them, anyway. I tend to "wet sand", which helps eliminate the dust issue, and makes the paper last longer- it doesn't load up as fast. (You need "wet or dry" paper, though- and guess what? The purple stuff... isn't. )
)
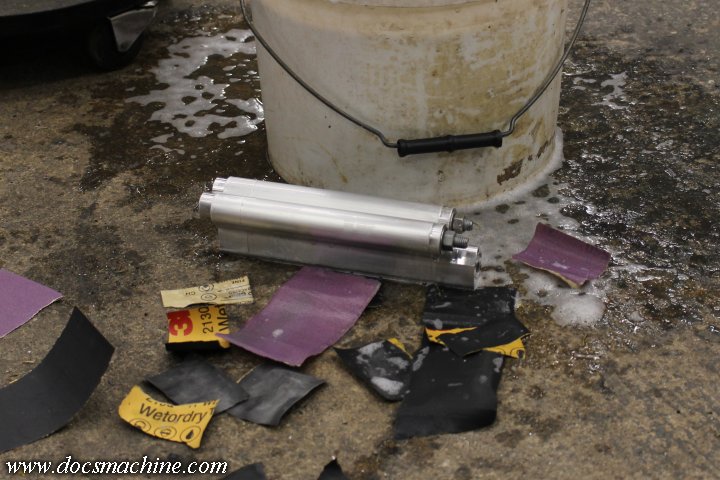
After approximately fourteen hours and three elbow transplants, I had it at least acceptably smooth. It'll still need some work before polishing, but the heavy sanding to get rid of the tool marks, is done.
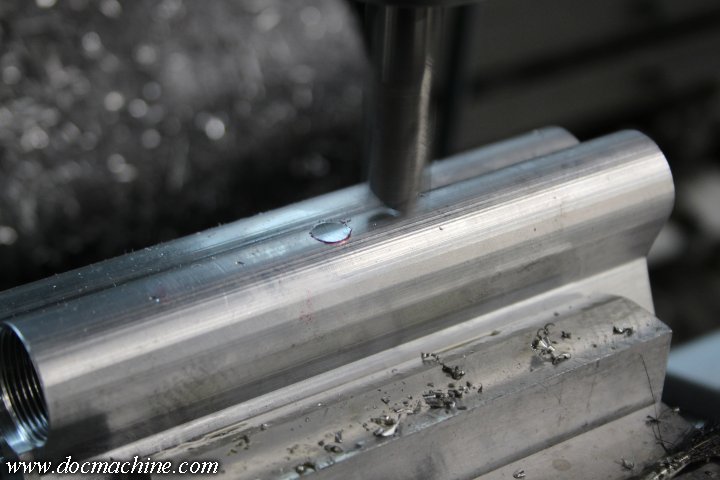
Then, back to the mill to bore the opening for the new necks...
And then a ride through the forty-ton press to mash the neck into place. (Obviously, along with a dash of red Loctite.)
That's an .0025" interference fit, she's not comin' out of there.
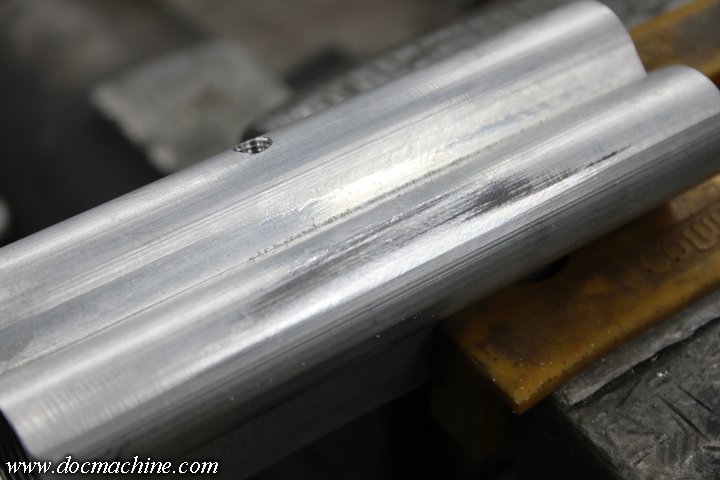
And there she is! I promised feednecks by Friday, and by my clock I still have 30 minutes.
Big update on Monday!
Doc.Leave a comment:
-
Please check your email and send me some info about my build when you get a chance.Originally posted by DocsMachine View Post
Leave a comment:
-
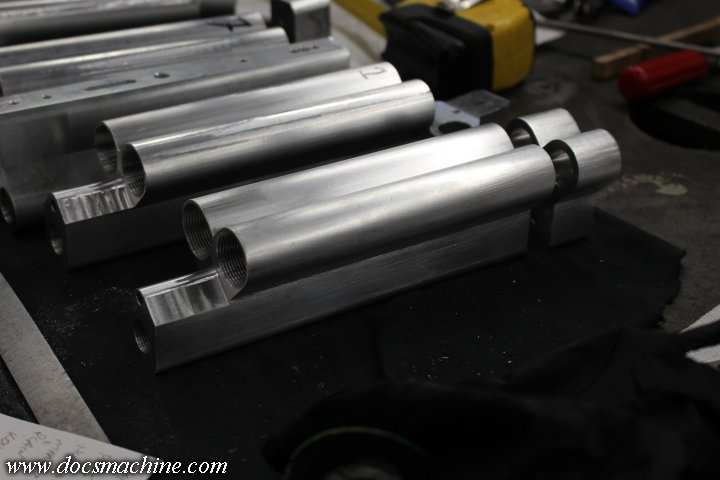
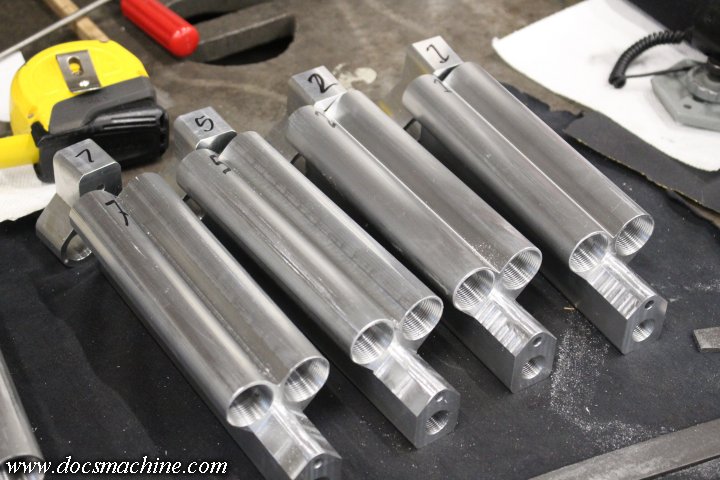
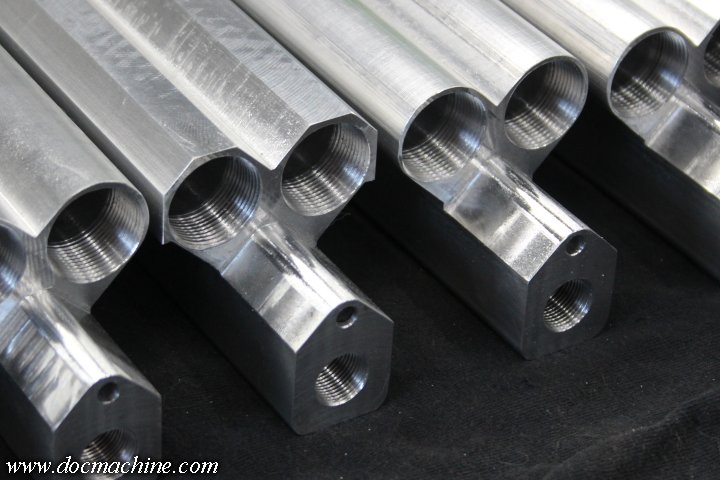
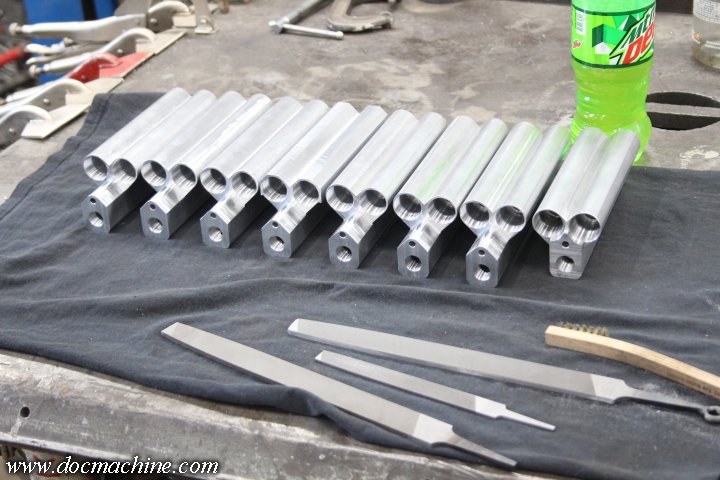
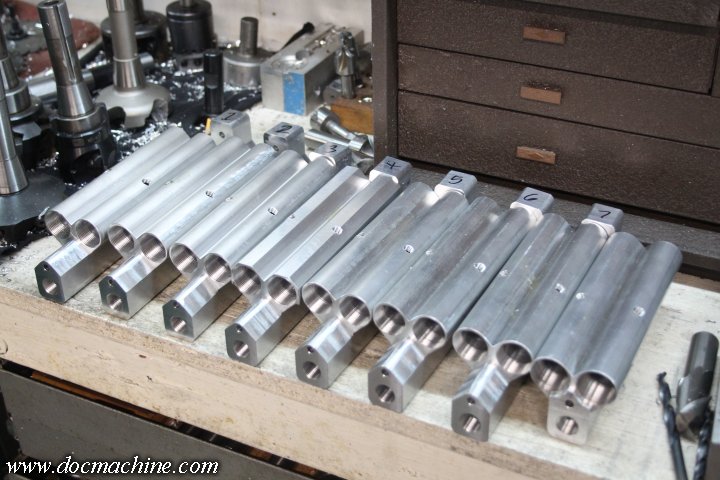
Got all (but one) bodies successfully filed and smoothed down today:
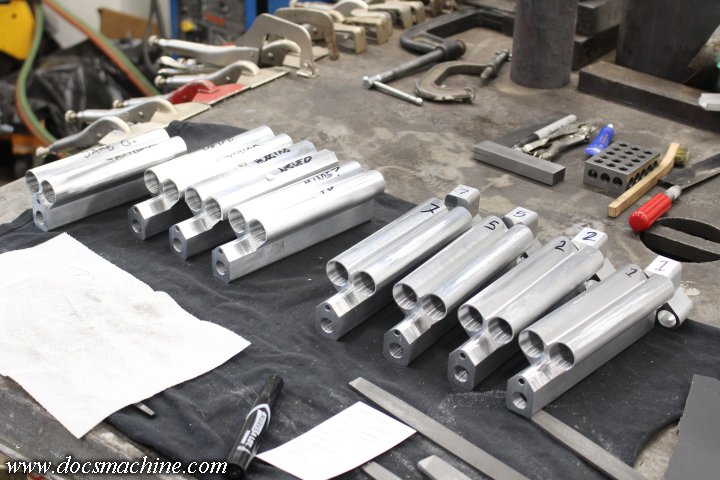
And now it's time to start segregating the individual bodies, as the overall build and milling will start to vary per customer. These four will be "standard" builds, with normal backblocks and whatnot.
I wanted to start installing feed necks today, but as per a conversation over on The Guild, this is, really, a good opportunity to practice a little short-run CNC stuff. As such, I spent the day making another tool for my CNC, so that I can make a batch of them accurately and consistently.
I should be able to get that coded up and run on Friday, maybe have the first few installed by Friday afternoon.
Get'cher checkbooks ready; with a little luck, I think I might be able to start shipping some of these out next week!
Doc.
Leave a comment:
-
On the anodizing, no. No issues. I used the exact same technique on all the other bodies I've made, including the one in Firpo's video shown earlier. The red loctite, once cured, is surprisingly chemical resistant, and when the plugs are tightened solidly, there's no issue with an electrical connection. (Only time I ever had a problem with that was plugging the front ASA on a VM body. I sealed it with JB Weld, which did, in fact, electrically insulate the new plug, and the shop told me it wouldn't take anno because of it. Looked okay, though.)
Doc.Leave a comment:
-
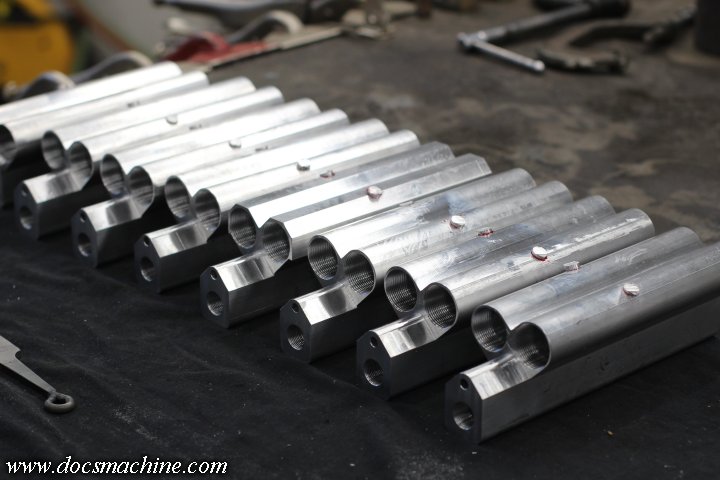
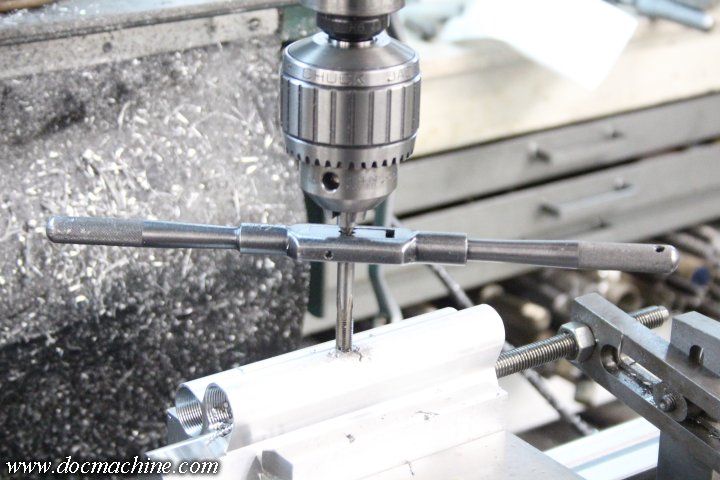
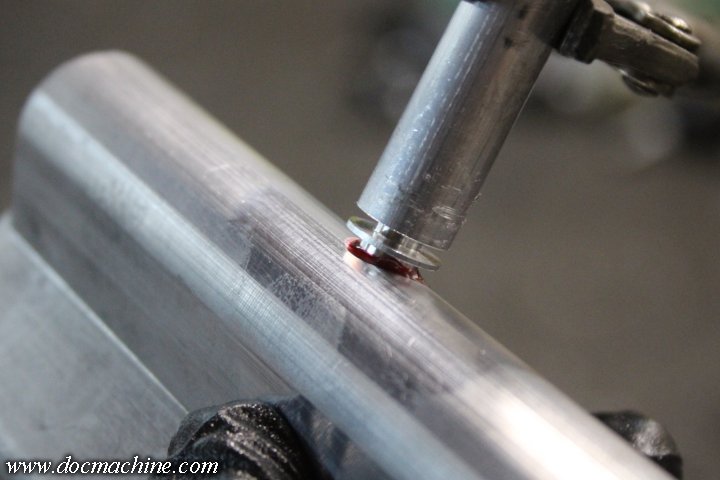
Not much to show today, apart from getting the holes plugged.
I'd hope to get some or all of them filed down, too, but I just didn't have time.
It does kind of frustrate me, though: Making these plugs was rather time consuming, and I should be able to do this sort of thing on my shiny new CNCs. Well, actually, I can, this would have been a fairly simple part to code, but in this case, I'm still nowhere near good enough- or fast enough- that it'd actually save time making just sixteen plugs.
If I was making 200 or more, you bet your boots I'd take the time to set the CNC up for it. (Although at this point, I'd still need a spindle liner, bar-puller and parting tool to do it right.)
Anyway, with a little luck... Feed necks by Friday!
Doc.
Leave a comment:
-
The only issue Red Loctite could have with anodizing (after fully curing) is if it broke the electrical contact with the rest of the body or had a significant electrical resistance that would cause variation in color or effectiveness of the the anodizing. According to the guys in our proto-shop they've never had a problem with red Loctite and anodizing other then when they did not fully clean up the surface to expose the aluminum. Given Doc filed away the plug cleanly this should not be an issue.Leave a comment:
-
Nice trick with the plug and drilling the air holes. I was wondering if you drilled from the top, but didn't know if you would have enough meat in that top wall to plug like that.
2 questions though:
1.) I assume you use the same aluminum to help hid it after anodize? no color differences due to reacting differently?
2.) the red loctite holds up okay through anodize? I don't remember if heat is used or not (been a while since I worked with anodizers), but don't they use some acidic liquids too?Leave a comment:
-
And we're back!
I had a ton of must-do work that... well, I had to do, and all of it took me longer than expected. (Which, of course, it always does. You'd think that at some point I'd learn. )
But, all the immediate fires have been put out, the cat's been fed and I told my secretary to hold all my calls, so it's time to get back to these badboys!
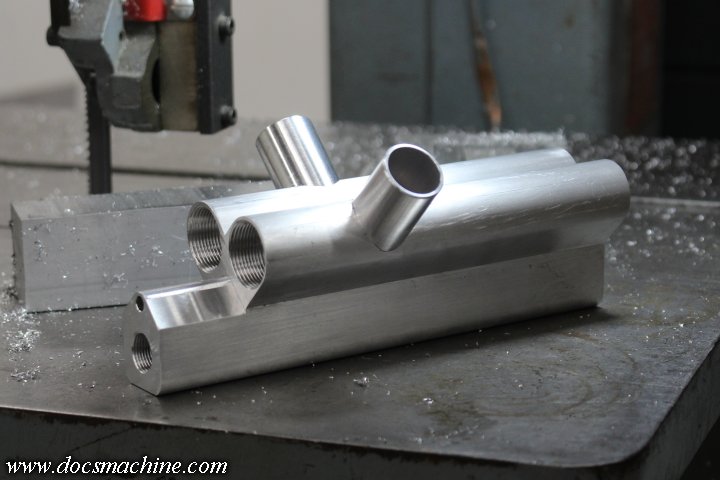
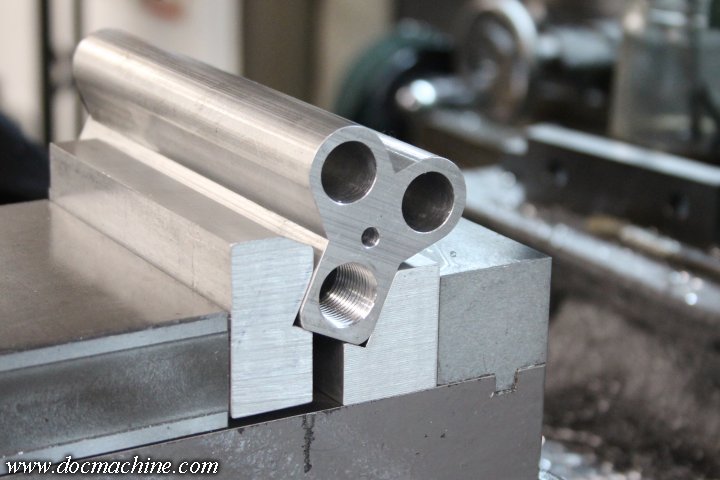
Starting off, there was this little weehaw on the 'nose' of the body, where I couldn't reach with the corner-rounding endmill.
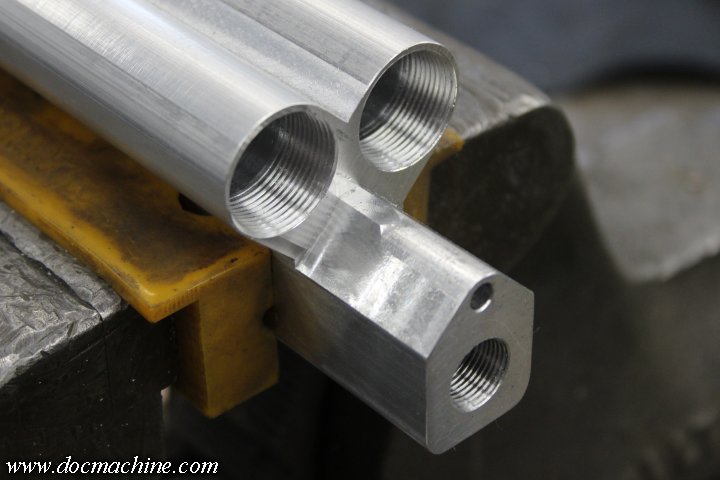
Easy enough to take care of- I'm no Clickspring, but I know my way around a file.
And here's a trick for a situation like this: I want to take the bit at the 'peak' off, but NOT scar up the barrel faces, so you use a "safe edge" file like so:
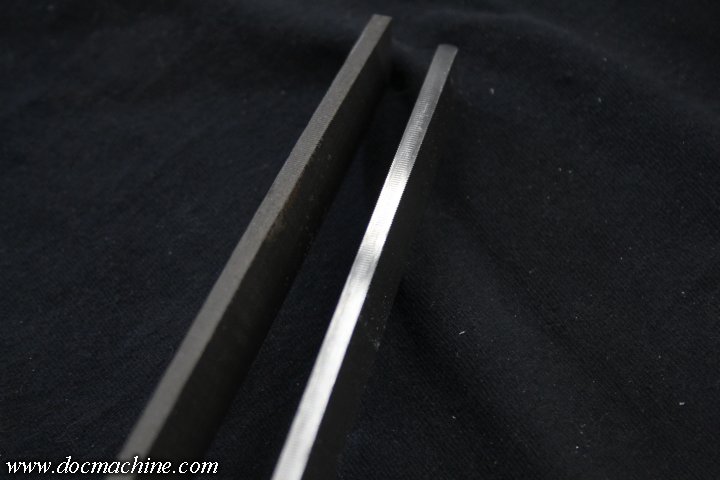
I know it's kind of hard to see, but basically I just hit the narrow faces of the file with the belt grinder, 'til the teeth were basically gone. That way, it can't cut on that face, and you get a nice, sharp corner where the two faces meet.
A few careful minutes on each one and the form is now perfect. A touch of sandpaper when it comes time to finish each body, and it'll be smooth as glass.
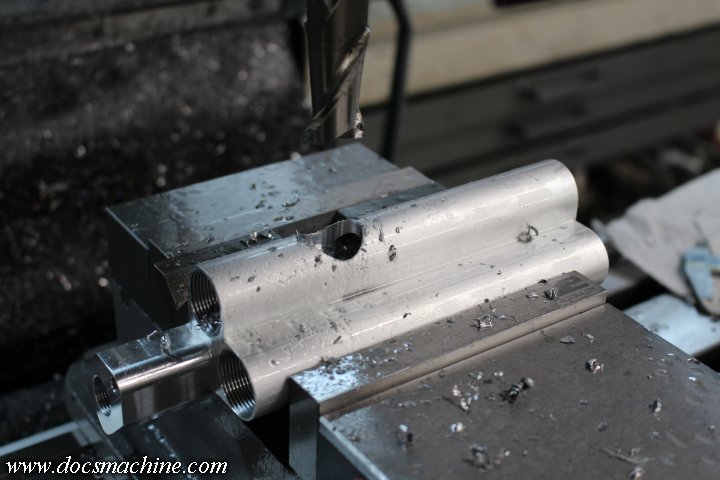
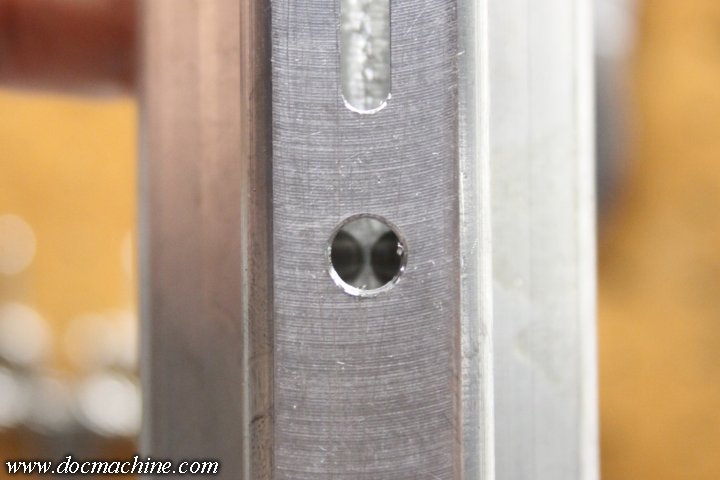
Now, here's one of the tricky bits some of you fellers were asking about. Back when I've made individual bodies, I've just used a cheap angle vise, but in this case, I wanted something faster and more repeatable. So I took a few minutes to make some quick and dirty angled vise jaws:
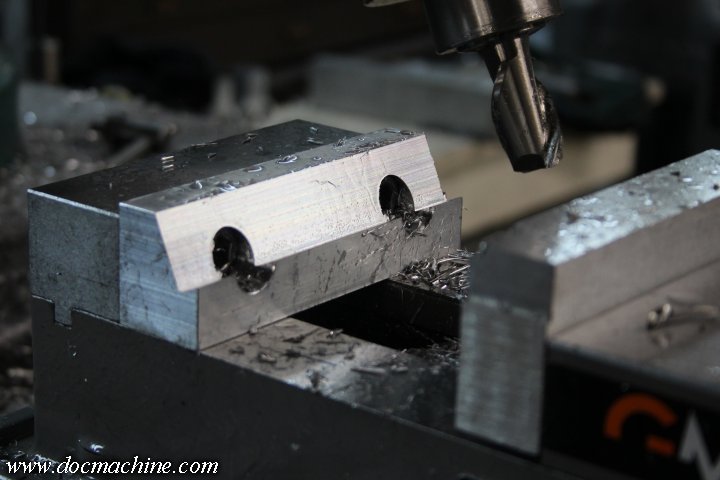
Those hold the body just like this, securely and repeatably, at the exact angle necessary to drill the gas ports up from the valve.
Like so:
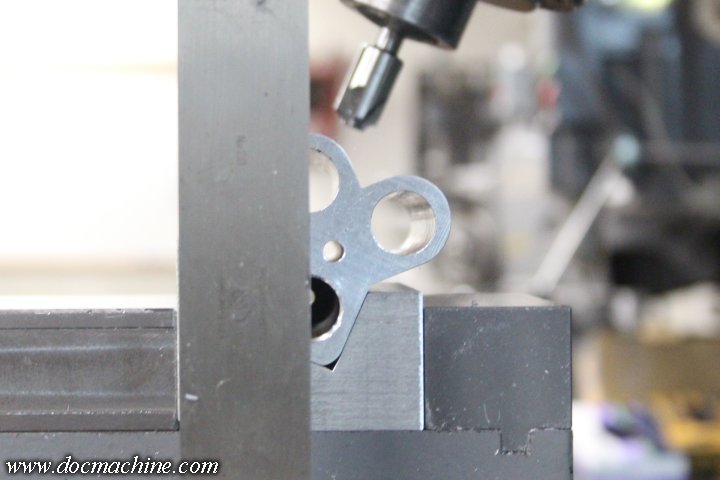
After finding the center of the bore, and the proper spacing, the hole is drilled through from the top, unlike a typical 'Cocker.
The upper part of the new hole is then tapped in the same setup.
And looking up from the normal valve retaining screw hole underneath, you can see they juuuust about meet at the top of the valve.
Do all that approximately sixty more times, and we're partway there!
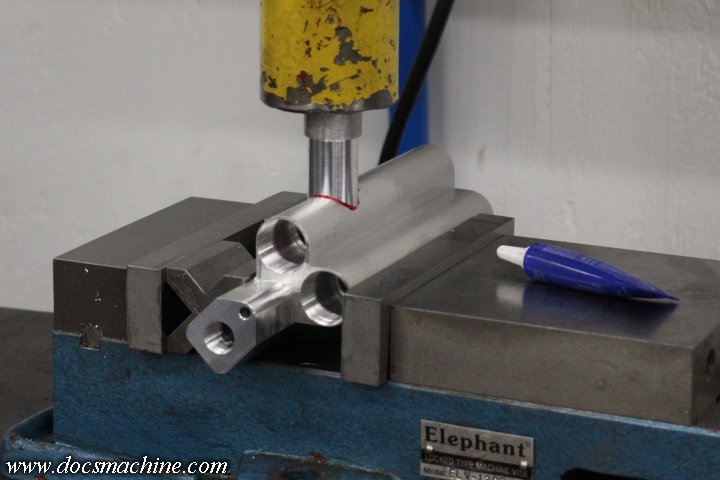
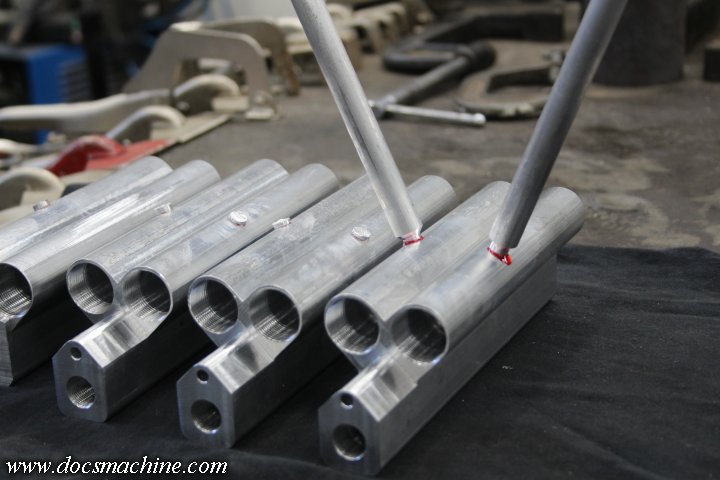
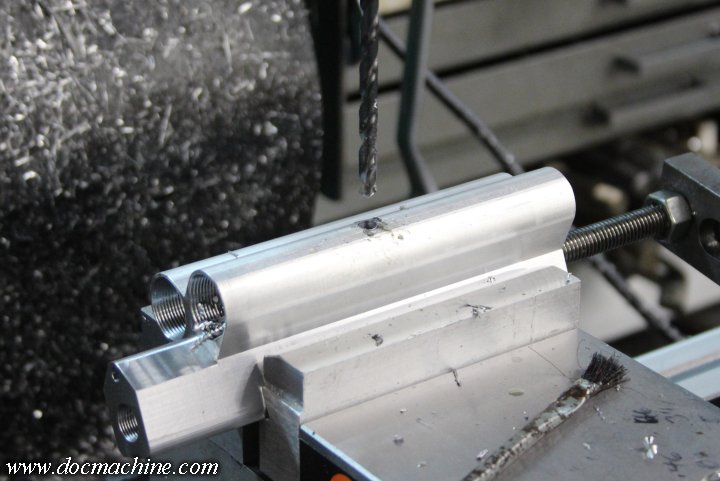
Now, the trick: I turn an aluminum plug, with dead-ended threads, like so:
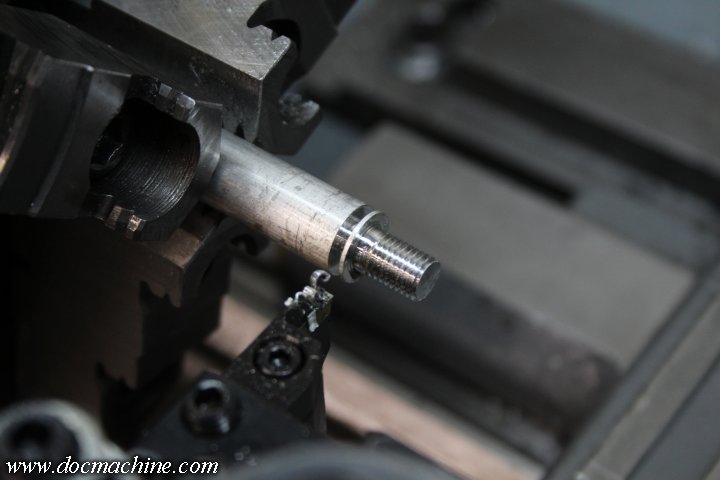
That gets a liberal dose of red LocTite (one of the very few times you should use red anywhere near a paintball gun) and then screwed hard into the threaded hole.
After that's had a chance to cure slightly, and the stub is sawed off (that's what the groove is for, to make that easier and quicker) I use the same mill vise setup to very closely shave off the bulk of the plug.
And then, back to the file vise, a couple careful strokes with a fine file, and the unnecessary part of the hole is basically gone!
I just have to finish up the rest of the holes, and all of a sudden it'll be time for feed necks!
As always, Stand By! More coming soon!
Doc.Leave a comment:
-
Still haven't forgotten about you lot. I got four out of those five things delivered on time, and expect to finish and deliver the fifth by Tuesday. I have a couple other less-time-dependent jobs to finish up and get off the table after that, and at least a solid day of cleaning the shop. It looks like I hosted a particularly rowdy kegger for the entire 9th Armored Division in there, only with slightly fewer whiskey bottles.
But, with luck, by Thursday or Friday, I can get back to this and firewall the throttles 'til I can start getting finished kits out to you gents.
Thank you for your patience.
Doc.Leave a comment:
Leave a comment: