instagram takipci satin al - instagram takipci satin al mobil odeme - takipci satin al

bahis siteleri - deneme bonusu - casino siteleri

bahis siteleri - kacak bahis - canli bahis

goldenbahis - makrobet - cepbahis

cratosslot - cratosslot giris - cratosslot

Announcement

Collapse
No announcement yet.

Just got my first brass marker and I could use advice

Collapse
X
 
  • Filter
  • Time
  • Show
Clear All
new posts

    Just got my first brass marker and I could use advice

    So not long after my thread about the price of pgps I got a few offers and landed on a converted pg I thought would be a good starter project in terms of brass.

    My current plan is to do widgets according to the sticky, polish a whole bunch, then strip the frame and possibly repaint it. I've just got a few questions for the experts.

    As far as polishing goes my plan is to use brasso and a Dremel with a polishing bit after a few passes using rags. Obviously it's fine to hit the outside, but the inside could use a shine it would seem, is there anything wrong with polishing the interior of the tubes and the hammer/other internals with the aforementioned method?

    In terms of the frame I figure hit it with brake clean or paint thinner to strip away some gunk and the remaining paint, buff it out a bit with a light grit sand paper, dissemble it, plug the pinholes/screw holes and hit it with an outdoor spray paint or something? I'm kind of lost here as anodizing it just doesn't feel right for some reason.

    I'd love to hear from the experts as to any mistakes to avoid or if I'm using the right methods. And speaking of which I told netsurferdude2 I'd tag him when I made a post so here you go.

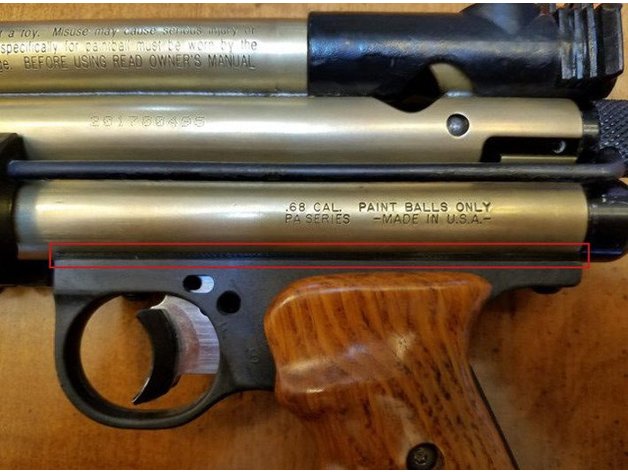
    I attached some pictures for those who are curious as to what I'm working with, sorry for the potato quality.
    Last edited by Impactfour; 06-16-2022, 06:10 PM. Reason: Figured out how to tag people
    WTB phantom dropout valve-any color
    Feedback: https://www.mcarterbrown.com/forum/b...our-s-feedback

    #2
    Somebody get this man a sheridan front sight. I was clean out of them.

    Also if you want to try and knock some of those dents out of the top tube, bang an empty 12 gram down there (with the sight and front cap removed.

    Comment


    • Impactfour

      Impactfour

      commented
      Editing a comment
      I was just looking into the front sight funny enough, and I love the idea of smashing the 12g through to remove dents. I'll add that to the list of stuff to do. Is there any reason I couldn't do that so all three tubes? I havent had the time to dissemble anything yet so I'm pretty damn clueless here.

    • netsurferdude2

      netsurferdude2

      commented
      Editing a comment
      The barrel is a smaller diameter so you cant fit a 12gram down there, and the bottom tube is larger than the diameter of the 12gram and it has a soldered-in valve housing so it wont fit through. Just the top tube!

    #3
    Get a nice fluffy 12 gauge swab kit, put it in a drill with brasso, move it quickly up and down as you spin away will do I nice job polishing the insides.
    it’s messy do it outside with the gun in a 5 gallon pail.
    Last edited by Paintslinger16; 06-16-2022, 07:19 PM.

    Comment


    • Impactfour

      Impactfour

      commented
      Editing a comment
      That's brilliant, I was getting ready to weld up an absurd Dremel attachment to make it long enough to fit the length, that would be much easier.

    #4
    That patina is beautiful. I would just straighten out the feed tube and get either a Kframe or just an RVA to get your velocity up.
    💀Team Ragnastock💀
    Ion Long Rifle
    Spyder Pump
    BST Feedback
    Brass Thread

    WTB Sheridan Parts

    Comment


    • Impactfour

      Impactfour

      commented
      Editing a comment
      netsurferdude2 actually threw in a RVA, and I've got an order with PPS (if they ever process it) for a few parts.

      To be honest I'm not a patina guy, while I'm sure fingerprints will bug me, I wanna polish the tubes. Just not sure what to do with the frame yet, maybe once I remove the remaining paint I will just decide to polish it as well (I like shiny).

      When you say straighten out the feed tube I assume you mean the dents like netsurferdude2 suggested?

    #5
    You can chuck a barrel swab in a drill to polish the inner bore as well if you have an old one kicking around

    Comment


    • Impactfour

      Impactfour

      commented
      Editing a comment
      I've got a uselessly long one that should do the job perfectly if I can find it.

    • Grendel

      Grendel

      commented
      Editing a comment
      12 gauge shotgun swab soaked in brasso works wonders as well.

    #6
    I don't think anodizing the frame is possible. It's cast metal for sure. I think these frames pre-date the development of cast aluminum that can be anodized. Either way, I've never seen one anodized, and I would be interested in the process of it were possible.
    Feedback

    https://www.mcarterbrown.com/forum/b...der-s-feedback

    Comment


    • Grendel

      Grendel

      commented
      Editing a comment
      Yup they are Pot Metal frames not even cast aluminum. Clean up well, use an etching primer and paint (rattle can style) it will last a season or so before it starts chipping. If you really want a nice frame you can use a plate to adapt to a Automag or Cocker Frame. Good use for a Mag CF Frame.

    #7
    Manages to make some progress this afternoon as I was working on land for once. Got a fair amount of polishing done on both the interior and exterior before the Dremel attachments wore out. I got started on the wedgits as well, but didn't bring small enough paint to feel comfortable going much further, I'll finish them off with some graffiti later. The frame was easy enough to strip, still need to prime and paint it though.

    Now for round two of the questions. Does anyone know the screw sizes for the frame, I manages to strip one of them when I mixed the two up. Additionally, it seems like the bolt isn't going back far enough when I cock it, I'm sure I reassembled something wrong, anyone have any guesses?

    Otherwise I'm loving this project so far.
    WTB phantom dropout valve-any color
    Feedback: https://www.mcarterbrown.com/forum/b...our-s-feedback

    Comment


    • Impactfour

      Impactfour

      commented
      Editing a comment
      Awesome, thanks for the screw sizes. And it's cocking, but for whatever reason the bolt isn't coming back far enough for a paintball to fall into the breach. I'm guessing it could be that the hammer is backwards, but the marker isn't in front of me right now.

    • BrickHaus

      BrickHaus

      commented
      Editing a comment
      Check the length of your hammer lug ( the set screw in the bolt) it should catch the shoulder on the back of the bolt, vs the face of the bolt.

    • JeeperCreeper

      JeeperCreeper

      commented
      Editing a comment
      Make sure the rear screw isn't too long and jamming up the spring. I just figured that out myself.

    #8
    As for the frame, and anodizing. If you want to have fun, I recommend 2x options, and cost and or part availability is a factor.

    First option. If you have a cocker frame laying around. You can go on Thingiverse and print an adapter rail that JonM created. Then you simply slap a cocker frame on that bad boy and rock. Sliders make sheridans point extremely well.

    This adapter will allow you to mount a trigger frame for an Autococker to a Sheridan paintball marker such as a PGP. Depending on the trigger frame, you may need to purchase longer 8-32 screws. Do not over tighten the screws or the adapter may split. Update: I've uploaded a second version that is 0.25mm thicker than the previous model. This should help with splitting under stress.


    If you want to sink some money into it, get a K frame from Dsergison they spread the grip of a pgp out some, and really make them feel bad ass. You can get a raw aluminum one and anno it to your desires.

    https://www.mcarterbrown.com/forum/b...khaus-feedback

    Comment


    • Brokeass_baller

      Brokeass_baller

      commented
      Editing a comment
      ChoSanJuan that is the craziest PGP I've ever seen in my life.

    • ChoSanJuan
      ChoSanJuan commented
      Editing a comment
      Haha, thanks! I got crazy with some 3d modeling/printing on it. What you are seeing is a mid-way point in my feedgate project. It's almost ready for primetime once I can get a way to elegantly stop rollback.

    • Impactfour

      Impactfour

      commented
      Editing a comment
      ChoSanJuan that's a wild pgp. Unfortunately my only access to a 3d printer is at the library, with limited accessibility and capabilities from what I've gathered. But that is quite a cool set-up and fun inspiration.

      For now I'm going to stick with the current frame and grips. I don't know how it slipped my mind, but the more I held the pgp the more familiar it felt until I finally realized I learned to shoot with a Benjamin Sheridan air pistol as a kid. I might get the k frame some day for cool cowboy appeal and the full brass curb appeal though..

    #9
    BrickHaus was correct, it was the hammer lug causing the cocking issue.

    I've been drooling over k-frames for year now, but I'm going to hold off until I can play with it for a bit and decide if I like it before investing that much (although I did see someone was 3d printing a cheaper option that I may try before investing if I can get my hands on one.)

    ​​​​​​​For now I'm going drill an allen key hole, prime and paint the frame and wait for the pps parts.
    WTB phantom dropout valve-any color
    Feedback: https://www.mcarterbrown.com/forum/b...our-s-feedback

    Comment


    • Impactfour

      Impactfour

      commented
      Editing a comment
      The house grips I see on many k frames look cozy as could be, does that style fit the stock frame as well, or are they not compatible?

      BrickHaus please do let me know if you end up selling your rainmaker frame, I'd be very interested.

    • BrickHaus

      BrickHaus

      commented
      Editing a comment
      Houge grips on the k frames are specific to k frames. You would need a pair if I sold ya my Krain frame as I got mine without grips.

      Ill let you know if I let them go. I had planned on making a walzmas pgp with it and gifting them, but I'd sell them at cost if it works out that way.

      As for grips, you need sheridan, or early wgp style grips with the single hole.

      I see autocoxkerparts.com has a pair of pps battle grips for 40 bucks that would work, and Bacci seems to be fresh out of pmi grips.

      Maybe the community can dial some print files in and we can print them out of tpu.
      Last edited by BrickHaus; 06-18-2022, 01:57 PM.

    • Impactfour

      Impactfour

      commented
      Editing a comment
      I was looking at those battle grips the other day, they're tempting but we'll see if I feel the need, I've got relatively small hands with arthritic sausage fingers so finding the right grip is an experiment every time.

      I know less than nothing about 3d printing, but there is a library near me that has one and says their expert can help, I've been debating printing a frame adapter, pump handle and a few other parts just for kicks, I'll have to find some free time to get in touch and see what their deal is. I'd imagine they may be skeptical of printing anything that looks like firearms parts though...

    #10
    The Krain. Rainmaker would have to make another batch and I don’t know if that is in the cards. Worst case scenario, if you don’t like it with a k frame on it, someone here would buy it. Here is mine with the Krain on it.

    Click image for larger version

Name:	E10CDA65-DC17-4D10-A1C8-3B1DFE91CA0A.jpeg
Views:	408
Size:	3.58 MB
ID:	285840

    Comment


    • Impactfour

      Impactfour

      commented
      Editing a comment
      That looks so nice for a 3d print, and I absolutely love the colors on your barrel there, how did you achieve that?

      Also I just noticed the trufuel in the background and got a good laugh out of that

    • BrickHaus

      BrickHaus

      commented
      Editing a comment
      The barrel is titanium, thats a custom project by the great WALZ. He flame anodizes ( tortches) the titanium for varying color options. A greenleafs pistol is one of his many amazing projects.

      I too was blessed with a WALZ pirate with a TI barrel. Its been my main shooter since it showed up at my house.

    #11
    Looks like tomorrow I'll have the chance to get a bit more work done. Hoping to drill the frame, prime and possibly paint it if time allows. In the meantime I've ordered a whole slew of polishing bits for my Dremel to finish up the body, as well as a fast changer, speed plug and a safety from PPS. I'm holding off playing with until the PPS parts arrive as I can barely grip the feed plug.

    My newest questions should be simple enough. I noticed my two frame screws are different lengths, is that by design? And what type of lubricant do you guys recommend? I think the only paintball lube in my house is whatever came with my girls emek and that's more of a grease than anything..
    WTB phantom dropout valve-any color
    Feedback: https://www.mcarterbrown.com/forum/b...our-s-feedback

    Comment


    • BrickHaus

      BrickHaus

      commented
      Editing a comment
      I personally lightly grease the bolt o rings. And put a drop of oil on the face of a 12ie before a day of play.

      The old sheridan manuals say to remove the hammer and wipe it clean after play to prevent rust.

    • Impactfour

      Impactfour

      commented
      Editing a comment
      Thanks, I left everything at work disassembled while the paint dries, but I'll be sure to put a smidge of grease on when I get it home tomorrow.

    #12
    Well I got the frame drilled, primed and painted today. I'm kind of digging the gloss look over the dust black the frame original comes with, but we'll see when I can put it all back together.

    I was also able to get the wedgits a bit more pounded in, 9/10 rounds of graffiti I brought with me stayed in place, so I think I will leave that as is for now.

    On a side note, I measured the grip frame screws today and one is 3/8th", while the other is closer to 1/4". I'm probably going to go ahead and get a few of each size screw just to be safe.
    WTB phantom dropout valve-any color
    Feedback: https://www.mcarterbrown.com/forum/b...our-s-feedback

    Comment


      #13
      I'm pretty happy with how the frame looks on the marker. While I'm waiting on the parts from PPS I think I'm going to cut a few windows into the feed tube for keeping track of paint, as well as for looks.

      Ill need to sit down with a measuring tape, but my plan is to start with pairs of small pilot holes, expand those out to 3/8th of an inch or so, then connect the upper and lower edges of each pair of holes with a cutting disk on the Dremel, leaving oval shapes cut outs, I've done my best to illustrate my plan in my 'diagram' below. I figure if I do the pilot and bore out holes correctly, I can go straight through the tube to get nice window cuts through both sides. Any thoughts or concerns with that plan?

      Last edited by Impactfour; 06-22-2022, 07:17 PM.
      WTB phantom dropout valve-any color
      Feedback: https://www.mcarterbrown.com/forum/b...our-s-feedback

      Comment


      • JeeperCreeper

        JeeperCreeper

        commented
        Editing a comment
        I don't see any issue, but afterwards, you're gonna need to sand down the rough edges inside the tube. I usually use a stick wrapped in 220 sandpaper roughly the size of the tube, and put it in the drill.

      #14
      Well the PPS parts are coming Wednesday, but in my impatience I brought it out today and found that I definitely need to clean the valve up. My fps and sound signature were all over the place. Any other potential sources you guys could thing of?
      WTB phantom dropout valve-any color
      Feedback: https://www.mcarterbrown.com/forum/b...our-s-feedback

      Comment


        #15
        Also does anyone know of a holster that fits the pgp well?
        WTB phantom dropout valve-any color
        Feedback: https://www.mcarterbrown.com/forum/b...our-s-feedback

        Comment


        • JeeperCreeper

          JeeperCreeper

          commented
          Editing a comment
          I know the old Spec Ops paintball drop leg ones will fit a PGP

        • Impactfour

          Impactfour

          commented
          Editing a comment
          I'll keep my eyes open for one then, thanks for the tip!
      Working...
      X